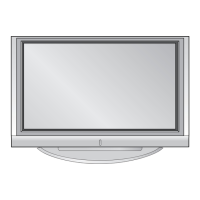
4. Sub Program Down Load
1) Select “ PDP” and “Hurricane” on Model dialog. and check
your connection in Communication dialog. (If your
connection is ‘NG’, then set your PORT(COM1,2,3,...)
correctly.
2) Connect RS232 cable and turn on the power. (Use the
special Cable for Sub-program)
(If your connection has completed, you can see ‘Ready’)
3) Select proper ‘Model’ for each model.
4) Select ‘flash file’ for each model.
5) Click the [Download] button.
It means the completion of the ROM download if all items
show ‘OK’ and Status is changed by ‘PASS’ at the lower
right corner of the window.
5. PCMCIA CARD Checking Method
1) You must adjust DTV 29 Channel and insert PCMCIA
CARD to socket.
2) If PCMCIA CARD works normally, normal signal display on
screen. But it works abnormally, “No CA module” words
display on screen.
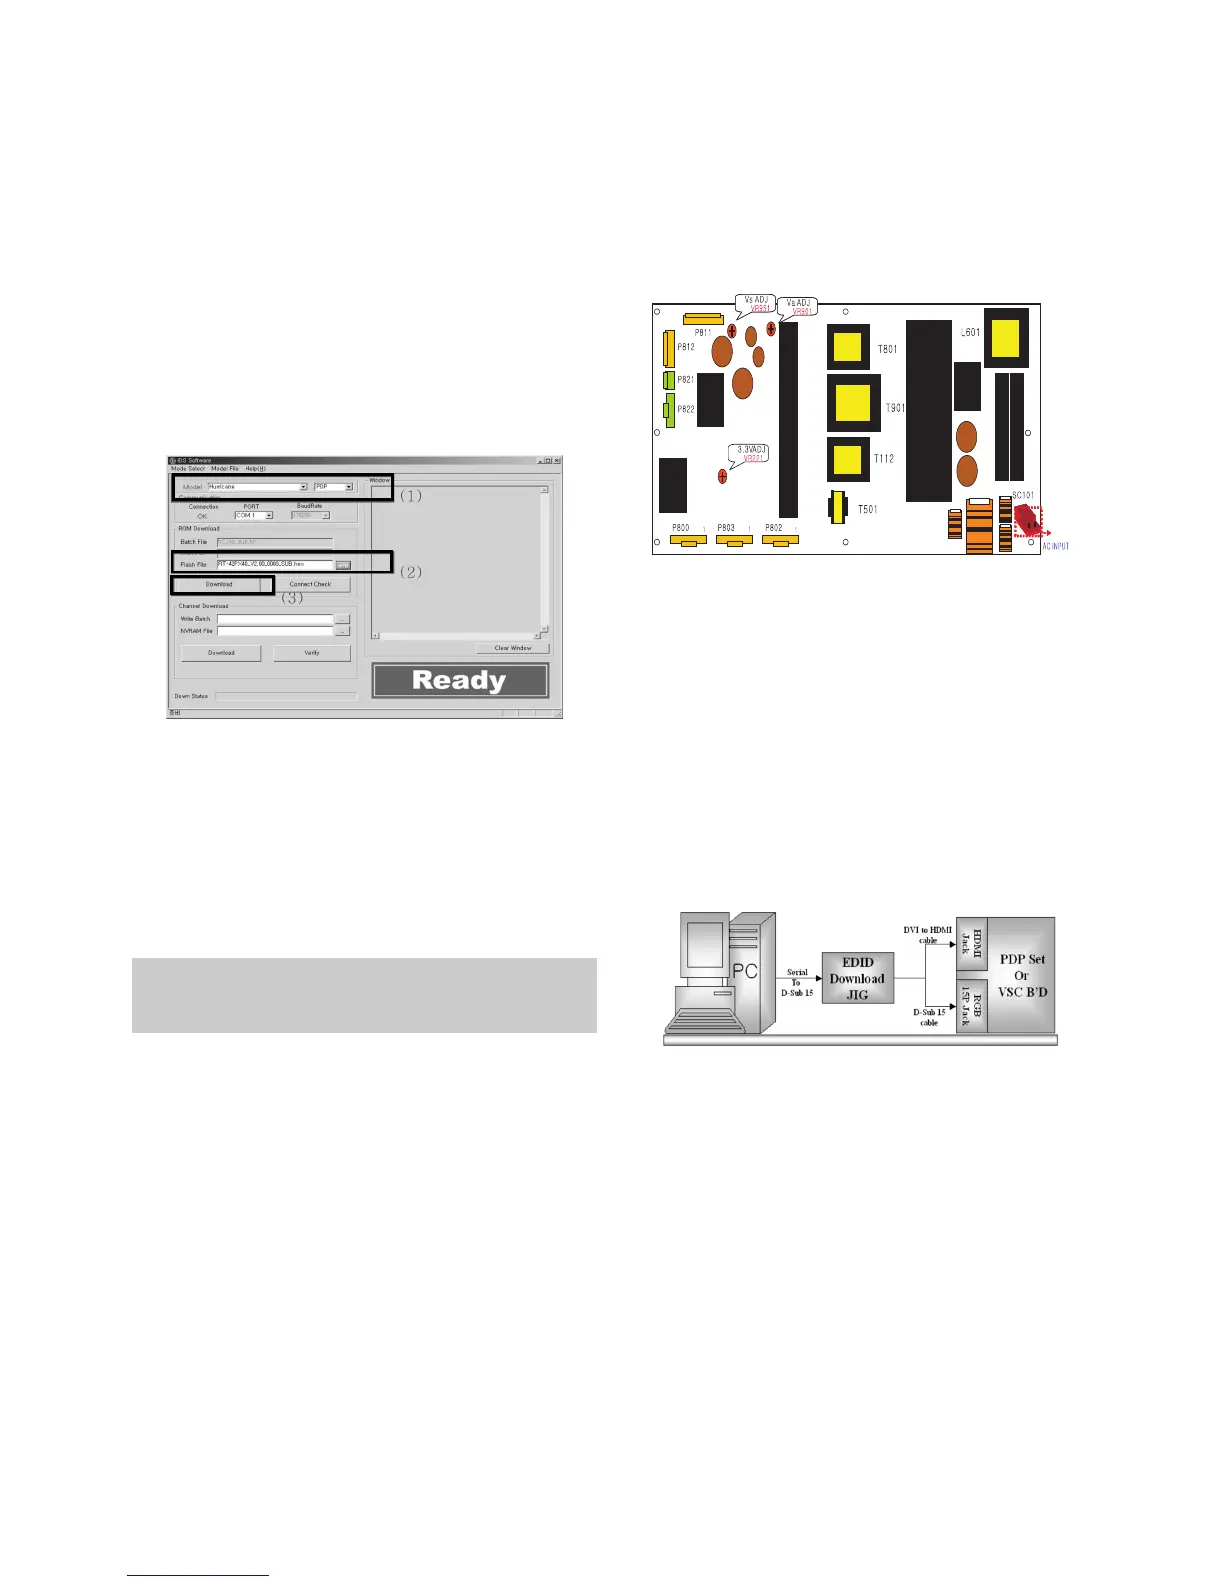
6. POWER PCB Assy Voltage
Adjustments
(Va, Vs Voltage adjustments)
6-1. Test Equipment : D.M.M. 1EA
6-2.Connection Diagram for Measuring
: refer to fig.5
6-3. Adjustment Method
(1) Va Adjustment
1) After receiving 100% Full White Pattern, HEAT RUN.
2) Connect + terminal of D.M.M to Va pin of P812, connect
- terminal to GND pin of P812.
3) After turning VR901, voltage of D.M.M adjustment as
same as Va voltage which on label of panel right/top.
(Deviation; ±0.5V)
(2) Vs Adjustment
1) Connect + terminal of D.M.M to Vs pin of P812, connect
– terminal to GND pin of P812.
2) After turning VR951, voltage of D.M.M adjustment as
same as Va voltage which on label of panel right/top.
(Deviation; ±0.5V)
7. EDID (The Extended Display
Identification Data)/ DDC (Display
Data Channel) download
7-1. Required Test Equipment
1) Adjusting PC with S/W for writing EDID Data.(S/W : EDID
TESTER Ver.2.5)
2) A Jig for EDID Download
3) Cable : Serial(9Pin or USB) to D-sub 15Pin cable, D-sub
15Pin cable, DVI to HDMI cable
7-2. Setting of device
7-3. Preparation for Adjustment
1) As above Fig. 6, Connect the Set, EDID Download Jig, PC
& Cable.
2) Turn on the PC & EDID Download Jig. And Execute the
S/W : EDID TESTER Ver,2.5.
3) Set up S/W option.
Repeat Number : 5
Device Address : A0
PageByte : 8
4) Power on the Set.
- 13 -
Each PCB assembly must be checked by check JIG set.
(Because power PCB Assembly damages to PDP Module,
especially be careful)
(Fig. 5) Connection diagram of power adjustment for measuring
(Fig. 6) Connection Diagram of DDC download
 Loading...