4. ADC Process
4-1. Auto ADC Process (using DFT)
PC (for communication through RS-232C) UART Baud rate
: 115200 bps
Command : aa 00 00 (Start factory mode)
Command : ad 00 10 (working Auto ADC)
Command : aa 00 90 (End of Auto ADC Process)
4-2. Manual ADC Process using Service
Remocon
After enter Service Mode by pushing “ADJ” key, execute
“ADC Adjust” by pushing “
G” key at “0. ADC CALIBRATION”.
4-3. Confirmation
(1) We confirm whether “0xBF(480i)/0xC8(1080i)” address of
EEPROM “0xA2” is “0xAA” or not.
(2) If “0xBF(480i)/0xC8(1080i)” address of EEPROM “0xA2”
isn’t “0xAA”, we adjust once more
(3) We can confirm the ADC values from “0xB9 ~ 0xBE(480i) /
0xC2 ~ (1080i)” addresses in a page “0xA2”
* Manual ADC Confirmation using Service Remocon. After
enter Service Mode by pushing “INSTART” key,
5. DDC EDID Write Confirmation
6. Total Assembly line process
* Caution : Each PCB assembly must be checked by check JIG
set.(Because power PCB Assembly damages to PDP Module,
especially be careful)
* Caution: Set up “RF mode(noise)” before voltage adjustment.
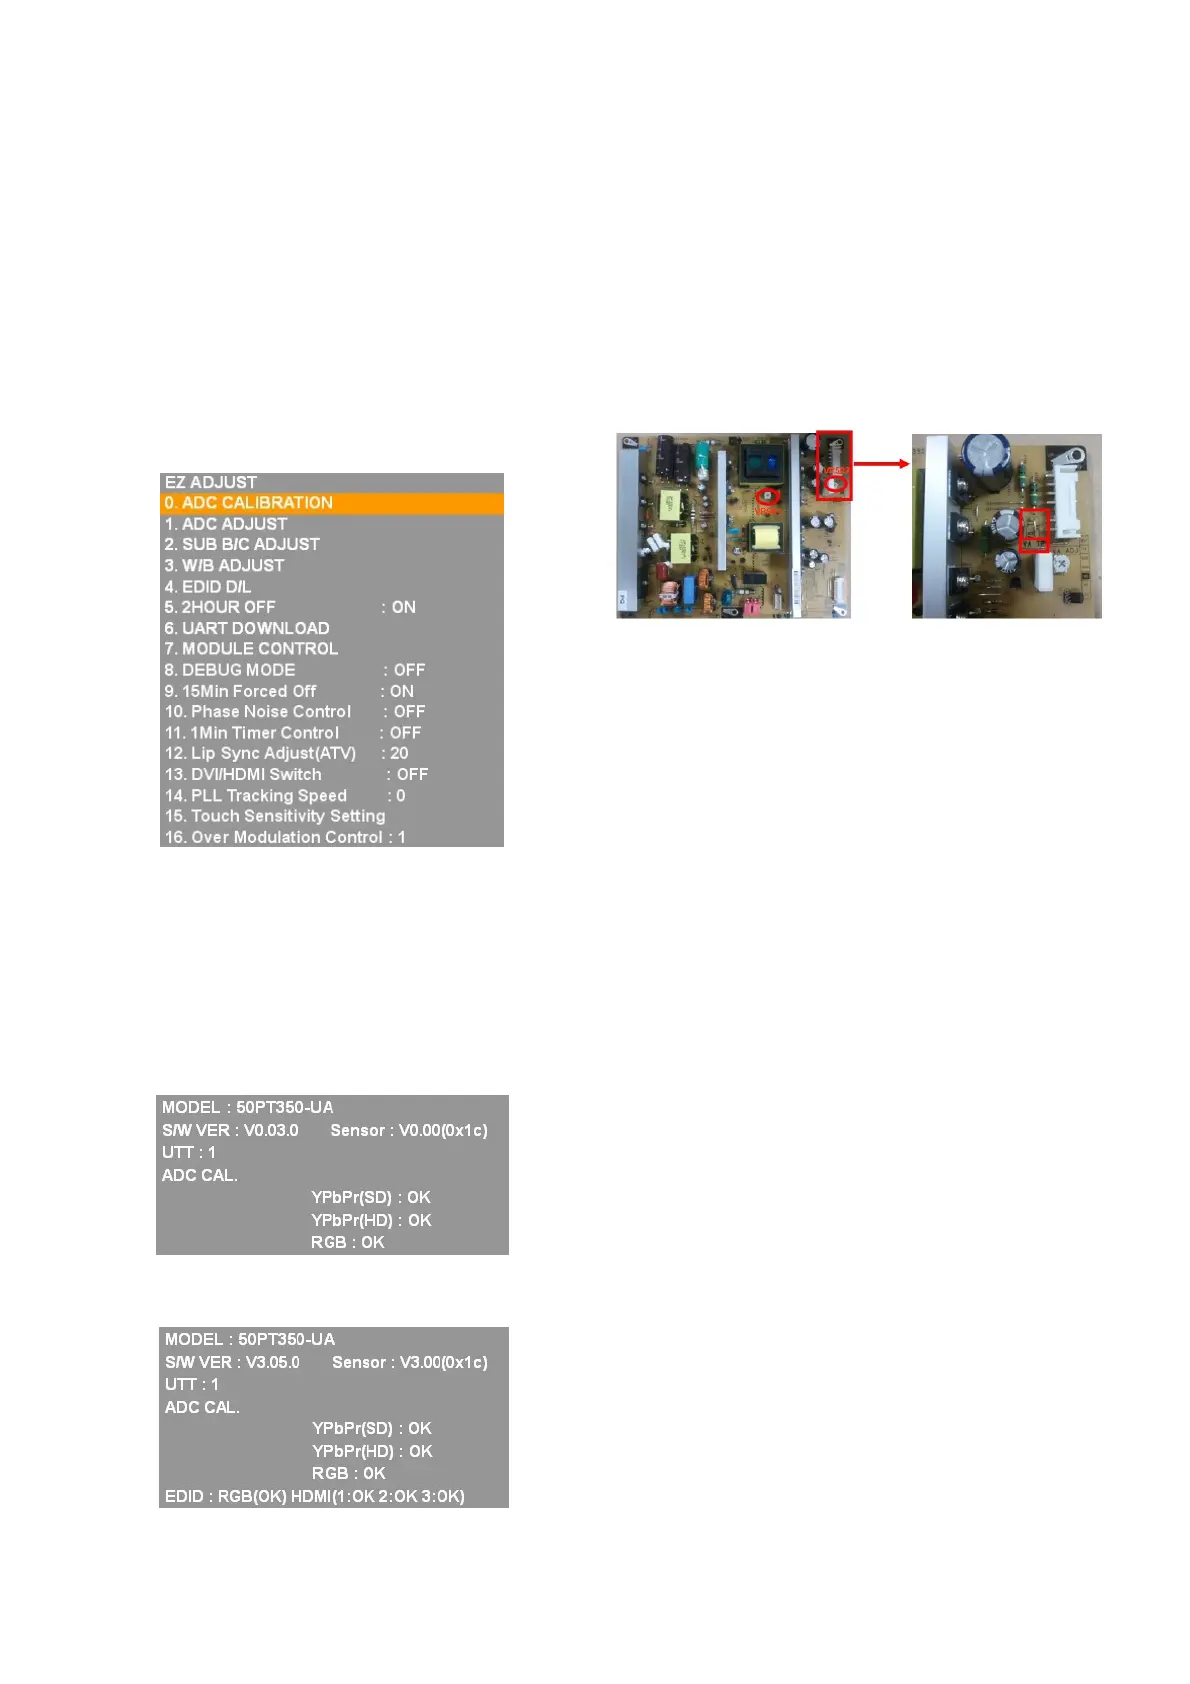
6-1. POWER PCB Ass’y Voltage
adjustment (Va, Vs voltage adjustment)
(1) Test equipment : D.M.M 1EA
(2) Connection Diagram for Measuring : refer to fig.1
(fig.1 : Power PCB Assy Voltage adjustment)
6-2. Adjustment method
(1) Vs adjustment (refer fig.1)
1) Connect + terminal of D.M.M. to Vs pin of
P812(42”:P811), connect -terminal to GND pin of
P812(42”:P811)
2) After turning VR901, voltage of D.M.M adjustment as
same as Vs voltage which on label of panel left/top (
deviation ; ±0.5V)
(2) Va adjustment (refer fig.1)
1) After receiving 100% Full White Pattern, HEAT RUN.
2) Connect + terminal of D.M.M. to Va pin of
P812(42”:P811), connect -terminal to GND pin of
P811(42”:P812).
3) After turning VR502,voltage of D.M.M adjustment as
same as Va voltage which on label of panel left/top
(deviation; ±0.5V)
7. DDC EDID Write
MODEL NAME: LG TV (Not necessary)
Caution: Please only check write status in Instart-menu
7-1. Manual Download(using DFT)
PC(for communication through RS-232C), UART baud rate:
115200 bps
Command : aa 00 00 (Start Factory mode)
Command : ae 00 10 (Download All EDID)
Command : aa 00 90 (End of Factory mode)
7-2. Manual EDID D/L using Service Remocon
(1) After enter Service Mode by pushing “ADJ” key, select “4.
EDID D/L”.
(2) Finally execute “START” by pushing “
G” or “9”key.
- 8 -
LGE Internal Use OnlyCopyright ©2011 LG Electronics Inc. All rights reserved.
Only for training and service purposes
< XPOWER4 42T3 PSU >
 Loading...