8. Electrical Wiring
27
Multi V S Outdoor Unit
Installation of Outdoor Units
8.3 Automatic Addressing
• The address of indoor units would be set by auto addressing
1. Wait for 3 minutes after supplying power.
2. Press RED button of the outdoor units for 5 seconds. (SW01C)
3. A “88” is indicated on 7-segment LED of the outdoor unit PCB.
4. For completing addressing, 2~7 minutes are required depending on numbers of connected indoor units
5. Numbers of connected indoor units whose addressing is completed are indicated for 30 seconds on
7-segment LED of the outdoor unit PCB
6. After completing addressing, address of each indoor unit is indicated on the wired remote control display
window. (CH01, CH02, CH03, ……, CH06 : Indicated as numbers of connected indoor units)
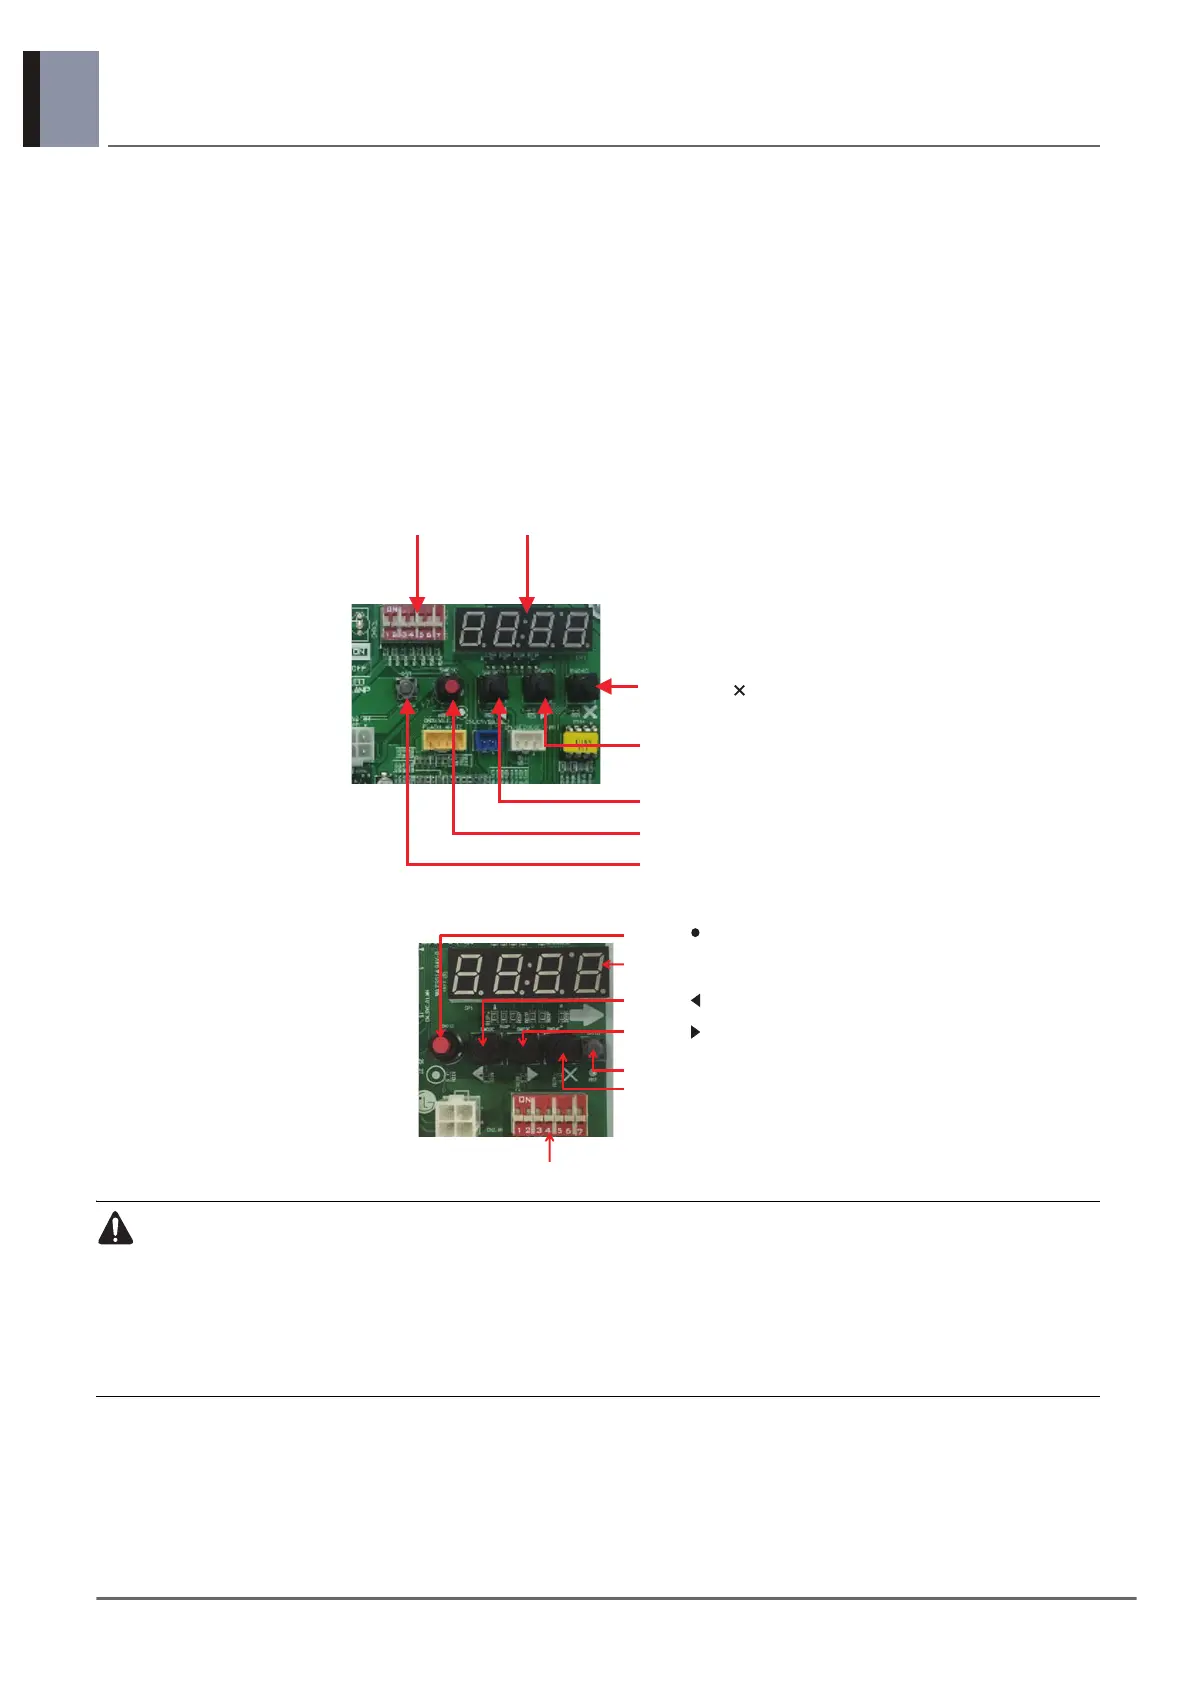
Main PCB (Standard model)
Display PCB (Compact model)
• In replacement of the indoor unit PCB, always perform Auto addressing setting again (At that time,
please check about using Independent power module to any indoor unit.)
• If power supply is not applied to the indoor unit, operation error occur.
• Auto addressing is only possible on the Unit.
• Auto addressing has to be performed after 3 minutes to improve communication.
DIP-SWITCH 7 - Segment
SW01C ( ● : confirm)
SW02C ( ඔ : backward)
SW03C ( ඖ : forward)
SW04C (
: cancel)
SW01D (reset)
DIP SWITCH
7-Segment
SW01C (
: confirm)
SW02C (
: backward)
SW04C ( X : cancel)
SW01D (reset)
SW03C (
: forward)
 Loading...