This document is an owner's manual for an LG Refrigerator-Freezer, providing instructions for installation, operation, maintenance, and troubleshooting. It is available in English, French, and Spanish.
Function Description
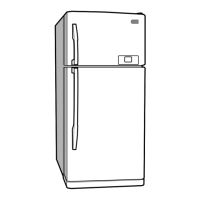
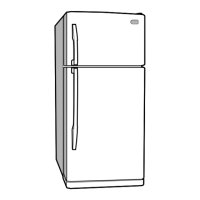
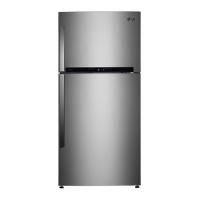
The LG Refrigerator-Freezer is designed to store food, keeping it fresh and frozen as required. It features separate compartments for refrigeration and freezing, each with its own temperature control. The refrigerator aims to maintain a constant temperature regardless of ambient room temperature.
Important Technical Specifications
While specific technical specifications like dimensions, capacity, or energy rating are not detailed, the manual highlights several operational and safety aspects:
- Temperature Control: The refrigerator compartment has a temperature control button with seven settings from 0°C to 6°C, with a default of 3°C. The freezer compartment has a temperature control dial with settings from 1 (MIN) to 8 (MAX), with a default of 5 (NORMAL), which corresponds to a 4-STAR freezing effect. Higher numbers on the freezer control dial indicate lower temperatures.
- Power Requirements: The appliance requires a dedicated electrical outlet and proper grounding (earthing) to prevent electric shock. It should not be installed in wet places or near heat sources. The power cord should not be modified or extended.
- Installation: The unit should be placed on a solid, level floor, maintaining at least 2 inches (5 cm) of space from the rear wall for proper air circulation. Leveling screws are provided to adjust for unevenness and aid in door closing. The appliance should not be installed below 5°C.
- Safety Precautions: The manual emphasizes several safety warnings, including:
- Electrical Safety: Do not use damaged power cords or plugs, avoid touching the power plug with wet hands, ensure proper grounding, and unplug the unit before cleaning or replacing lamps.
- Flammable Materials: Do not store or use inflammable materials (ether, benzene, alcohol, LP gas, sprays, cosmetics) near or inside the refrigerator. Do not place lit candles inside.
- Physical Safety: Do not place heavy or dangerous objects on top of the refrigerator. Do not cling to doors or shelves. Do not insert hands or metal sticks into air vents or other openings. Be careful when opening/closing doors to avoid injury.
- Disposal: When disposing of the refrigerator, remove packing materials from the door to prevent children from getting locked inside. Contact local authorities for proper disposal, as the appliance contains reusable and recyclable materials (refrigerant, lubricant).
Usage Features
The refrigerator-freezer includes several features to enhance food storage and user convenience:
- Door Alarm: An alarm sounds if the refrigerator or freezer door remains open for 1 minute, repeating every 30 seconds if the door stays open.
- Lamp Auto-Off Feature: The interior lamp automatically turns off after 7 minutes of the door being open to save energy and prevent overheating.
- Self Test: The appliance has a built-in diagnostic capability that displays error codes for malfunctions, assisting repair technicians.
- Super Cool: This feature activates upon initial startup or when warm food is placed inside, operating the compressor and fan at maximum capacity to quickly lower the refrigerator temperature. It deactivates automatically or can be manually shut off.
- Child Lock: A child lock function can be activated by pressing and holding the CHILD LOCK button for 3 seconds, preventing other buttons from operating.
- Green Ion Door Cooling (Optional): An anion coating in the duct cover purifies the air, helping foods stay fresh longer.
- Ice Making (Optional):
- In-Door Ice Maker: Users fill a water tank, which automatically drops water into the ice tray. Ice cubes are formed in about 5 hours and can be removed by pulling a lever.
- Twisting Ice Serve Type: Users fill ice trays with water and insert them. Ice cubes are removed by gently twisting a lever, causing them to drop into an ice cube box.
- Fresh Zone: Designed to keep food fresher by minimizing the influence of warmer air when the door is opened.
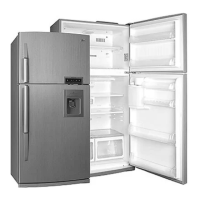
- Vegetable Drawer (Magic Crispers): Features a lattice on the underside of the cover and a sealing structure to efficiently hold or release moisture, keeping fruits and vegetables fresher.
- Vitamin Kit (Optional): Used to keep fruits fresher. Users are advised to keep the kit dry to maintain effectiveness.
- Deodorizer (Optional): Located in the cooling air inlet, it deodorizes unpleasant food odors. It requires no handling but should not be pricked with sharp objects. For strong odors, food should be wrapped or stored in lidded containers. The deodorizer can be revived by using a hair dryer to remove moisture and then oxidizing it under sunlight.
- Dairy Corner (Optional): A movable compartment with a protruded handle for easy access. The cover can be removed for cleaning by pushing it to the center, aligning holes with the basket, and pulling the basket out.
Maintenance Features
- Cleaning: Regular cleaning is recommended to prevent odors and stains.
- Exterior: Clean with a lukewarm solution of mild soap or dishwashing detergent, then wipe with a clean, damp cloth and dry.
- Interior: Clean interior parts (shelves, door racks, storage trays, magnetic door seals) with a lukewarm solution of mild soap or dishwashing detergent, then wipe with a clean, damp cloth and dry.
- Water Tank (for In-Door Ice Maker): Remove the cover, clean the inside and outside with dishwashing detergent, rinse thoroughly, and wipe dry. Clean the tank cover similarly.
- Ice Tray Kit: For the upper ice tray, separate the water tank and wipe with a wet cloth. For the lower ice tray, remove the ice cube box and wipe with a wet cloth. Do not immerse the ice tray kit in water; if it gets wet, dry it completely.
- Cleaning Agents: Use lukewarm water and mild soap/dishwashing detergent. Avoid metallic scouring pads, brushes, coarse abrasive cleaners, strong alkaline solutions, flammable/toxic cleaning liquids, surface active agents, car wax, anticorrosives, oils, gasoline, acids, or wax, as these can cause damage or discoloration.
- Electrical Safety during Cleaning: Always remove the power cord from the wall outlet before cleaning near electrical parts (lamps, switches, controls). Wipe up excess moisture to prevent electric shock.
- Defrosting: Defrosting occurs automatically. The defrosted water flows to an evaporating tray at the lower back of the refrigerator and evaporates automatically.
- Lamp Replacement:
- Freezer Lamp: Unplug the power cord. Loosen one screw on the room lamp lid, pull it forward with both hands, and remove the lamp by turning it counterclockwise.
- Refrigerator Lamp: Unplug the power cord. Remove refrigerator shelves. Pull the room lamp lid forward. Ensure bulbs are cool, then remove the lamp by turning it counterclockwise.
- Bulb Type: Use appliance bulbs of the same size, shape, and wattage.
- Vacation Time: For average length vacations, leave the refrigerator operating, placing freezable items in the freezer. For extended periods, remove all food, disconnect power, clean the interior, and leave doors open to prevent odor.
- Power Failure: Most power failures are short. Minimize door openings. For longer outages, place dry ice on top of frozen packages.
- Moving the Appliance: Remove or securely fasten all loose items inside. Turn leveling screws all the way into the base to prevent damage.
- Anti-Condensation Pipe: The outside wall may feel warm after installation due to an anti-condensation pipe pumping hot refrigerant to prevent "sweating." This is normal.