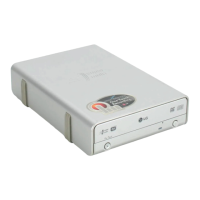
This document is the owner's manual for the LG Super Multi DVD Drive, model GSA-4040B. It provides comprehensive information on the drive's features, installation, operation, and troubleshooting.
Function Description
The LG Super Multi DVD Drive is a versatile optical drive designed for use with personal computers. It supports a wide range of disc formats, including CD-R/RW, DVD-R/RW, DVD+R/RW, and DVD-RAM, functioning as a single, integrated drive for both reading and writing operations. The drive connects to the host computer via an Enhanced-IDE (ATAPI) interface, allowing for seamless integration into most PC systems. It is compatible with various Windows operating systems, including Windows 98, 2000 Professional, ME, XP Home Edition, and XP Professional.
A key feature of this drive is its ability to perform both reading and writing tasks across multiple disc types. For CD-R, it supports writing speeds up to 24X max, and for CD-RW, up to 16X max. DVD-R and DVD+R writing speeds reach 4X max, while DVD-RW and DVD+RW are supported at 2X and 2.4X max, respectively. DVD-RAM discs can be written at 3X max. When it comes to reading, the drive offers speeds up to 32X max for CD-ROM/R, 24X max for CD-RW, 12X max for DVD-ROM single-layer discs, and 8X max for DVD-ROM dual-layer, DVD-R/RW, DVD+R/RW, and DVD-VIDEO discs. DVD-RAM reading is supported at 3X max. It's important to note that writing speeds are highly dependent on the capabilities of the discs used.
The drive incorporates an automatic buffer underrun error prevention technology, which helps ensure reliable data writing by preventing interruptions during the recording process. It also supports UDF (Universal Disk Format) for easy writing to CD-RW, DVD-RW, DVD+RW, and DVD-RAM discs. For DVD video playback, the drive supports Region playback control Phase II, which manages regional coding for DVD content.
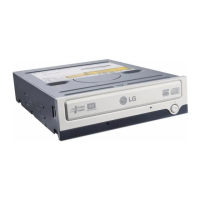
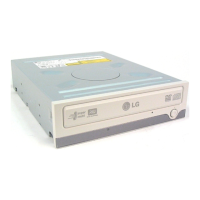
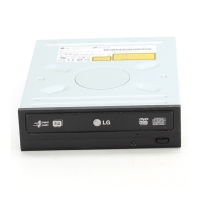
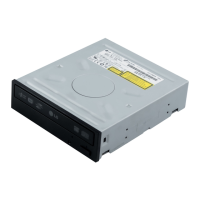
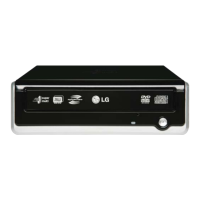
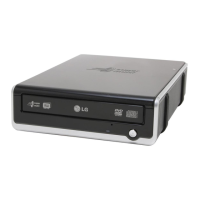
The front panel of the drive includes a disc tray for loading and ejecting discs, an emergency eject hole for manual disc removal in case of power failure or malfunction, and a stop/eject button. An activity indicator LED on the front panel illuminates green during disc reading sessions and flashes green during disc writing sessions (CD-R/RW, DVD-R/RW, DVD+R/RW, DVD-RAM).
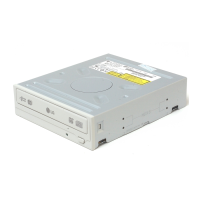
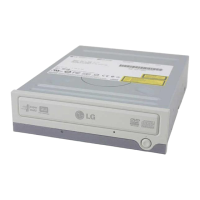
The rear panel features a Digital Audio Output Connector (though not supported by this model), an Analog Audio Output Connector, a Jumper Connector for configuring the drive as Master or Slave, an IDE Interface Connector for connecting to the computer's motherboard, and a Power Connector for receiving power from the computer's power supply.
Usage Features
Installation:
The installation process involves physically mounting the drive into a 5.25-inch half-height bay in the computer case and connecting the necessary cables. Before installation, it's crucial to turn off all peripheral appliances and the computer itself, disconnecting power cords from wall sockets. Discharging static electricity by touching computer covers is also recommended. The 5.25-inch drive bay panel needs to be removed, and the drive unit is then inserted and secured with screws. If space is limited, connecting IDE and other cables before securing the drive is advised.
Jumper Setup:
A critical step before installation is setting the jumper connector on the rear panel to configure the drive as either Master or Slave on the EIDE (ATAPI) interface. If two peripheral devices with the same settings are connected to the same EIDE bus, it can cause system malfunction. Only one jumper should be installed on the connector; installing more can damage the drive. The manual provides a table detailing jumper settings for Master, Slave, and Cable Select (CSEL) configurations. If CSEL is used, the Master/Slave setting is determined automatically by the hardware configuration.
PC Connection:
The drive connects to the motherboard using a 40-pin IDE interface cable. The colored (red) stripe on the IDE cable must be connected to pin 1 on the drive, which is typically closest to the Power Connector. The IDE connector is usually keyed to prevent incorrect insertion. The power cable from the computer's power supply connects to the drive's power connector, ensuring a firm fit. If the computer uses a sound card, the drive can be connected to it with an audio cable for analog audio output.
Device Drivers:
For Windows 98/2000 Professional/Me/XP Home Edition/XP Professional, no special device drivers are required. The operating system should automatically recognize and load native software drivers upon bootup after installation. Users can verify normal operation by checking the drive's display in the Device Manager. If the drive is not recognized, checking for a "!" indicator on the IDE controller in Device Manager might indicate a need to contact the PC or motherboard manufacturer for an appropriate IDE controller driver. Running "Add New Hardware" in Control Panel can also prompt the PC to search for new devices.
Disc Handling:
When using CD-ROM, CD-R, DVD, or CD-RW discs, it is imperative not to attach any stickers or labels, as this can lead to read/write errors or even damage to the disc itself. The drive operates at very high speeds, so using damaged, cracked, or warped discs is strictly prohibited to prevent damage to the drive's optical unit. Non-standard discs (e.g., non-circular shapes) should also be avoided as they may not play or store data properly.
Emergency Eject:
In case of power outage or drive malfunction, the drive features an emergency eject mechanism. To use this, turn off the power, then insert a fine-tipped object (like a straightened paper clip) into the small hole above the eject button. This will cause the front door to pop open partway, allowing the user to gently pull the disc tray out completely. This feature should only be used in emergencies to prevent malfunction.
Maintenance Features
Precautions:
The manual emphasizes several precautions to ensure the longevity and proper functioning of the drive and to prevent data loss. The manufacturer disclaims responsibility for data loss due to inappropriate installation, handling, or direct/indirect damages. Users are advised to back up all important data as a protective measure.
Installation Environment:
The drive should not be placed in locations subject to high humidity, high temperature, excessive dust, mechanical vibration, or direct sunlight. It is recommended to use the drive in a horizontal or vertical position, avoiding tilted positions.
Operational Care:
Sudden temperature changes (e.g., moving the drive from a cold to a warm place) should be avoided as condensation can occur, leading to abnormal operation. Discs should always be removed before moving the drive to prevent damage and data loss. Care must be taken to prevent foreign objects (liquids, metal) from entering the drive. If this occurs, the dealer should be consulted. Interrupting electric power while the drive is operating should be avoided.
IDE Configuration:
When connecting two IDE devices, ensure they are not both configured as Master or Slave, as this can cause Windows to fail to run or recognize the drives. The total length of the IDE cable should not exceed 18 inches (about 45 cm).
Disc Inspection:
Before inserting discs, always check for wear, cracks, damage, warping, or poor quality, especially in the clear plastic on the center of the disc, as these are common causes of disc crush. Non-standard shaped discs (e.g., heart-shaped, business card-shaped) should not be used.
Disc Storage:
When not in use, discs should be removed from the drive and stored in their supplied packaging, away from direct sunlight and heat sources, to prevent damage.
Troubleshooting:
The manual includes a troubleshooting section to address common issues. If the drive has no power, check the power supply cable and Power Connector. If the system doesn't start, verify Master/Slave settings, IDE cable length, and connector attachments. If discs cannot be read or written, check system conditions (CPU, hard disk), disc cleanliness, ensure no screen savers or other applications were running during writing, confirm sufficient free space on the disc, and verify the disc is loaded correctly (label up) and the drive is installed in the correct orientation. Condensation due to temperature changes can also affect disc readability. For service, users are advised to provide detailed information about their system, environment, and the specific problem, including any error messages. The drive supports Region Playback Control Phase II, and users can change the regional code up to 5 times.