This document is a user's guide for LG L1752T, L1952T, L1752TX, and L1952TX series monitors. It provides essential information regarding safety, installation, operation, and troubleshooting.
Function Description:
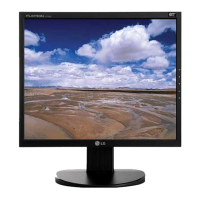
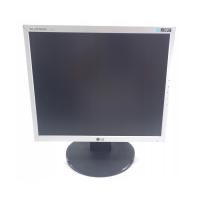
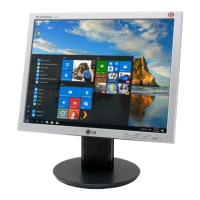
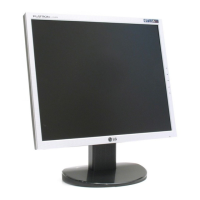
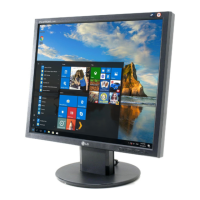
The LG L1752T, L1952T, L1752TX, and L1952TX are flat panel active matrix-TFT LCD monitors designed for use with computers. They serve as a visual display unit, allowing users to interact with their computer systems. The monitors support both analog (D-sub) and digital (DVI-D) signal inputs, making them versatile for various computer setups. Key features include on-screen display (OSD) controls for image adjustment, a 'Self Image Setting Function' for automatic optimization, and an 'f-Engine' for customized image settings.
Important Technical Specifications:
Display:
- L1752T/L1752TX (17 inch):
- Size: 17 inches (43.2 cm)
- Viewable Area: 17 inches
- Pixel Pitch: 0.264 mm
- Resolution (Recommend): VESA 1280 x 1024 @60 Hz
- Resolution (Max Analog): VESA 1280 x 1024 @75 Hz
- Resolution (Max Digital): VESA 1280 x 1024 @60 Hz
- L1952T/L1952TX (19 inch):
- Size: 19 inches (48.19 cm)
- Viewable Area: 19 inches
- Pixel Pitch: 0.294 mm
- Resolution (Recommend): VESA 1280 x 1024 @60 Hz
- Resolution (Max Analog): VESA 1280 x 1024 @75 Hz
- Resolution (Max Digital): VESA 1280 x 1024 @60 Hz
- Coating: Anti-Glare coating
- Horizontal Frequency (Analog/Digital): 30 - 83 kHz (Automatic) / 30 - 71 kHz (Automatic)
- Vertical Frequency: 56 - 75 Hz (Automatic)
- Input Form: Separate TTL, Positive/Negative, SOG (Sync On Green), Digital
- Signal Input: 15 pin D-Sub Connector, DVI-D connector (Digital)
- Input Form: RGB Analog (0.7 Vp-p/ 75 ohm), Digital
Power Consumption:
- 17 inch models:
- On Mode: < 33 W
- Sleep Mode: < 1 W
- Off Mode: < 1 W
- 19 inch models:
- On Mode: < 37 W
- Sleep Mode: < 1 W
- Off Mode: < 1 W
- Power Input: AC 100-240V~50/60Hz 0.8A
Dimensions & Weight (With Stand):
- 17 inch models:
- Width: 36.45 cm / 14.35 inches
- Height: 37.82 cm / 14.89 inches
- Depth: 18.00 cm / 7.08 inches
- Net Weight: 3.5 kg (7.72 lbs)
- 19 inch models:
- Width: 40.20 cm / 15.83 inches
- Height: 40.75 cm / 16.04 inches
- Depth: 18.00 cm / 7.08 inches
- Net Weight: 4.4 kg (9.70 lbs)
Environmental Conditions:
- Operating Temperature: 10°C to 35°C
- Operating Humidity: 10% to 80% non-Condensing
- Storage Temperature: -20°C to 60°C
- Storage Humidity: 5% to 90% non-Condensing
Tilt Range: -5°~20°
Usage Features:
Installation:
- Stand Assembly: The monitor stand consists of a Stand Body and a Stand Base. The Stand Body is pushed into the product until it clicks, and then the Stand Base is assembled into the Stand Body.
- Positioning: The display panel can be tilted from -5° to 20° for optimal viewing comfort. A warning is provided to avoid placing fingers between the monitor head and stand body during adjustment.
- VESA Wall Mounting: The monitor is VESA-compliant and supports wall mounting using an optional VESA-compliant interface pad. Instructions for detaching the stand for wall mounting are provided.
- Kensington Security Slot: A security slot is included for connecting a locking cable, which can be purchased separately, to deter theft.
Connecting to a Computer:
- Users must ensure the monitor, computer, and other devices are powered off before connecting.
- The signal cable (D-sub or DVI-D) is connected to the monitor and tightened with thumbscrews.
- The power cord is connected to a proper, easily accessible power outlet.
- The monitor is turned on using the power button on the front panel.
- Self Image Setting Function (Analog Mode Only): This function automatically adjusts display settings for optimal image quality upon initial connection or when manually activated via the 'AUTO/SET' button.
Control Panel Functions (Front and Side):
- MENU Button: Enters/exits the On Screen Display (OSD). Also used to lock/unlock OSD controls by holding for several seconds.
- Δ ∇ Buttons: Selects or adjusts functions within the OSD.
- f-Engine Button: Activates the 'f-Engine' menu for customized image settings (Movie/Text, User, Normal modes).
- SOURCE Hot Key: Switches between D-Sub and DVI input connectors when two computers are connected.
- AUTO/SET Button: Enters a selection in the OSD and performs auto image adjustment for optimal display settings based on current screen resolution.
- Power Button: Turns the display on or off.
- Power Indicator: Lights green or blue in On Mode and changes to amber in Sleep Mode (Energy Saving).
On Screen Display (OSD) Control Adjustment:
The OSD system allows for quick and easy adjustments of image size, position, and operating parameters.
- Navigation: Press MENU to enter, use Δ ∇ to select, AUTO/SET to confirm/enter sub-menus, and MENU to return/exit.
- Main Menu Items:
- PICTURE: Adjusts Brightness, Contrast, and Gamma.
- COLOR: Adjusts color temperature (Preset: 6500K, 9300K, sRGB) and individual Red, Green, Blue levels.
- POSITION: Adjusts Horizontal and Vertical image position.
- TRACKING: Adjusts Clock (to minimize vertical bars/stripes) and Phase (to adjust focus/remove horizontal noise), and Sharpness.
- SETUP: Adjusts Language, OSD Position, White Balance, Power Indicator (ON/OFF), and Factory Reset.
- f-ENGINE: Selects desired image settings (MOVIE/TEXT, USER, NORMAL).
Troubleshooting:
The guide provides solutions for common issues:
- No image appears: Check power cord, power indicator, brightness/contrast, power saving mode, and PC power.
- "OUT OF RANGE" message: Adjust PC video card frequency/resolution to match display specifications.
- "CHECK SIGNAL CABLE" message: Ensure signal cable is properly connected.
- "OSD LOCKED" message: Hold MENU button for several seconds to unlock OSD controls.
- Display Position is incorrect: Use AUTO/SET button or manually adjust H/V position in OSD.
- Vertical bars/stripes: Use AUTO/SET button or adjust CLOCK in OSD.
- Horizontal noise/unclear characters: Use AUTO/SET button or adjust PHASE in OSD.
- Screen color is mono/abnormal: Check signal cable, video card insertion, and color settings (24 bits/true color) in Control Panel - Settings.
- Screen blinks: Check for interlace mode (change to recommended resolution) and ensure power voltage is AC100-240V 50/60Hz.
- Display driver issues: Install display driver from CD/diskette or download from http://www.lge.com. Check if video card supports Plug&Play.
Maintenance Features:
On Safety:
- Use only the supplied power cord.
- Ensure the power supply cord is easily accessible.
- Operate from the specified power source.
- Avoid overloaded AC outlets and frayed cords.
- Do not open the display; no user-serviceable components inside.
- Do not place the display on a sloping shelf unless secured.
- Use only a manufacturer-recommended stand.
- Turn off the display when leaving the room or house.
- Keep children from dropping objects into cabinet openings.
- Do not add non-designed accessories.
- Unplug during lightning storms or extended unattended periods.
On Installation:
- Do not allow anything to rest on or roll over the power cord.
- Avoid using near water.
- Do not block ventilation openings (bottom slots, built-in enclosures, covered openings).
- Avoid placing near radiators or heat sources.
- Do not rub or strike the LCD screen with hard objects.
- Avoid pressing the LCD screen with a finger for long periods to prevent afterimages.
- Note that some dot defects (red, green, blue spots) may appear but do not affect performance.
- Use recommended resolution for best image quality; scaled images may appear otherwise.
On Cleaning:
- Unplug the display before cleaning.
- Use a slightly damp (not wet) cloth.
- Do not use aerosol directly on the screen to avoid electrical shock.
On Repacking:
- Keep the carton and packing materials for future transport.
On Disposal:
- The fluorescent lamp contains mercury; do not dispose of with general household waste.
- Dispose of the product according to local authority regulations.