This document serves as a user's guide for the LG L1752S and L1952S display models, providing essential information for safe installation, operation, and maintenance. It emphasizes the importance of reading the "Important Precautions" section before using the product to ensure personal safety and prevent potential electrical shock or fire hazards. The guide advises users to keep the included CD with the User's Guide in an accessible place for future reference and to provide product information from the attached label to a dealer when requesting service.
The "Important Precautions" section outlines critical safety guidelines. It states that the unit is engineered for personal safety, but improper use can lead to hazards. To ensure proper operation of all safeguards, users must observe basic rules for installation, use, and servicing. Regarding safety, it specifies using only the supplied power cord and ensuring it is certified if a different one is used. The power supply cord is the main disconnection device, so the socket-outlet must be easily accessible after installation. The display should only be operated from a power source indicated in the manual's specifications. Overloaded AC outlets, extension cords, frayed power cords, and broken plugs are dangerous and can cause shock or fire hazards, requiring replacement by a service technician. Users are warned not to open the display as it contains no user-serviceable components and dangerous high voltages, even when off. If the display isn't operating properly, the dealer should be contacted. To avoid personal injury, the display should not be placed on a sloping shelf unless properly secured, and only a manufacturer-recommended stand should be used. To prevent fire or hazards, the display should always be turned off when leaving the room for more than a short period, and never left on when leaving the house. Children should be prevented from dropping or pushing objects into the cabinet openings, as some internal parts carry hazardous voltages. No unapproved accessories should be added. During lightning storms or extended periods of unattended use, the display should be unplugged from the wall outlet.
For installation, users are instructed not to allow anything to rest upon or roll over the power cord and to avoid placing the display where the power cord is subject to damage. The display should not be used near water sources like bathtubs, washbowls, kitchen sinks, laundry tubs, wet basements, or swimming pools. Ventilation openings are provided to release heat, and blocking them can cause failures and fire hazards. Therefore, users must never block bottom ventilation slots by placing the display on a bed, sofa, or rug; place it in a built-in enclosure without proper ventilation; cover openings with cloth or other material; or place it near a radiator or heat source. Users are also advised not to rub or strike the Active Matrix LCD with hard objects, as this can permanently scratch, mar, or damage it. Pressing the LCD screen with a finger for a long time may cause afterimages. Some dot defects (red, green, or blue spots) may appear but will not impact display performance. If possible, the recommended resolution should be used for the best image quality; using other modes may result in scaled or processed images, which is characteristic of fixed-resolution LCD panels.
For cleaning, the display should be unplugged before cleaning the screen. A slightly damp (not wet) cloth should be used, and aerosol sprays should not be applied directly to the screen to avoid electrical shock. For repacking, users should keep the carton and packing materials, as they are ideal for transporting the unit. The fluorescent lamp contains a small amount of mercury, and the product should not be disposed of with general household waste but according to local regulations.
The guide also includes notes on FCC compliance, stating that the manufacturer is not responsible for radio or TV interference caused by unauthorized modifications. The equipment has been tested and complies with Class B digital device limits, designed to provide reasonable protection against harmful interference in a residential installation. If interference occurs, users are advised to reorient the receiving antenna, increase separation between equipment and receiver, connect the equipment to a different circuit, or consult a dealer or experienced radio/TV technician.
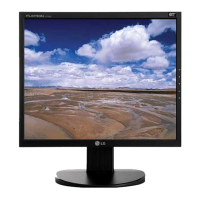
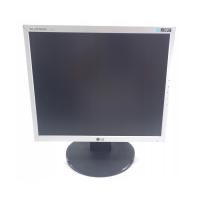
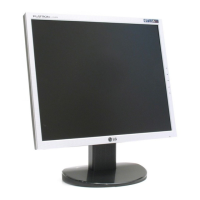
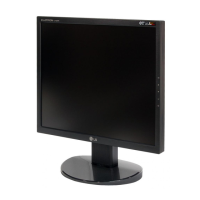
Connecting the display involves several steps. Before setup, ensure power to the monitor, computer, and other attached devices is off. To remove the stand base, place the monitor face down on a soft cloth, then firmly pull out the stand body in the indicated direction until it clicks to separate it. To assemble, first attach the stand body to the product in the correct direction until it clicks. Then, assemble the stand base (front and rear) into the stand body. Once assembled, carefully lift the monitor and face it forward. The guide notes that illustrations are general models and the monitor may differ. Once connected, the stand base should ideally not be disconnected. The product should not be carried upside down by only holding the stand base, as it may fall and cause damage or injury.
For positioning, users can adjust the panel for maximum comfort, with a tilt range of -5° to 20°. It is ergonomically recommended that the forward tilt angle not exceed 5 degrees.
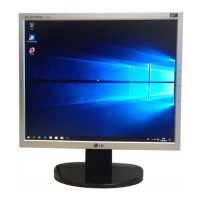
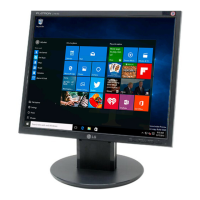
To use the computer, place the monitor in a convenient, well-ventilated location near the computer. Connect the signal cable, tightening thumbscrews to secure it. Connect the power cord to an easily accessible outlet. Then, press the power button on the front switch panel. The "Self Image Setting Function" will automatically execute, adjusting the display to optimal settings for individual input signals. This function can be manually run again by pressing the 'AUTO/SET' button or by using the 'Factory reset' option in the OSD menu, which initializes all menu items except 'Language'.
The control panel functions are detailed for both front and side panels. The MENU button enters/exits the On Screen Display (OSD) and can lock/unlock OSD controls by holding it for several seconds. The △▽ buttons select or adjust OSD functions. The fEngine button provides access to image settings. The AUTO/SET button enters OSD selections and performs auto image adjustment, optimizing display settings for the current screen resolution. The power button turns the display on/off, and the power indicator lights green for normal operation and amber for sleep mode.
The "On Screen Display (OSD) Control Adjustment" section explains how to make adjustments to image size, position, and operating parameters. Users are advised to allow the display to stabilize for at least 30 minutes before making adjustments. The steps are: press MENU to open the OSD, use △▽ buttons to highlight an icon and AUTO/SET to select it, use △▽ buttons to adjust levels and AUTO/SET for sub-menu items, and press MENU once to return to the main menu or twice to exit the OSD.
The OSD selection and adjustment table provides a comprehensive list of main and sub-menus with their functions. "PICTURE" controls brightness, contrast, and gamma. "COLOR" offers presets (6500K, 9300K, sRGB) and individual red, green, and blue adjustments. "POSITION" adjusts horizontal and vertical image placement. "TRACKING" adjusts clock, phase, and sharpness for clarity and stability. "SETUP" includes language, OSD position, white balance, power indicator settings, and factory reset. "FLATRON F-ENGINE" offers "MOVIE/TEXT," "USER," and "NORMAL" modes for customized image settings.
The guide further explains the OSD menu structure, showing icons, names, and descriptions. It details how to navigate and adjust settings, including the "FLATRON F-ENGINE" feature, which presents two screens (applied and non-applied) for comparison and allows users to select optimized image conditions for different environments (movie/text) or manually adjust brightness, ACE (Adaptive Clarity Enhancer), and RCM (Real Color Management) in "USER" mode. The "NORMAL" mode represents standard operating conditions.
The "Troubleshooting" section helps users diagnose common issues. If no image appears, check power cord connection, power indicator light, brightness/contrast, and if the display is in power-saving mode. Messages like "OUT OF RANGE" indicate the PC's video card is outside the display's frequency range, requiring adjustment of video card settings. "CHECK SIGNAL CABLE" means the signal cable is disconnected. If "OSD LOCKED" appears, hold the MENU button for several seconds to unlock it. If the display image is incorrect (position, vertical bars, horizontal noise, mono/abnormal color, blinking), users are advised to use the AUTO/SET button, adjust specific OSD settings (H/V position, clock, phase), check video card settings (frequency, resolution, color depth), ensure proper signal cable connection, and verify power voltage. Finally, if the display driver is not installed or an "Unrecognized monitor" message appears, users should install the driver from the CD or LG website and ensure the video card supports Plug&Play.