- 19 -
7-1-10 TEST MODE
1. The Test mode allows checking the PCB and the function of the product as well as finding out the defective part in
case of an error.
2. While in the test mode, the function control button is not recognized, but the recognition tone (beep - ) sounds.
3. After exiting the test mode, be sure to reset by unplugging and then plugging in the appliance.
4. If an error, such as a sensor failure, is detected while in the test mode, the test mode is cleared and the error code
is displayed.
5. While an error code is displayed, the test mode will not be activated.
NOTE: LED CHECK MODE: When the refrigerator temperature control and the dreezer temperature control button at
The same time are hold for 1 second or longer, every LED on the display turns on at the same time, when the
Button are released, the previous mode is restored.
* Freezer Fan RPM Variable Check:
In case the freezer fan is in operation when the ADJUST key in Refrigerator and Freezer Temp. Control are pressed
for more than one second at the same time freezer fan RPM changes. (For example if high speed, to normal speed
or if normal speed, to high speed for 30 seconds)
After 30 seconds, it turns to its original RPM.
*Demonstration MODE:
1. When the ULTRA ICE key and ADJUST key of refrigerator temperature control are pressed for more than 3
seconds at the same time temperature’s it converts to demonstration mode.
2. In this status, each LED is rotated with 1 second interval.
3. In this status, all Loads are off (Compressor/ Fan/ Damper/ Heater)
(Even is Demonstration Mode, the refrigerator Lamp automatic off function works normally and can be
demostrated).
4. It reset if you do again as clause.
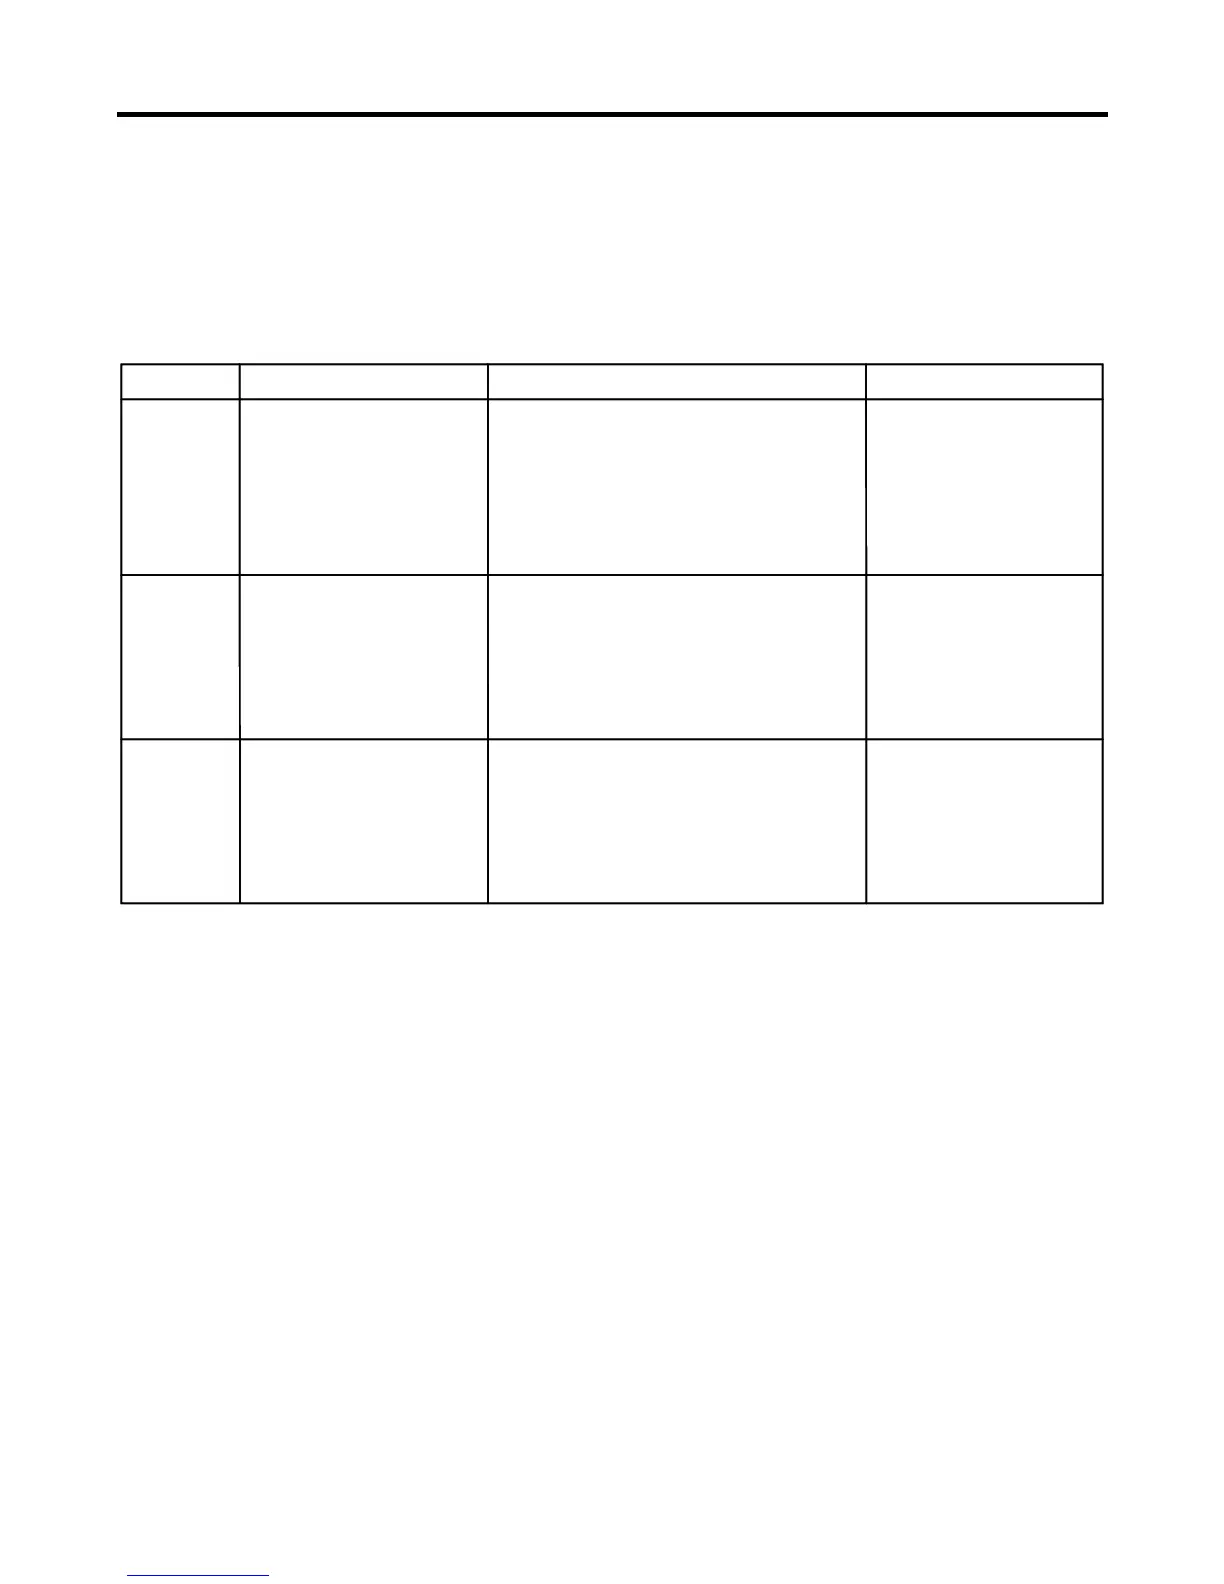
MODE MANIPULATION CONTENTS REMARKS
TEST1
TEST2
Reset
Push ICEPLUS key and
ADJUST key of Freezer
temperature at the same
time over 3 seconds. Or
press TEST S/W one time
in the Main PCB board.
Push ICEPLUS key and
ADJUST key of Freezer
temperature at the same
time over 3 seconds being
in TEST MODE1. Or press
TEST S/W one time being
in TEST MODE 1.
Push ICEPLUS key and
ADJUST key of Freezer
temperature at the same
time over 3 seconds being
in TEST MODE2. Or press
TEST S/W one time being
in TEST MODE 2.
1.-Continuous operation of the
COMPRESSOR
2.Continuous operation of the freezer fan
3.Stepping DAMPER OPEN
4.Defrosting Heater OFF
5.Every DISPLAY LED ON
1.COMP OFF
2.Freezer FAN OFF
3.Stepping DAMPER CLOSE
4.Defrosting Heater ON
5.DISPLAY LED 1,3,5,7 ON
Reset after 5 minutes
Reset if the temperature
of the defrosting sensor
is 46°F (8°C) or more
Reset to the previously setting before
TEST MODE
The Compressor will
start after a 7-minute
Delay