15INSTALLATION
ENGLISH
Removing/Assembling
Handles
When moving the refrigerator through a narrow
opening, removing the doors is preferred. If you
must remove the handles, be very careful not to
scratch the doors.
The appearance of the handles may vary from
what is shown.
• When assembling or disassembling the
refrigerator handles, grasp the handle firmly to
avoid dropping it.
• Do not swing the handle into nearby people or
animals.
• Make sure that the set screws are in place and
the handle footprints at the ends of the handles
are aligned correctly over the mounting
fasteners on the doors. The set screws should be
loose enough to allow the handle footprints to
slide down into place over the mounting
fasteners on the door.
• Make sure that there is not a gap between the
door and handle after assembling the handle.
• Tools Needed
- 3/32 in. Allen wrench
- 1/8 in. Allen wrench
- 1/4 in. Allen wrench
Removing Refrigerator Handles
1 Loosen the set screws a with a 3/32 in. Allen
wrench and remove the handle.
2 If needed, loosen the mounting fasteners b
that connect the refrigerator door and handle
using a 1/4 in. Allen wrench, and remove the
mounting fasteners.
Assembling Refrigerator Handles
1 If needed, reassemble the mounting
fasteners a on the door with a 1/4 in. Allen
wrench.
2 Place the handle on the door by fitting the
handle footprints over the mounting
fasteners and tightening the set screws
b
with a 3/32 in. Allen wrench.
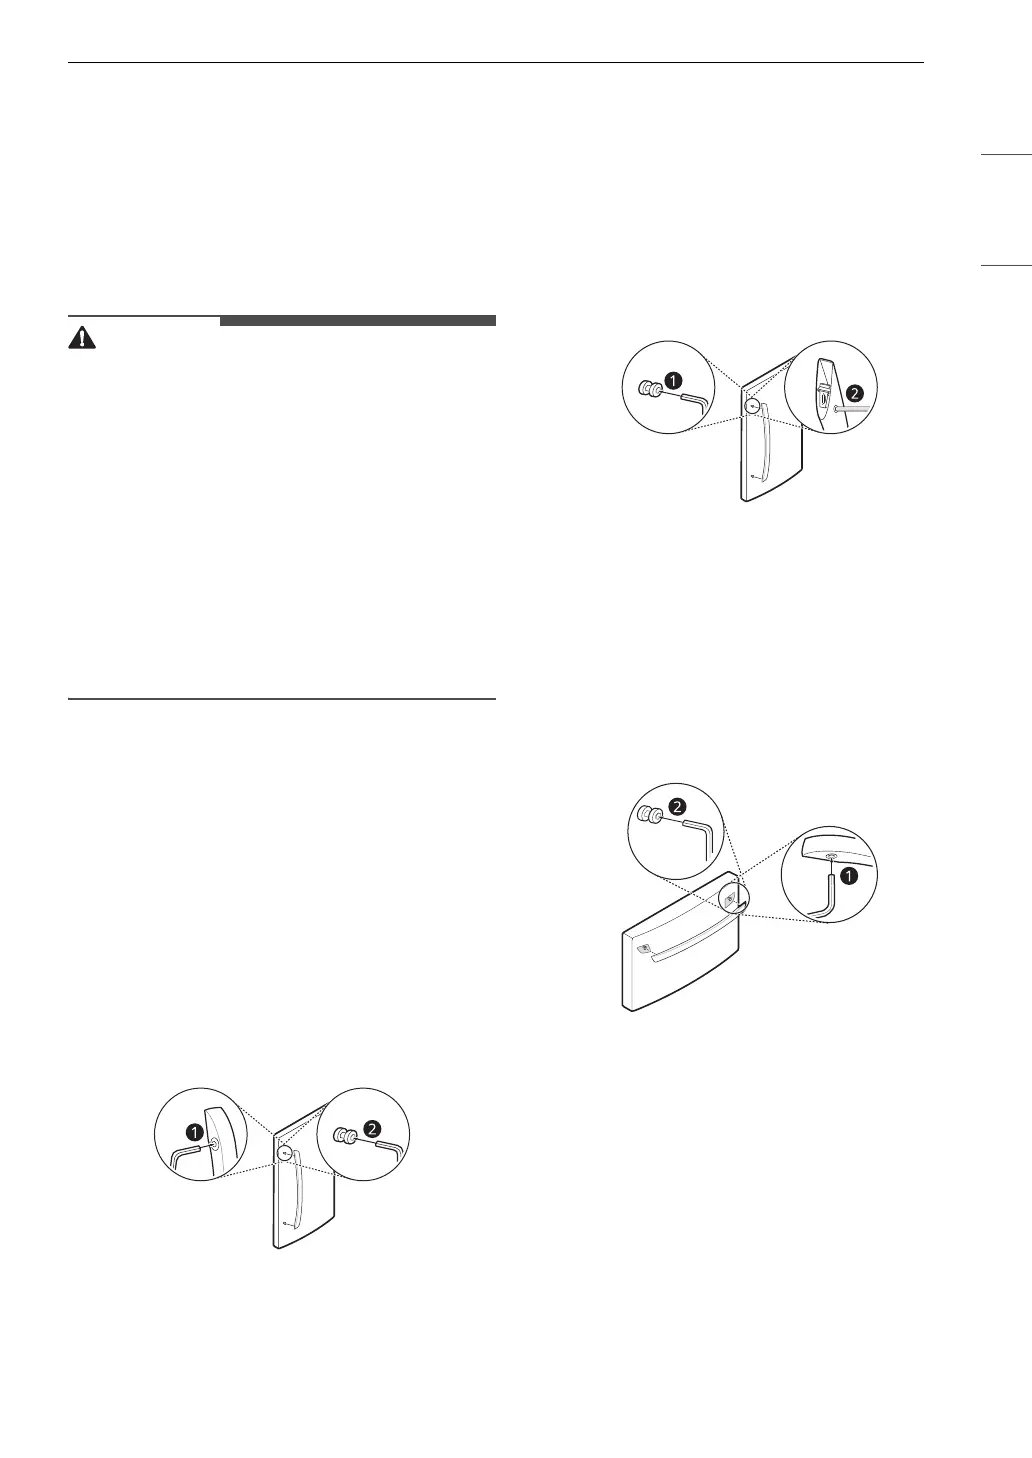
Removing Freezer Drawer Handles
1 Loosen the set screws a located on the lower
side of the handle with a 1/8 in. Allen wrench
and remove the handle.
2 Loosen the mounting fasteners b with a 1/4
in. Allen wrench, and remove the mounting
fasteners.
Assembling Freezer Drawer
Handles
1 Assemble the mounting fasteners a at both
ends of the handle with a 1/4 in. Allen wrench.
2 Place the handle on the door by fitting the
handle footprints over the mounting
 Loading...