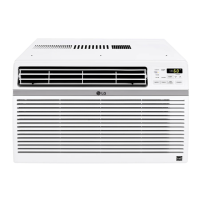
This document is a service manual for the LG Room Air Conditioner models LW1815HR and LW2415HR. It provides comprehensive information for servicing, operating, and maintaining these air conditioning units.
Function Description
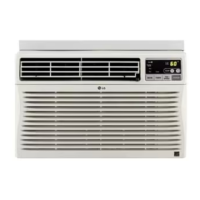
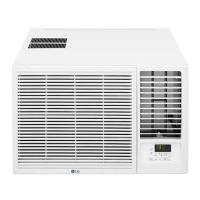
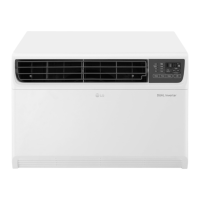
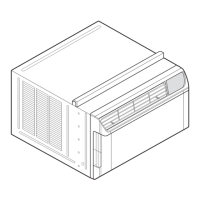
The LG Room Air Conditioner is designed to provide cooling and heating for indoor spaces. It operates as a self-contained unit, drawing in room air, conditioning it, and then recirculating it. The unit features a reversible inlet grille, allowing for flexible installation. Key components include a condenser, evaporator, compressor, fan, and various electrical parts, all working in a refrigeration cycle to achieve the desired temperature. The models covered in this manual are capable of both cooling and heating, making them suitable for year-round use.
Important Technical Specifications
The manual provides detailed specifications for two models: UWX183NGMMB (likely corresponding to LW1815HR) and UWX243NGMMB (likely corresponding to LW2415HR).
Performance:
- BTU performance (Cooling):
- UWX183NGMMB: 17,500/18,000
- UWX243NGMMB: 22,500/23,000
- BTU performance (Heating):
- UWX183NGMMB: 9,800/12,000
- UWX243NGMMB: 9,400/11,600
- EER:
- UWX183NGMMB: 11.2/11.2
- UWX243NGMMB: 9.8/9.8
- CEER:
- UWX183NGMMB: 11.1/11.1
- UWX243NGMMB: 9.8/9.8
- Dehumid. (Pts/Hr):
- UWX183NGMMB: 5.5
- UWX243NGMMB: 6.5
- Dry Air Flow (CFM):
- UWX183NGMMB: 430
- UWX243NGMMB: 560
- DBA Level (Indoor / Outdoor):
- UWX183NGMMB: 61/66
- UWX243NGMMB: 64/69
- Est. Cooling Area (SQ.FT.):
- UWX183NGMMB: 1000
- UWX243NGMMB: 1420
Electrical Ratings:
- Voltage: 60 Hz:
- UWX183NGMMB: 208/230
- UWX243NGMMB: 208/230
- Plug Type:
- UWX183NGMMB: 1,560/1,600
- UWX243NGMMB: 2,290/2,340
- Watts (Cooling):
- UWX183NGMMB: 3,100/3,670
- UWX243NGMMB: 3,750/3,770
- Watts (Heating):
- UWX183NGMMB: 7.8/7.2
- UWX243NGMMB: 11.5/10.6
- Rated Amps (Cooling):
- UWX183NGMMB: 15.0/16.0
- UWX243NGMMB: 15.0/16.0
- Rated Amps (Heating):
- UWX183NGMMB: 15.0/16.0
- UWX243NGMMB: 15.0/16.0
Features:
- Thermostat Control: Thermistor (both models)
- Air Deflection: 4-Way (both models)
- Remote controller: Yes (both models)
- Auto swing: Yes (both models)
- Auto Restart: Yes (both models)
- Energy Saver Function: Yes (both models)
- Timer: 24Hr.On/Off (both models)
- Filter Alarm Function: Yes (both models)
- Fan Speed: Cooling(Heating): 2(2) (both models)
- Fan Only: 2 (both models)
- Compressor: Rotary (both models)
- In Door Fan Type: BLOWER (both models)
- Type Air Discharge: Side by side (both models)
- Outdoor Vent / Exhaust: Yes (both models)
- Chassis Type: Slide In-Out (both models)
Dimensions (W x H x D):
- UWX183NGMMB: 660 mm (26 in) x 428 mm (16 27/32 in) x 675 mm (26 9/16 in)
- UWX243NGMMB: 660 mm (26 in) x 428 mm (16 27/32 in) x 770 mm (30 5/16 in)
Weight:
- Net Weight (lbs.):
- UWX183NGMMB: 126
- UWX243NGMMB: 145
- Shipping Weight (lbs.):
- UWX183NGMMB: 139
- UWX243NGMMB: 159
Room Air Conditioner Voltage Limits:
- Name Plate Rating 208-230±10%: Minimum 187V, Maximum 253V
- Name Plate Rating 115±10%: Minimum 104V, Maximum 126V
Usage Features
The manual details various aspects of using and installing the air conditioner:
-
Installation:
- The unit should be installed securely and firmly to avoid vibration and noise.
- Direct sunlight should not shine directly on the unit; if it does, an awning should be built to shade the cabinet.
- There should be no obstacles, like a fence, within 20 inches that might restrict heat radiation from the condenser.
- To prevent reducing performance, the unit should be installed so that louvers of the cabinet are not blocked.
- The unit must be installed slightly obliquely outward to allow condensed water to leak from the cabinet (about 1/2" or 1/4 bubble with level).
- The unit should be installed with its bottom portion 30-60" above the floor level.
- The foam between the top of the unit and the wall should be sealed to prevent air and insects from getting into the room.
- The power cord must be connected to an independent circuit, and the green wire must be grounded.
- A drain tube to the base pan hole is required on the rear side if plastic hose or equivalent is connected to the drain tube.
- Reversible Inlet Grille: The grille can be designed to clean the filter both upward and downward. This feature allows for easier maintenance and adaptability to different installation scenarios.
- Window Requirements: The unit is designed for installation in standard double hung windows with actual opening widths from 29" to 41". The top and bottom window sashes must open sufficiently to allow a clear vertical opening of 18" from the bottom of the lower sash to the window stool. The stool offset (height between the stool and sill) must be less than 1 1/4".
- Installation Kits: The manual illustrates various components included in the installation kits, such as top retainer bar, foam strips, left and right frame curtains, frame guides, window locking bracket, sill bracket, and support brackets, along with screws and nuts.
- Suggested Tool Requirements: Screwdriver (+, -), ruler, knife, hammer, pencil, and level.
-
Operation:
- Ventilation: The ventilation lever must be in the CLOSE position for best cooling conditions. When fresh air is desired, set the lever to the OPEN position. The damper is opened and room air is exhausted.
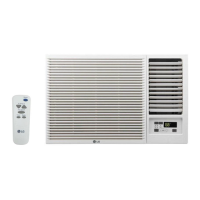
- Remote Controller: The manual illustrates the remote controller with buttons for Power, Temp, Fan Speed, Timer, Mode, Energy Saving, and Auto Swing.
- Power Button: Turns the air conditioner ON/OFF.
- Operation Mode Selection Button: Cycles through COOL, FAN, and HEAT modes.
- On/Off Timer Button: Sets the timer for various durations (1 hour to 12 hours).
- Fan Speed Selector: Adjusts fan speed (Hi, F2, Low, F1).
- Room Temperature Setting Button: Sets the temperature within a range of 60°F to 86°F by 1°F increments.
- Auto Swing: Controls the air flow direction.
- Energy Saver: Stops the compressor when the compressor stops cooling. Approximately every 3 minutes, the fan will turn on to check room air temperature and determine if cooling is needed.
- Remocon Signal Receiver: Receives signals from the remote controller.
Maintenance Features
The manual emphasizes safety precautions and provides detailed instructions for disassembly and troubleshooting, which are crucial for maintenance.
This service manual is a critical resource for anyone involved in the installation, operation, maintenance, or repair of the LG Room Air Conditioner models LW1815HR and LW2415HR, providing detailed instructions and troubleshooting guidance to ensure safe and effective servicing.