EasyManua.ls Logo

LG MCS903AW - User Manual

LG MCS903AW
14 pages
Print Icon
To Next Page IconTo Next Page
Loading...
ENGLISH
SBITANY_MCV903_ENG_MFL40968709
MODEL : MCV903 (MCV903-A0U, MCS903S/F, MCS903W/AW)

Other manuals for LG MCS903AW

Question and Answer IconNeed help?

Do you have a question about the LG MCS903AW and is the answer not in the manual?

Summary

Safety Precautions

General Safety Warnings

Covers warnings regarding electric shock, fire hazards, moisture, and ventilation.

Power Cord Safety Guidelines

Advises on proper use, inspection, and protection of the power cord to prevent hazards.

Laser Product Safety Notice

Provides warnings and instructions for safe operation of the product's laser system.

About Player Controls and Functions

Setting Up the System

Subwoofer Configuration

Instructions on how to use and power the subwoofer for enhanced bass.

Speaker Connection Guide

Details on connecting front, surround, and subwoofer speakers correctly.

Antenna and Power Connections

Steps for attaching the AM/FM aerials and plugging in the power cord.

Important Setup Notes

Guidance on speaker placement, cable matching, and child safety.

Listening to CDs

Tape Recording Operations

Recording from Various Sources

Recording audio from CD, AUX, USB, PORTABLE, or radio to cassette tape.

USB Media Playback

Recording to USB Device

Recording External Sources to USB

Steps for recording FM, AM, TAPE, AUX, or PORTABLE audio to a USB drive.

Setting the Clock and Alarm

Troubleshooting Common Issues

General Problems and Solutions

Resolving issues related to power and sound.

Media Playback Troubleshooting

Solutions for CD, radio, and tape playback or tuning problems.

Remote Control Troubleshooting

Addressing issues with the remote control not working correctly.

Product Specifications

Overview

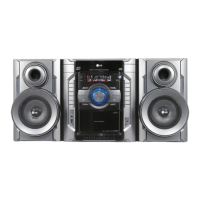
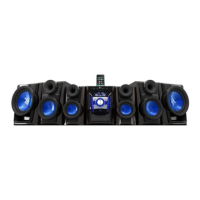
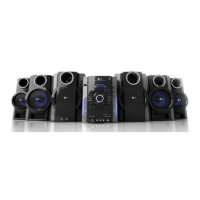
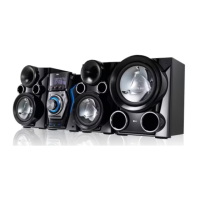
This document describes the LG MCV903 (MCV903-A0U, MCS903S/F, MCS903W/AW) Hi-Fi system, outlining its functions, usage, and maintenance.

The device is a versatile Hi-Fi system capable of playing various audio sources, including CDs (Audio CD, MP3/WMA CD), cassette tapes, USB devices, and radio (FM/AM). It also features recording capabilities from multiple sources to USB or cassette tape.

Safety Precautions

The manual emphasizes several safety precautions. To reduce the risk of electric shock, the cover should not be removed, and servicing should be referred to qualified personnel. The lightning flash symbol warns of dangerous voltage, while the exclamation point indicates important operating and maintenance instructions. The device should not be exposed to rain or moisture and should not be installed in confined spaces like bookcases without proper ventilation. Ventilation openings must not be blocked. The apparatus should not be exposed to dripping or splashing water, and no liquid-filled objects should be placed on it.

Regarding the power cord, it is recommended to place the appliance on a dedicated circuit. Wall outlets should not be overloaded, and damaged cords or insulation are dangerous. The power cord should be protected from physical or mechanical abuse. To disconnect power, the mains cord plug should be pulled out, and the plug should be easily accessible during installation.

The product employs a Laser System. Users are advised to read the manual carefully for proper use and to contact an authorized service center for maintenance. Opening the enclosure to prevent direct exposure to the laser beam is cautioned, as visible laser radiation is present when open, and users should not stare into the beam.

About the Player

The front panel features a DISPLAY WINDOW for showing information. The POWER on/off button controls the unit's power. The CLOCK button is used for setting and checking the time. The TIMER function allows users to set the CD, tape, USB play, and tuner reception to turn on or off at a desired time.

For audio adjustments, the USER EQ allows for custom sound settings. The XDS PLUS (eXtreme Dynamic Sound System) reinforces treble, bass, and surround sound effects. The MP3 OPT function optimizes compressible MP3 files for improved bass sound. The VOCAL FADE function reduces vocal levels in music.

The unit includes a DISC TRAY with an OPEN/CLOSE button for inserting or removing CDs. Navigation buttons include SKIP to another track and MULTI JOG for selecting radio stations or tracks. The NATURAL EQ allows users to choose from various sound impressions. The MIC VOL knob adjusts microphone volume. Playback controls include START PLAYBACK, STOP PLAYBACK OR RECORDING, and PAUSE.

For radio functions, there are buttons to LOOK FOR RADIO STATIONS AUTOMATICALLY and CHOOSE A 'PRESET NUMBER' for a radio station.

The PORTABLE IN jack allows connection of portable devices to play music through the system's speakers. The AUX IN sockets on the back enable connection of other audio or audio-visual devices. MIC 1/MIC 2 jacks are available for connecting microphones (not supplied) for singing along to music.

Remote Control

The remote control provides convenient access to all functions. The POWER button turns the unit on/off and can activate a power save mode when held for more than 3 seconds. The EQ, VSM, and MUTE buttons control sound settings and temporarily stop sound. The PRESET/FOLDER button is used to search for MP3/WMA folders or select preset radio stations. The FUNCTION button changes the active source (FM, AM, CD, TAPE). The VOLUME buttons adjust the sound level. The INPUT button changes input functions (USB, AUX, PORTABLE). The SLEEP button sets a delay time for the player to turn off automatically. The INFO button displays information about MP3/WMA files. The MODE button allows listening to tracks again and again. TUN.-/TUN.+ buttons select radio stations. The PROGRAM/MEMO button is used for storing radio stations. Playback controls include REC, PLAY/PAUSE, STOP, FAST FORWARD, and REWIND. D.SKIP and LINK buttons are also available for specific functions.

Setting Up

The setup process involves connecting speakers and aerials. The manual details connecting front speakers, surround speakers, and subwoofers (A and B) by matching cable colors to terminals. The FM aerial should be connected with its loose ends straight and horizontal for best reception, and the AM loop aerial should be fitted to its stand and connected to the player. Finally, the power plug should be inserted into a wall socket.

The subwoofer sound can be enhanced by pressing the POWER button on the subwoofer repeatedly to toggle SUB_WOOFER ON/OFF.

Important notes for setup include not placing speakers near a TV (within 30cm to avoid discoloration), matching speaker cord colors to terminals, and ensuring correct polarity (+ to +, - to -) to prevent distorted sound. The manual also warns against children putting hands or objects into the speaker duct, which is a hole for bass sound.

Listening to CDs

To play a CD:

  1. Open the CD door using OPEN/CLOSE.
  2. Select the CD tray using DISC.SKIP.
  3. Insert the CD with the label facing up.
  4. Close the CD door.
  5. Select the CD function. The display will show the total number of tracks/files.
  6. Start playback using PLAY.
  7. Stop playback using STOP.

Additional CD features:

  • Pause/Restart: Press CD PAUSE on the player or PLAY/PAUSE on the remote.
  • Search within a track: Hold FAST FORWARD or REWIND on the player or remote.
  • Skip to another track: Use MULTI JOG on the player or SKIP buttons on the remote.
  • Listen in any order: Up to 20 tracks can be programmed. Press PROGRAM/MEMO, use MULTI JOG or SKIP to select tracks, press PROGRAM/MEMO again to save, and then PLAY. To clear selections, press STOP, PROGRAM/MEMO, then STOP.
  • Repeat/Random Play: Press MODE repeatedly to cycle through RPT 1, RPT DISC, RPT ALL, RANDOM, and OFF.

Listening to the Radio

To listen to the radio, ensure FM and AM aerials are connected.

  1. Select FM or AM using TUN. or FUNCTION.
  2. Select a radio station using MULTI JOG or TUN.-/TUN.+.
  3. To save a station, press PROGRAM/MEMO. A preset number will flash.
  4. To select a saved station, use PRESET(-)/(+) or PRESET/FOLDER.
  5. To confirm, press PROGRAM/MEMO. Up to 50 stations can be saved.

Additional radio features:

  • Automatic Tuning: Hold AUTO TUN on the player or TUN.-/TUN.+ on the remote for over 0.5 seconds. The tuner will scan and stop when a station is found.
  • Delete all saved stations: Hold PROGRAM/MEMO for two seconds until "ERASE ALL" shows, then press PROGRAM/MEMO again.
  • Improve poor FM reception: Press DUBB/CD SYNC on the player or PLAY/PAUSE on the remote to switch from stereo to mono, or connect the antenna securely.
  • Improve poor AM reception: If beat noises occur, press AM-NOISE repeatedly to cycle through AM -- NOISE ON and AM -- NOISE OFF.

Listen to Cassette Tapes

To play cassette tapes:

  1. Open the tape door using PUSH EJECT.
  2. Insert the tape.
  3. Close the tape door.
  4. Select the TAPE function.
  5. Start playing using PLAY/PAUSE.
  6. Stop playing using STOP.

Additional cassette features:

  • Fast backward/forward: Press FAST FORWARD or REWIND on the player or remote during playback or stop.
  • Dubbing (Tape to Tape Recording): Select TAPE function. Insert playback tape in TAPE 1 and blank tape in TAPE 2. Press DUBB on the player. Stop dubbing by pressing STOP.
  • RVS MODE (Auto Reverse Deck - TAPE2): Set the tape to play one side, both sides, or both sides six times by pressing RVS MODE.
  • Note: For first-time tape use, push PUSH EJECT to open the door and remove the cushion.

Tape Recording

Record from CD, AUX, USB, PORTABLE, or radio to cassette. Use only normal tapes.

  1. Open TAPE 2 door, insert blank tape.
  2. Close TAPE 2 door.
  3. Select the source to record (CD, TUN, PORTABLE/AUX, or USB) and start playing it.
  4. The unit enters standby for recording, displaying "USB REC → TAPE REC".
  5. Select "TAPE REC" and start recording.
  6. Stop recording using STOP.

CD to Tape Synchronized Recording

This function dubs a complete CD or programmed titles to a cassette automatically.

  1. Open TAPE 2 door, insert blank tape.
  2. Close TAPE 2 door.
  3. Select the CD function.
  4. Start recording. Synchronized recording begins automatically after about 7 seconds.
  5. Stop recording using STOP.

Playing Music Using USB

Connect a portable USB player to the system's USB port.

  1. Connect the portable player using a USB cable (not supplied).
  2. Select the USB function. The display will show "READ" and the number of files.
  3. Start playing using PLAY.
  4. Stop playing using STOP.
  5. Before disconnecting, change to another function (TUN., CD, TAPE, PORTABLE/AUX).
  6. Remove the USB player.

Additional USB features:

  • Listen to tracks again and again: Press MODE repeatedly to cycle through RPT 1, RPT ALL, RANDOM, and OFF.
  • Notes: Some portable devices may not be compatible. Only the first detected card is recognized when multiple cards are connected to a Memory Card Reader. Do not extract the USB device during operation. Back up data to prevent damage. USB extension cables or hubs may prevent recognition. NTFS file system is not supported (only FAT 16/32). The unit does not support all USB devices, digital cameras, or mobile phones. It is not supported if the total number of files exceeds 1000.

USB Direct Recording

Record FM, AM, TAPE, AUX, or PORTABLE sources to USB. Connect USB to the player before recording.

  1. Select the source to record (TUN., TAPE, PORTABLE/AUX) and start playing it.
  2. The unit enters standby for recording, displaying "USB REC → TAPE REC".
  3. Select "USB REC" and start recording.
  4. Stop recording using STOP.

Record Audio CD Source to USB

Record one desired track or all music tracks from an Audio CD to USB.

  1. Select the CD function.
  2. Select the track using MULTI JOG.
  3. The unit enters standby for recording, displaying "USB REC → TAPE REC".
  4. Select "USB REC" and start recording.
  5. Stop recording using STOP.

Notes for USB Recording:

  • Removing USB during recording may result in unsaved files.
  • When selecting the CD function and pressing REC without selecting any tracks, all music files on the CD will be recorded.
  • To select bit rate (96kbps, 128kbps, 192kbps, 256kbps) and recording speed (X1 or X2 for Audio CD only), press REC for longer than 3 seconds, then use MULTI JOG or SKIP. X1 SPEED allows listening during recording, while X2 SPEED is for recording only.

About MP3/WMA

MP3/WMA Disc compatibility:

  • Sampling Frequency: 8-48 kHz (MP3), 32-48 kHz (WMA).
  • Bit rate: 8-320 kbps (MP3), 48-320 kbps (WMA).
  • CD-R physical format should be "ISO 9660".
  • Files created with software that cannot create a FILE SYSTEM (e.g., "Direct-CD") may not play. "Easy-CD Creator" which creates ISO 9660 is recommended.
  • Avoid special characters like "/ : * ? " < >".
  • If the total number of files on the disc exceeds 1000, only up to 999 will be shown.

Listening to Music from Your Portable Player

  1. Connect the portable player to the PORTABLE IN jack on the front.
  2. Turn on the power.
  3. Select the PORTABLE function.
  4. Turn on the portable player and start playing.

USER EQ

Customize sound effects (BASS, MIDDLE, TREBLE).

  1. Select "USER EQ".
  2. When "USER EQ" is displayed, press SET.
  3. Select the desired sound effect (BASS, MIDDLE, or TREBLE) using PRESET(-)/(+).
  4. Adjust the sound level (MIN, -4 to +4, MAX) using MULTI JOG.
  5. Repeat steps 3-4 for other sound effects.
  6. Press SET.

Natural EQ

Choose sound impressions by pressing NATURAL EQ on the player or EQ on the remote. The display cycles through NORMAL, NATURAL, ARABIC, AUTO-EQ (MP3/WMA only), POP, CLASSIC, ROCK, and JAZZ.

VSM (Virtual Sound Matrix)

Select virtual sound by pressing VSM on the remote control.

  • BYPASS: Multichannel surround audio signals play as recorded.
  • ON STAGE: Sound fills a concert hall.
  • VIRTUAL: Realtime 3D positioned sound rendering technology optimized for stereo speakers, creating amazing virtual surround effects.

VOCAL FADE

Reduces vocal levels in music. Press VOCAL FADE repeatedly to cycle through FADE ON and FADE OFF.

Setting the Clock

  1. Press CLOCK for at least 2 seconds.
  2. Choose 12-hour (AM/PM) or 24-hour display using MULTI JOG.
  3. Confirm with SET.
  4. Select hours using MULTI JOG.
  5. Press SET.
  6. Select minutes using MULTI JOG.
  7. Press SET.

Use Your Player as an Alarm Clock

  1. Press and hold TIMER for two seconds. TUNER, CD, USB, TAPE will flash.
  2. Press SET when the desired function for the alarm is shown.
  3. If TUNER is chosen, select PLAY or REC. If TUNER and PLAY are chosen, select a saved station using MULTI JOG, then SET.
  4. Set the ON TIME (alarm start time) using MULTI JOG for hours and minutes, then SET.
  5. Set the OFF TIME (alarm stop time) using MULTI JOG for hours and minutes, then SET.
  6. Set the alarm volume (VOL) using MULTI JOG, then SET.
  7. Switch the system off. The clock icon indicates the alarm is set. To check or turn the alarm on/off, press TIMER. To reprogram, follow the same steps.

Fall Asleep While Listening to Your Player

Press SLEEP on the remote control one or more times to select a delay time (10 to 180 minutes) after which the player will turn off. The display cycles through various SLEEP settings (e.g., SLEEP 180, SLEEP 150, etc.) and dimmer ON/OFF. Note that pressing SLEEP toggles the WOOFER LED on/off.

DEMO

Press DEMO in power off state to demonstrate the display window functions. Press again to cancel.

Troubleshooting

The manual provides a troubleshooting guide for common issues:

  • No power: Check if the power cord is plugged in and if electricity failed.
  • No sound: Check if the correct function is selected (FUNCTION or INPUT).
  • CD not starting playback: Insert a playable disc, clean the disc.
  • Radio stations not tuned in: Position or connect the antenna properly.
  • Unable to record (tape): Cover holes on the back edge of the tape with tape.
  • Remote control not working properly: Operate within 23 ft (7 m), remove obstacles, replace exhausted battery.

Designs and specifications are subject to change without notice.

LG MCS903AW Specifications

General IconGeneral
BrandLG
ModelMCS903AW
CategoryStereo System
Number of Discs1
USB portYes
BluetoothYes
USB PlaybackYes
SubwooferYes
Playable File TypesMP3
Disc PlayerCD
RadioFM
SpeakersYes

Related product manuals