Copyright © LG Electronics. Inc. All rights reserved.
Only for training and service purposes
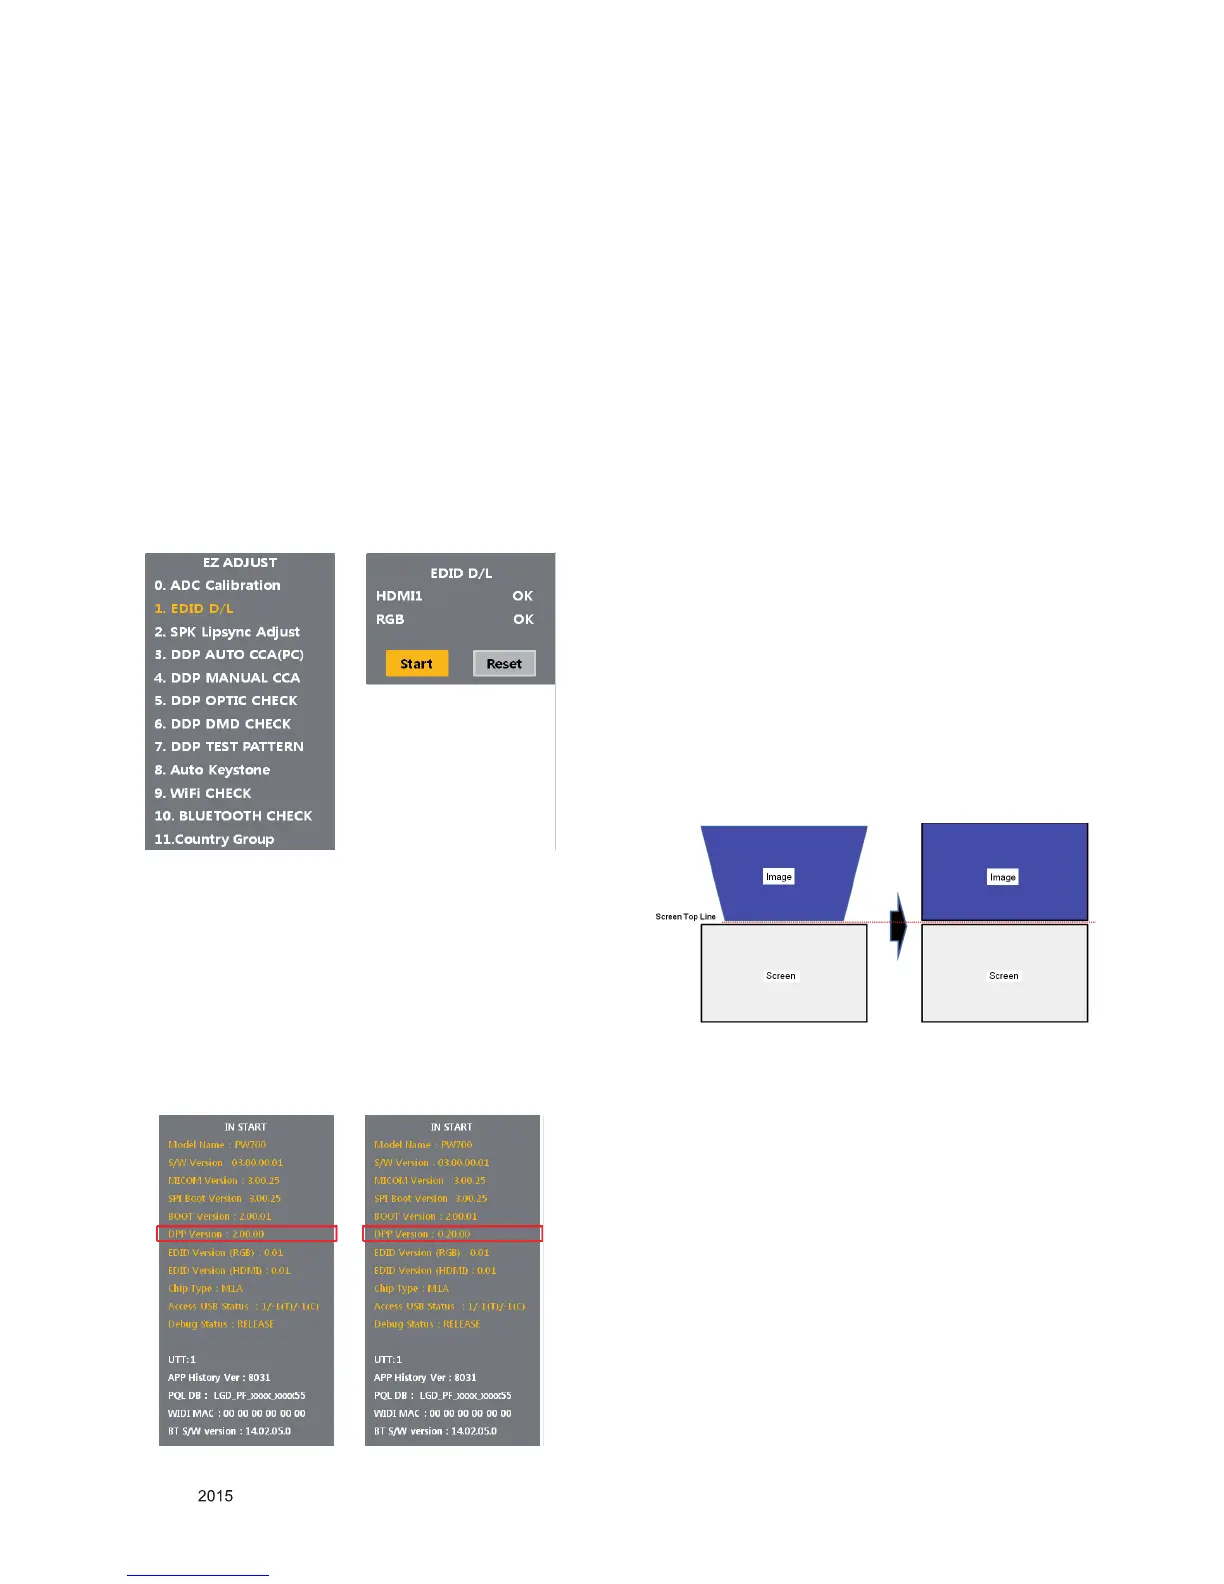
8. EDID Data Download
8.1. Used Device
: Adjustment remote control
8.2. Adjustment Method
(1) Enter to adjustment mode with selecting "ADJ" on remote
control.
(2) Enter to "1. EDID D/L" with pressing right direction key to
get in EDID Download adjustment menu (Fig. 8-2-1)
(3) Select "START".
(4) When adjustment is completed, check RGB "OK(PCM)"
HDMI1 "OK(PCM)". (Fig. 8-2-2)
When it fails, Reset and check by trying the (3) process
again.
(5) To exit, press "ADJ" or "EXIT" of the adjustment remote
controller again to exit.
(6) To verify the adjustment result, enter PCM EDID D/L or
IN-START and verify.
9. Verify DPP Version
(1) Used Device: Adjustment remote control 1EA
(2) DPP Version Verication Method
- Run IN-START and check the DPP version in the sixth
item on the left of the screen (Fig. 9-1).
- If the version information is displayed wrong, as shown in
(Fig. 9-2), exit and re-enter the IN-START menu to check
the version.
<Adjustment for Assembly Line>
10. Total Assembly Adjustment
10.1. Enter Power Only mode
(1) After assembling the SET, DC on the SET at the start of
post process. (use keypad or remote controller)
(2) Press ‘P-ONLY’ key of the adjustment remote controller to
enter ‘Power Only’ mode. (Full White screen is displayed)
(3) To enter the next adjustment, enter ‘EXIT’ of the remote
controller to exit Full white screen, and proceed to the
adjustment.
11. Compensate Auto Keystone
11.1. Used Device
- Adjustment remote controller
- Projector remote controller
11.2. Adjustment Preparations and Device
Conguration
(1) Adjustment Preparations
1) Input source: Default ( no need to specify an input
source)
2) The set must be adjusted on a plate, glass or table with
a atness degree between more than -1 and less than
+1.
3) Incline upward the set to project an image over the top
line of the screen. After the keystone changes, adjust
the image to the adjusting position. (Fig. 11-2-1)
(2) Adjustment Method
1) Make sure the set is placed on an adjusting position.
2) Check the keystone value using the projector remote
control.
A. Enter the Menu button.-> Move through the
options.-> Check the Keystone value.
3) Enter the menu to compensate the keystone using the
adjustment remote controller.
A. ADJ -> 8. Auto Keystone ADJ -> Enter the right arrow
key
(Fig.8-2-1) Adjustment Menu when ADJ is selected (Left)
(Fig.8-2-2) Selection Category on ADJ Adjustment Menu (Right)
(Fig. 9-1) (Fig. 9-2)
(Fig. 11-2-1) Preparations before Auto Keystone Compensation
 Loading...