Do you have a question about the LG RC9011 Series and is the answer not in the manual?
Critical safety warning about disconnecting power before servicing.
Instruction to properly re-fasten grounding devices after service.
Measures to prevent Electrostatic Discharge damage to electronic components.
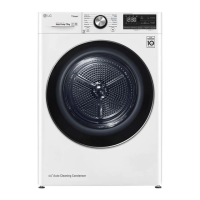
Highlights large capacity, energy savings, reduced drying time, and noise reduction.
Describes the control panel layout, LED display, and program selector functions.
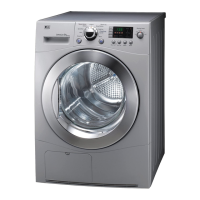
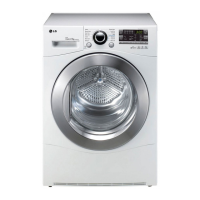
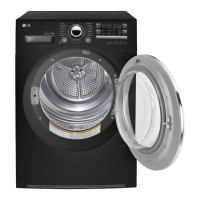
Identifies main external parts of the dryer.
Lists and illustrates optional accessories like drain hose and stacking kit.
Explains features like Time Delay, Favourite, Anti-Crease, Drum Light, and More/Less Time.
Details options like Child Lock, Gentle, Damp Dry Beep, Crease Care, and Buzzer.
Comprehensive table detailing various drying cycles and their fabric suitability.
Steps to ensure the dryer is stable and level to prevent vibration.
Guide for installing the stacking kit to place the dryer on a washing machine.
Information on managing condensed water drainage, including direct hose connection.
Instructions for cleaning the front ventilation grille for proper airflow.
How to manage condensed water drainage, including direct hose connection.
Explains the function and cleaning of the moisture sensor for accurate drying.
Detailed steps for replacing the drum's LED lamp assembly.
Testing procedures and expected resistance values for thermostats and thermistors.
Testing procedures and expected values for heater, motor, capacitor, and pump.
Testing procedures for the door switch based on resistance values and lamp holder voltage.
Diagram showing the layout of the main control board's display side.
Diagram showing the component layout on the main control board.
Visual representation of the dryer's electrical connections and components.
Steps to enter the diagnostic test mode for troubleshooting.
Details error codes like 'dE' and 'tE' and their meanings.
A visual flowchart guiding users through common fault diagnosis.
Procedure to check electrical supply and control board functionality.
Steps to diagnose issues with the door switch and interior lamp.
Procedure for checking motor operation, noise, and related components.
Diagnostic steps for heater malfunction or ventilation errors.
How to check the pump for proper operation and diagnose 'empty water' signals.
Diagnosing poor drying performance related to thermistor issues.
Procedure to check the moisture sensor for drying failure.
Steps to remove the top plate, drawer assembly, and control panel.
Instructions for removing the lower cover, cabinet, and front panel frame.
Procedures for removing the door, switch, belt, and cabinet cover.
How to remove housing for motor, heater, pump, capacitor, and the dispenser.
Steps to disassemble the duct, air guide, and the drum.
Exploded view of the control panel and top plate components.
Exploded view of the cabinet cover and door assembly parts.
Exploded view of the base and motor assembly components.
Exploded view of the back cover and drum assembly parts.
| Capacity | 9 kg |
|---|---|
| Weight | 56 kg |
| Smart Diagnosis | Yes |
| Energy Source | Electric |
| Drum Material | Stainless Steel |
| Color | White |
| Width | 60 cm |
| Height | 85 cm |
| Dimensions (H x W x D) | 850 x 600 x 640 mm |
| Depth | 640 mm |