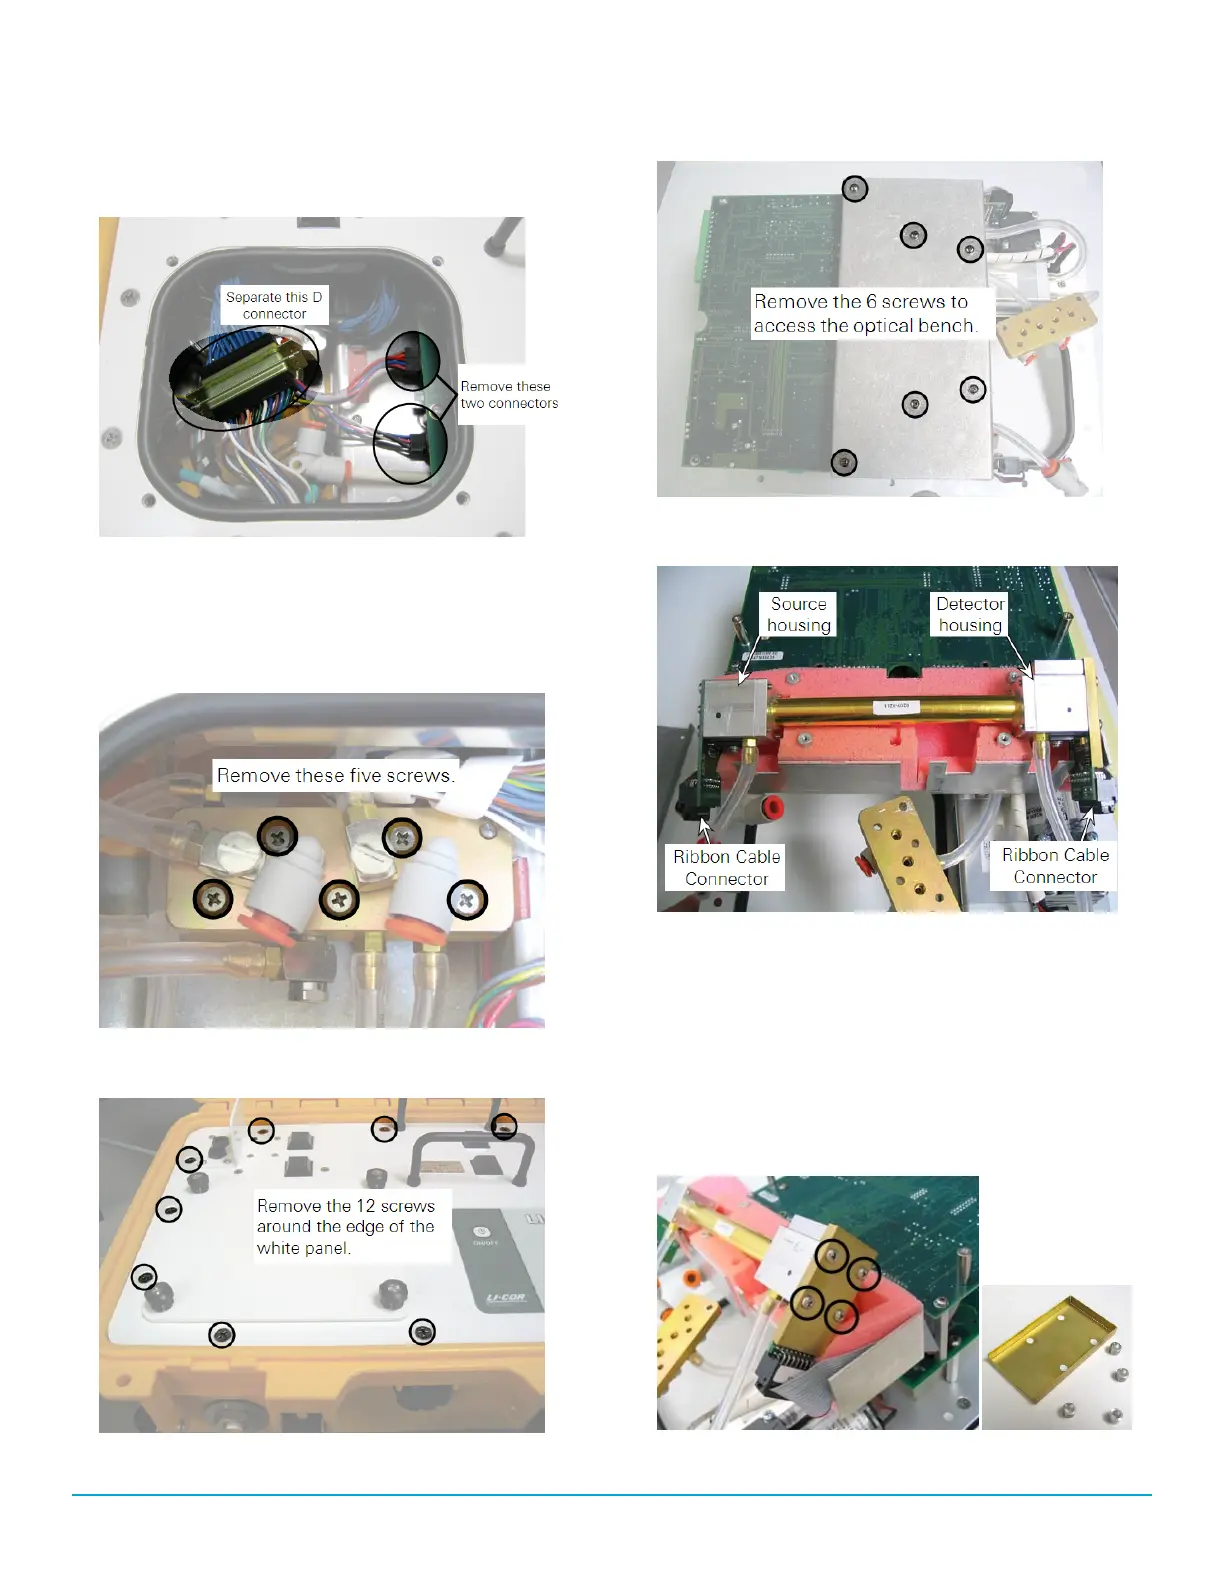
4
Disconnect the 3 electrical connectors.
Two of them are on a single wiring harness, just to the
right of filter connectors; the third is at the left end of the
bundle of blue cables. Pull straight out on the connectors
to remove them.
5
Remove the 5 screws from the top of the air man-
ifold.
The top half of the manifold rests on two pins; lift the top
half until it is completely separated from the bottom half.
It is not necessary to remove any of the hoses.
6
Remove the 12 screws around the outer edge of the
white panel.
7
Lift the assembly out of the yellow case and turn it
upside down.
8
Remove the 6 screws from the optical bench cover.
9
Leaving the hoses connected to the optical bench, lift
the bench out of the foam casing.
10
There are four screws on the source and detector
housings that must be removed.
Remove only the screws from the assembly you are repla-
cing. Remove the four screws in the corners of the source
housing circuit board. Do not remove the remaining four
screws. Remove the four screws from the detector housing
cover. Note that there are some small standoffs inserted
over the screws behind the cover; tilt the housing down
when removing the cover so these standoffs don’t get lost.
4
 Loading...