EasyManua.ls Logo

Lifebreath METRO 120F User Manual

Lifebreath METRO 120F
28 pages
To Next Page IconTo Next Page
Page #1 background imageLoading...
Page #1 background image
f
Pre-Installation Notes
Note
Due to ongoing research and product development, specifications, ratings, and dimensions are
subject to change without notice. Refer to www.LIFEBREATH.com for the latest product
information.
Attention
Do not apply electrical power to the unit until after the completion of the installation (including
installation of low voltage control wiring).
Ensure the installation and wiring is in accordance with CEC, NEC, and local electrical codes.
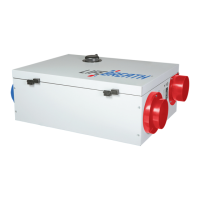
Plug the unit into a standard designated (120 VAC) electrical outlet with ground.
The use of an extension cord with this unit is not recommended. If the installation requires
further wiring, have a licensed electrician make all of the electrical connections. The
recommended circuit is a separate 15 A/120 V circuit.
Caution
Before installation, careful consideration must be given to how this system will operate if
connected to any other piece of mechanical equipment, i.e. a forced air furnace or air handler,
operating at a higher static. After installation, the compatibility of the two pieces of equipment
must be confirmed, by measuring the airflows of the HRV, by using the balancing procedure
found in this manual. Never install a ventilator in a situation where its normal operation, lack of
operation or partial failure may result in the back drafting or improper functioning of vented
combustion equipment
Unit must be installed level to ensure proper condensate drainage. Due to the broad range of
installation and operational conditions, consider the possibility of condensation forming on
either the unit or connecting ducting. Objects below the installation may be exposed to
condensate.
Do not install control wiring alongside electrical wire.
Warning

Questions and Answers:

Lifebreath METRO 120F Specifications

General IconGeneral
BrandLifebreath
ModelMETRO 120F
CategoryHeating System
LanguageEnglish

Summary

Pre-Installation Notes

Operational Cautions

Advises on careful operation and potential issues related to system integration.

Critical Safety Warnings

Emphasizes essential safety precautions to prevent injury, damage, or loss of life.

Location Notes

Simplified Installation (Return/Return Method)

Partially Dedicated System Installation

Fully Dedicated System Installation

Spring-Loaded Backdraft Damper

Instructions for installing a recommended damper component for airflow control.

Mounting

Mounting Brackets

Details on installing the unit's primary mounting hardware for secure attachment.

Main Control Installation (99-DXPL02)

Main Control Installation (99-BC02/3/4)

Interlocking the HRV/ERV

Interlocking with Air Handler/Furnace Blower

Details on integrating the unit with furnace or air handler systems.

Additional Controls

Setting Standby Mode

How to configure the unit for standby operation using control settings.

Adding Dry Contact Controls

Instructions for integrating external dry contact controls for added functionality.

Timers

Wireless Timer Installation and Pairing

Wireless Timer Pairing Procedure

Steps to establish a wireless connection between timers and the main control.

Repeaters

Repeater Pairing Process

Steps to connect the repeater to the main control for wireless communication.

Installer Selectable High Speed Settings

Adjusting DIP Switches

Guide to configuring DIP switches for selecting different unit speed settings.

DIP Switch Functionality

Explanation of the purpose and function of various DIP switches.

Adjusting EC Motor Speed

Procedure for setting fan speeds on EC motor units via control board.

Balancing the Airflows

Balancing Preparation

Steps to perform before initiating the air balancing procedure.

Balancing the Airflows – Pitot Tube

Steps

Detailed procedure for performing airflow balancing using a pitot tube.

Troubleshooting

Related product manuals