16
X SECTION 3 (CONTINUED) / SECTION 3 (SUITE) / SECCIÓN 3 (CONTINUACIÓN)
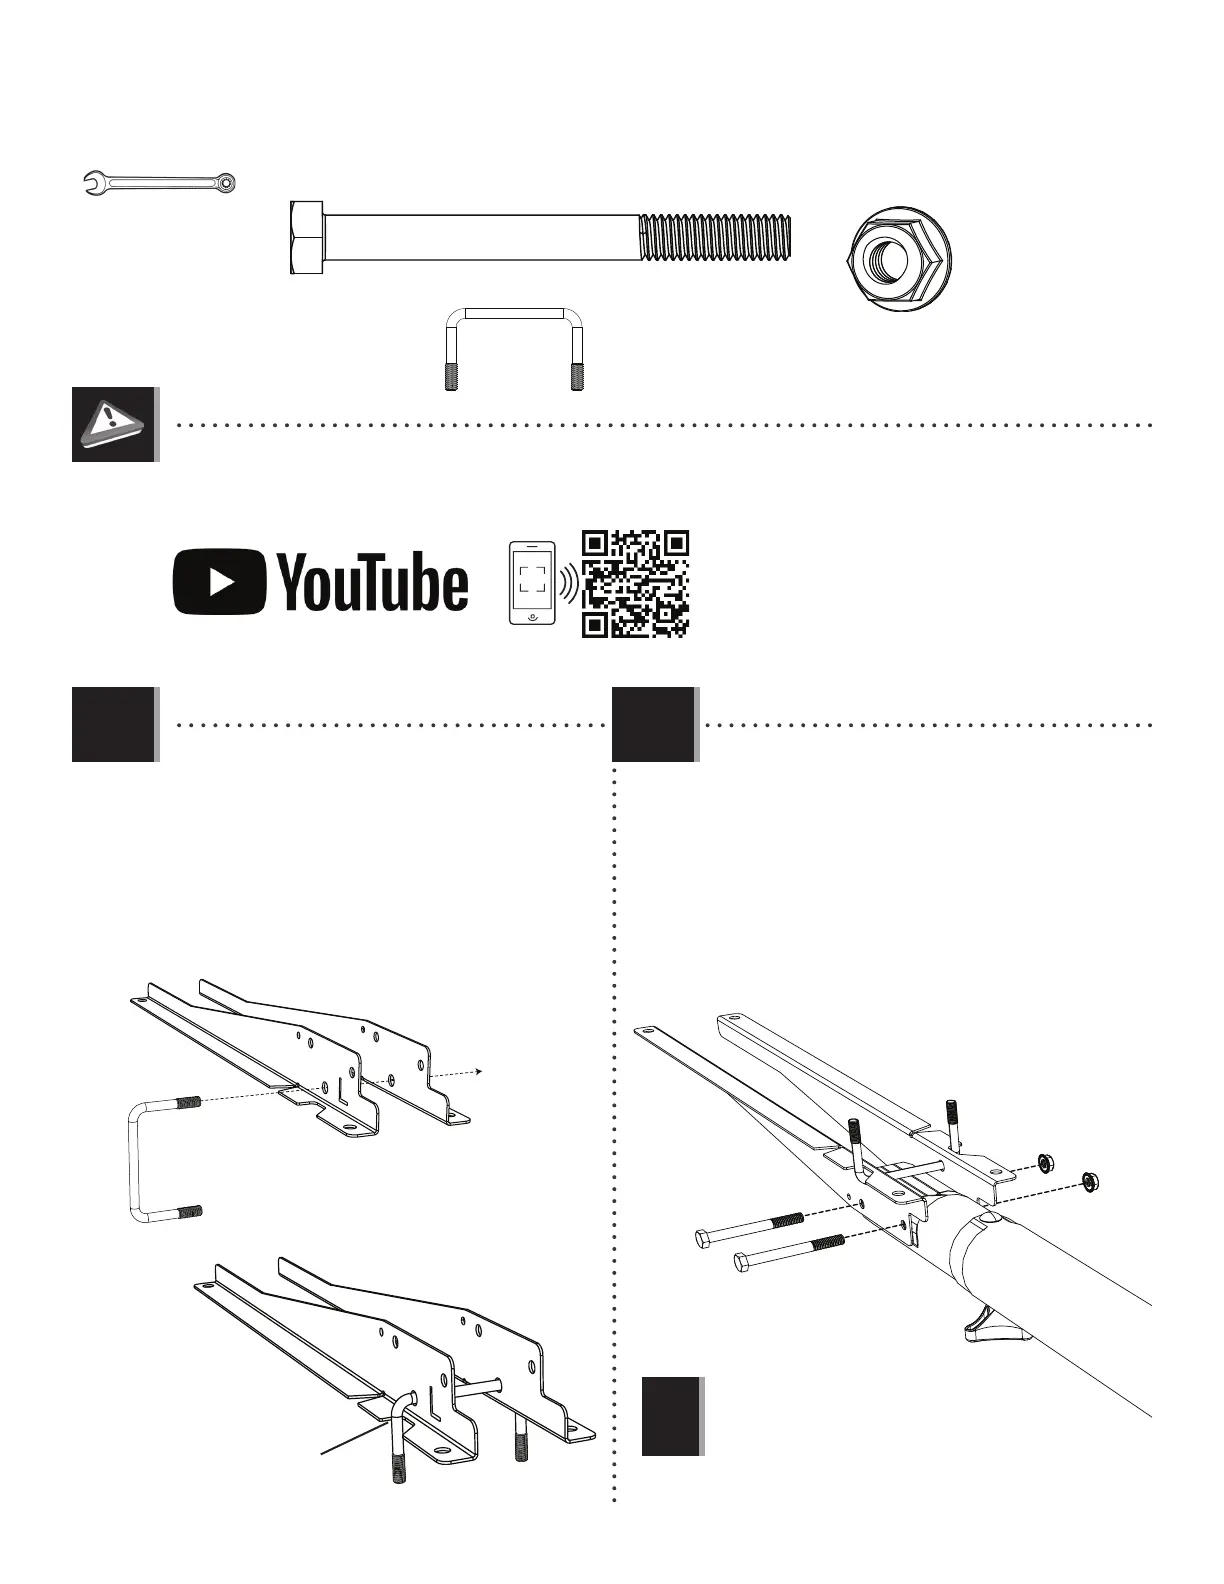
TOOLS AND HARDWARE REQUIRED / OUTILS ET QUINCAILLERIE REQUIS / HERRAMIENTAS Y HERRAJE REQUERIDOS
3.1 3.2
• If you have trouble with this section, scan the code below to view a video on on its assembly.
• Si vous avez des problèmes avec cette section, scannez le code QR en dessous pour voir un vidéo de l’assemblage.
• Si tiene problemas con esta sección, escanee el código QR debajo para ver un video del ensamblaje.
• http://go.lifetime.com/procourtbackboardtorim
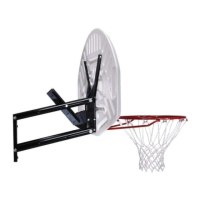
• Secure the left and right backboard brackets (AJJ & AJK) to
the top pole (ALH) with the hardware shown.
• Attachez les supports du panneau droit et gauche (AJJ et
AJK) à la section supérieure du poteau (ALH) à l’aide de la
quincaillerie indiquée.
• Sujete los soportes del tablero derecho e izquierdo (AJJ
y AJK) a la sección superior del poste (ALH) usando los
herraje indicados.
1/2” (≈13 mm) (x2)
APK
AJJ
AJK
Notch
Encoche
Muesca
APK (x1)
APG (x2)
• The U-bolt (APK) must rest in the notches of the
backboard brackets as shown.
• Le boulon en « U » (APK) doit rester dans les
encoches des supports du panneau comme
illustré.
• El perno en «U» (APK) debe quedarse en las
muescas de los soportes del tablero como se
muestra.
APN (x2)
APG
APG
APN
APN
AJJ
AJK
ALH
!
• Do not overtighten the hardware.
• Ne pas trop serrer la quincaillerie.
• No apriete demasiado los herraje.