EasyManua.ls Logo

Lifetime 1558 User Manual

Lifetime 1558
48 pages
To Next Page IconTo Next Page
Page #1 background imageLoading...
Page #1 background image
TOOLS REQUIRED TABLE OF CONTENTS
Pour le français, voir la page 2. Para el español, ver la página 3.
ASSEMBLY INSTRUCTIONS
ACTION GRIP
®
PORTABLE BASKETBALL SYSTEM
MODEL 1558
CONTACT LIFETIME
®
CUSTOMER SERVICE:
Dial 1-800-225-3865
QUESTIONS?
MODEL# AND PRODUCT ID
(both are needed when contacting us)
Model Number: 1558
Product ID:
For Customer Service in Mainland Europe
and the United Kingdom,
E-mail: csinternational@lifetime.com
Live Chat:
www.lifetime.com/customerservice/home
(click on “LIVE CHAT” tab)
Icon Legend...................................................4
Warnings & Notices......................................5
Pole Assembly...............................................6
Pole-to-Base Assembly...............................11
Backboard-to-Rim Assembly.....................15
Backboard-to-Pole Assembly.....................19
Parts Identifi er..........................................i–iv
Handle Assembly........................................24
Final Assembly............................................31
Maintenance Instructions..........................35
Warning Sticker..........................................36
Registration..............................................40
Warranty....................................................41
(2)
(1)
(1)
(1)
(1)
(1)
(1) (1)
1/2" (13 mm), 7/16" (11 mm),
9/16" (14 mm), 3/4" (19 mm)
3/16" (5 mm)
(incluidas)
(2)
375 lb (≈170kg)
Save this instruction in the event that the manufacturer has to be contacted for replacement parts.
Requires 1–2 hours to complete assembly steps
At least 2 people recommended for setup
BEFORE ASSEMBLY:
Question and Answer IconNeed help?

Do you have a question about the Lifetime 1558 and is the answer not in the manual?

Lifetime 1558 Specifications

General IconGeneral
CategoryBasketball Hoops
TypePortable
Backboard MaterialShatterproof Polycarbonate
Adjustment Increments6 inches
Pole Diameter3.5 inches
Base Capacity35 gallons
MaterialSteel
ColorBlack
Warranty5 years

Summary

Icon Legend

Special Attention Icon

Indicates special attention is required for reading.

Parts and Hardware Icons

Indicates parts or hardware required for a section.

Tools Icon

Indicates the tools required for a specific section.

Electric Drill Icon

Indicates whether to use or not use an electric drill.

Centerlock Nut Icon

Describes the use of a centerlock nut and its tightening effort.

Safety Instructions and Warnings

General Safety Instructions

General safety precautions and requirements for assembly and use.

Specific Safety Warnings

Specific warnings about assembly, usage, and potential hazards.

Pole Assembly

Pole Assembly Hardware and Parts

Lists all hardware and parts needed for pole assembly.

Pole Assembly Tools

Lists the tools necessary for pole assembly.

Attaching Pole Bracket to Middle Pole

Securing the Pole Bracket (ALL) to the Middle Pole (ALF).

Connecting Top Pole to Middle Pole

Connecting the Top Pole (ALH) to the Middle Pole (ALF).

Connecting Middle Pole to Bottom Pole

Connecting the Middle Pole to the Bottom Pole (ALE).

Seating Pole Sections

Striking pole ends on a surface to properly seat sections.

Securing Poles with Screws

Using self-drilling screws to secure the pole sections together.

Pole-to-Base Assembly

Pole-to-Base Hardware and Parts

Lists hardware and parts for pole-to-base connection.

Pole-to-Base Tools

Lists tools needed for pole-to-base assembly.

Attaching Base Cap

Securing the base cap (AJN) onto the base (AJM).

Attaching Wheels to Base and Pole

Sliding the axle through wheels and pole, securing to the base.

Attaching Pole Brace to Base

Securing the pole brace (ALI) to the base using specified hardware.

Positioning System for Filling

Tipping the system and resting the pole to prepare for filling.

Backboard-to-Rim Assembly

Backboard-to-Rim Hardware and Parts

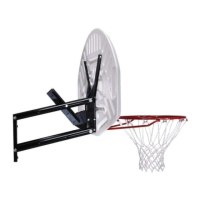
Lists hardware and parts for backboard-to-rim connection.

Backboard-to-Rim Tools

Lists tools needed for backboard-to-rim assembly.

Attaching Rim to Backboard

Inserting bolts and securing the rim (ALX) to the backboard.

Connecting Rim and Plastic Guard

Connecting the rim (ALX) and plastic guard (ALD) to the backboard (AJI).

Securing Rim Assembly with Springs

Securing rim assembly with springs and attaching backboard brackets.

Backboard-to-Pole Assembly

Backboard-to-Pole Hardware and Parts

Lists hardware and parts for backboard-to-pole connection.

Backboard-to-Pole Tools

Lists tools needed for backboard-to-pole assembly.

Attaching Short Extension Arms

Attaching short extension arms (AKC) to backboard brackets.

Attaching Long Extension Arms

Attaching long extension arms (AKB) to backboard brackets.

Connecting Backboard Assembly to Pole

Positioning backboard assembly and securing extension arms to top pole.

Tightening Nuts

Tightening nuts until flush with the ends of the bolts.

Handle Assembly

Handle Assembly Hardware and Parts

Lists hardware and parts for handle assembly.

Handle Assembly Tools

Lists tools needed for handle assembly.

Assembling Trigger and Handle Components

Attaching lock tab to trigger and inserting trigger assembly into handle.

Connecting Handle Assembly to Pole

Securing handle assembly to outer tube and attaching height sticker.

Inserting Inner Channel and Stop

Inserting inner channel and stop into outer tube and to pole bracket.

Securing Outer Tube and Pole Cap

Securing outer tube to extension arms and inserting pole cap.

Attaching Springs to Hex Bolt

Stretching springs over the hex bolt using a wrench.

Final Assembly

Final Assembly Components

Lists hardware, parts, and tools needed for final assembly.

Attaching Frame Pads

Attaching center and corner frame pads to the backboard.

Filling the Base

Instructions for filling the base with sand or water.

Attaching Net

Attaching the net (AKZ) to the rim (ALX).

Maintenance

General Maintenance Guidelines

Factors affecting system life and preventive measures.

Checking for Wear and Corrosion

Checking hardware, parts, warning sticker, and for rust/paint damage.

Rust Penetration Warning

Instruction to replace pole immediately if rust penetrates it.

Product Registration

Online Registration Benefits

Benefits of registering your product online, including feedback and notifications.

Lifetime's Privacy Policy

Information about Lifetime's commitment to customer privacy.

Warranty Information

5-Year Limited Factory Warranty

Details of the 5-year limited factory warranty terms and conditions.

Warranty Exclusions and Claims

Conditions that void warranty and process for reporting defects.

Warning Sticker Information

General and Specific Warnings

General warnings for safe operation and specific user behavior.

Usage Restrictions and Corrosion Warnings

Restrictions on use, corrosion warnings, and system damage.
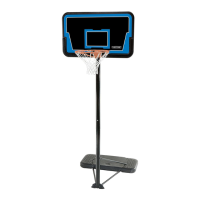
Related product manuals