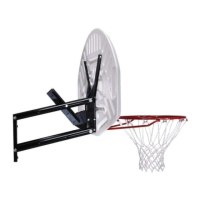
This document is an owner's manual with assembly instructions for a Lifetime Ball Return Net, Model #12347, specifically designed for cemented, in-ground basketball systems.
Function Description:
The Lifetime Ball Return Net is an accessory designed to assist with basketball practice by returning missed shots or made baskets to the player, reducing the need to chase after the ball. It functions as a training aid, allowing for more continuous practice sessions. The net is intended for use with cemented, in-ground basketball systems only and is not suitable for portable systems or during actual game play. It is designed to be removed after each use.
Important Technical Specifications:
The manual provides a parts list for the Ball Return Net, which includes:
- Tubes: Swaged Tube (AA) and Tube (AB), both essential for forming the frame of the net.
- Net: The main netting component (AC).
- Weight Bags: Two weight bags (AD) designed to be filled with sand (approximately 30 lbs each) to anchor the net.
- Net Hardware (Kit #1029637):
- 1/4"-20 Cap Nuts (NA): 6 pieces
- 1/4"-20 x 1 3/4" Hex Bolts (NB): 6 pieces
- 1/4" Flat Washers (NC): 12 pieces
- Harness (ND): 1 piece, used to secure the net to the rim.
- 6 mm Screw (NE): 1 piece, for securing tube assembly.
- 1" Plugs (NF): 2 pieces, for the ends of the tube assembly.
- Bungee Cords (NG): 2 pieces, to connect the net to the weight bags.
- Adjustable Wrench
- One 60 lb. bag of sand (for the weight bags)
- 7/16" Wrenches (2)
- 3/4" Wrenches (2)
- 3/8" Socket Wrench
- Phillips Screwdriver
Usage Features:
- Assembly Process:
- Tube Assembly: The Swaged Tube (AA) is inserted into Tube (AB) and secured with a 6 mm Screw (NE). 1" Plugs (NF) are inserted into each end of the assembled tube.
- Net Attachment: The assembled tube is placed between the flaps of the Net (AC), aligning six holes. The net is then secured to the tube assembly using 1/4"-20 x 1 3/4" Hex Bolts (NB), 1/4" Flat Washers (NC), and 1/4"-20 Cap Nuts (NA). A warning advises against overtightening the cap nuts to prevent injury from exposed threads.
- Harness Installation: The Harness (ND) straps are inserted under and around the tube assembly. The straps are then pulled through the first and second rings, looped around Ring 2, and back through Ring 1.
- Rim Attachment: The basketball rim must be lowered to its lowest setting. The Harness is looped over the rim, and the straps are pulled down until the net fits snugly against the back of the rim, next to the backboard. The straps of the Harness are then tied to a fixed, non-moving point behind the backboard (not extension arms). The rim can then be raised to the desired height.
- Weight Bag Preparation: The two Weight Bags (AD) are filled completely with sand (approximately 30 lbs each) and zipped closed.
- Weight Bag Connection: One end of each Bungee Cord (NG) is connected to a Weight Bag, and the other end to the bottom corners of the Net.
- Positioning: The Weight Bags are lifted (not dragged) and spread until the net is taut. Users are advised to avoid dropping the weight bags and to set them in desired locations.
- Safety Instructions:
- Read and follow all instructions carefully before assembly.
- Identify and inventory all parts using the Parts List.
- Failure to comply with warnings can result in serious personal injuries (cuts, broken bones, nerve damage, paralysis, brain injury, death) or property damage.
- The product is designed for cemented, in-ground systems only; not for portable systems.
- Do not climb on the net.
- This is a training aid, not for game play.
- Remove the net after each use.
- Use extreme caution if using a ladder during assembly.
- Owner must ensure all players know and follow safety rules.
- Proper and complete assembly, use, and supervision are essential.
- Most injuries are caused by misuse and/or not following instructions.
Maintenance Features:
- Pre-assembly Check: Before beginning assembly, users are instructed to keep hardware bags separate and to call Customer Service if any parts are missing.
- Bolt Fit Test: Users should test fit all bolts by inserting them into their respective holes. If necessary, excess powder coating buildup inside the holes should be carefully scraped away, but not all of it, as bare metal may rust. Some bolts may require pounding into place with a hammer or mallet.
- Warranty: The product comes with a 90-day limited factory warranty covering defects in material or workmanship from the date of original retail purchase.
- Defects are defined as imperfections that impair the use of the product.
- Warranty is voided by misuse, abuse, negligence, improper installation, alteration, accident, vandalism, rusting, "acts of nature," intentional damage, unreasonable use, or hanging from the net or rim.
- It does not cover scratching or scuffing from normal usage.
- The warranty is nontransferable and limited to repair or replacement of defective parts. Shipping and labor charges are not covered.
- Liability for incidental or consequential damages is excluded.
- The product is not intended for institutional or commercial use; such use will void the warranty.
- All warranty claims must be accompanied by a sales receipt.
- Customers are advised to report product defects in writing or by phone to Lifetime Products, Inc., and to include a dated sales receipt and photographs of damaged parts.
- Registration: Users are encouraged to register their product online at www.lifetime.com to provide feedback, receive product notifications/promotions, and facilitate direct notification in case of a product recall or safety modification. The privacy policy is highlighted, assuring users that personal data will not be sold or provided to third parties.