9
TOOLS AND HARDWARE REQUIRED / OUTILS ET QUINCAILLERIE REQUIS / HERRAMIENTAS Y HERRAJE REQUERIDOS
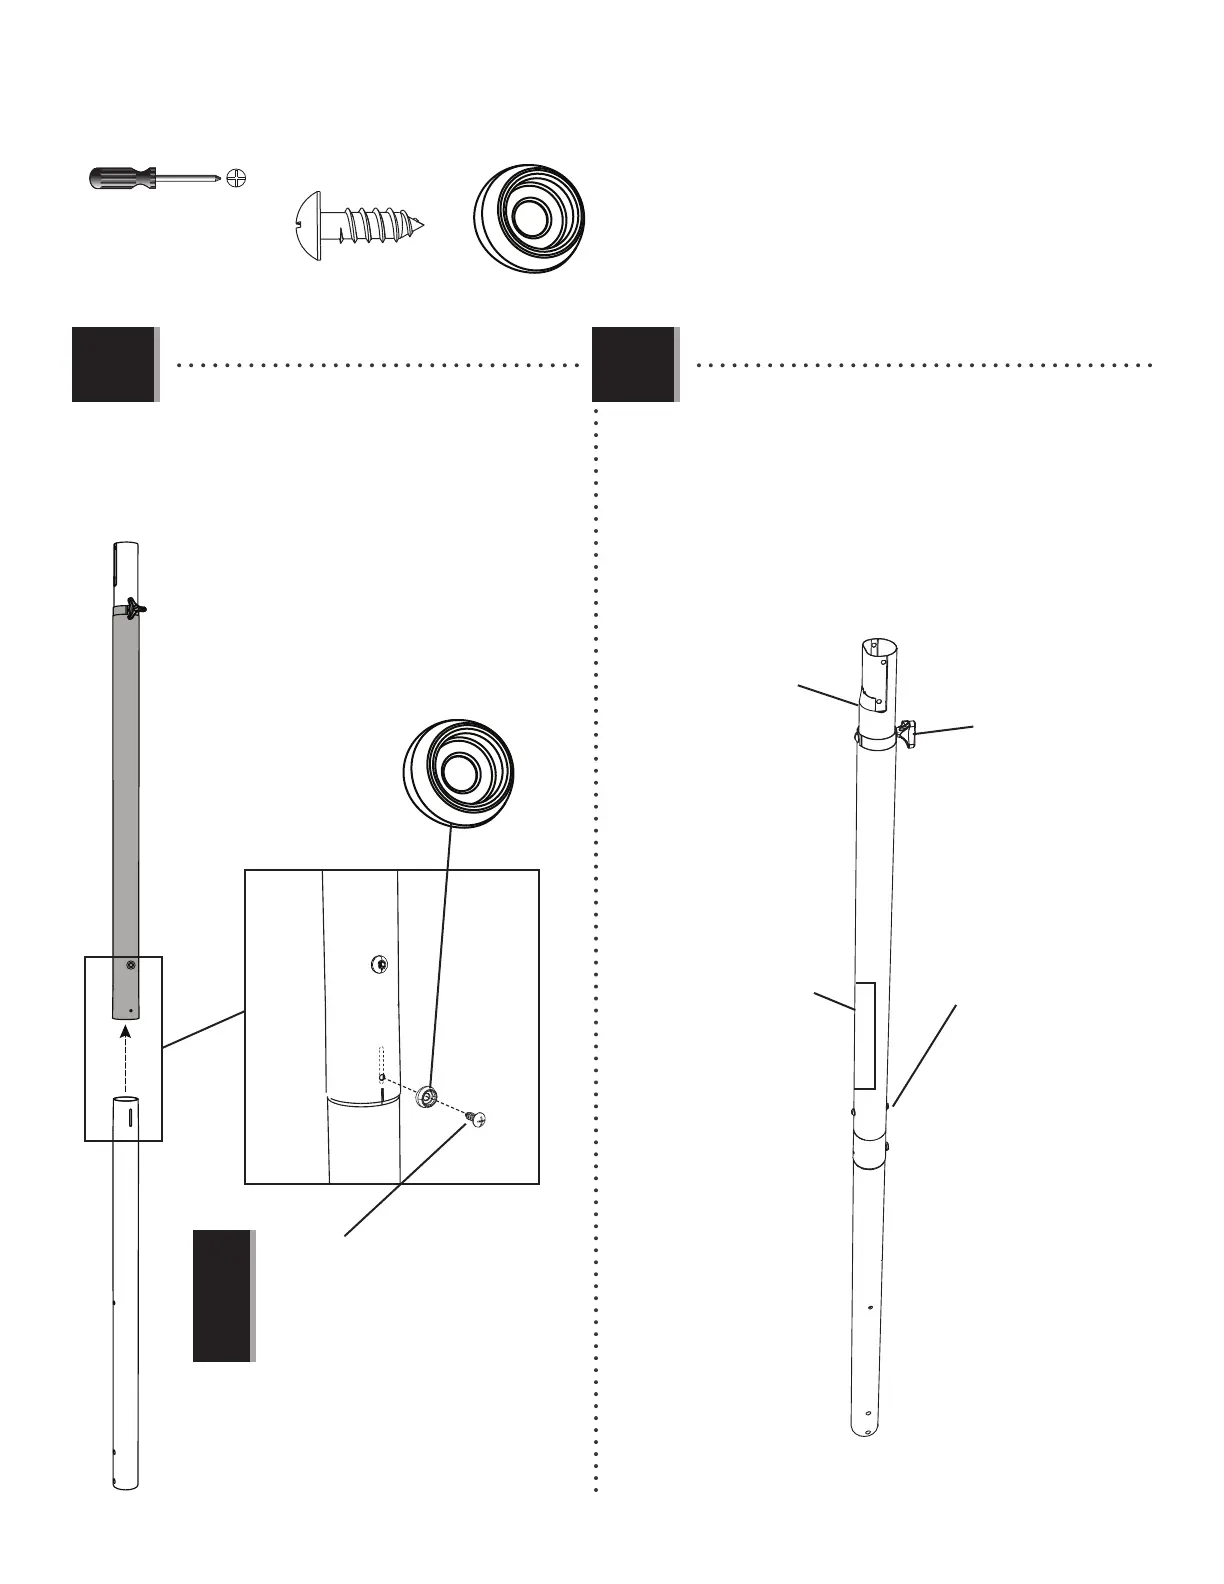
X SECTION 1 (CONTINUED) / SECTION 1 (SUITE) / SECCIÓN 1 (CONTINUACIÓN)
1.4
ADS (x1)
CIH
(1)
!
• The screw should be fl ush with the pole, and will
spin freely once installed.
• La vis doit être au ras du poteau, mais elle
tournera librement une fois installée.
• El tornillo debe quedar a ras con el poste, mas
girará libremente una vez esté instalado.
• STOP! Make sure all parts on the pole assembly are
oriented as shown before continuing to the next step.
• ARRÊT ! Orientez tous les pièces du poteau comme
illustré avant de continuer à l’étape suivante.
• ¡PARE! Oriente todas las partes del poste como se
muestra antes de continuar al próximo paso.
1.5
• Align the hole in the middle pole (ALF) with the
slot in the bottom pole (ALE) and install the domed
countersunk washer (CIH) with the hardware shown.
• Alignez le trou de la section de poteau du milieu (ALF)
sur la fente de la section inférieure (ALE) et installez
la rondelle fraisée (CIH) à l’aide de la quincaillerie
indiquée.
• Alinee el agujero de la sección intermedia (ALF) con la
ranura de la sección inferior del poste (ALE) e instale la
rondana frasada (CIH) usando los herraje indicados.
ALE
ADS
ALF
CIH
CIH (x1)
Warning sticker
Autocollant d’avertissement
Etiqueta de advertencia
Adjustment knob
Poignée de réglage
Pomo de ajusto
Crimped side of pole
Côté serti du poteau
Lado crimpado del poste
Barrel nut
Écrou de canon
Tuerca cilíndrica