46
TOOLS AND HARDWARE REQUIRED / OUTILS ET QUINCAILLERIE REQUIS / INSTRUMENTAL Y HERRAJE REQUERIDOS
X SECTION 9 (CONTINUED) / SECTION 9 (SUITE) / SECCIÓN 9 (CONTINUACIÓN)
ADZ (x6)
BXZ (x6)
ADZ
ADZ
BXZ
BYB
BYB
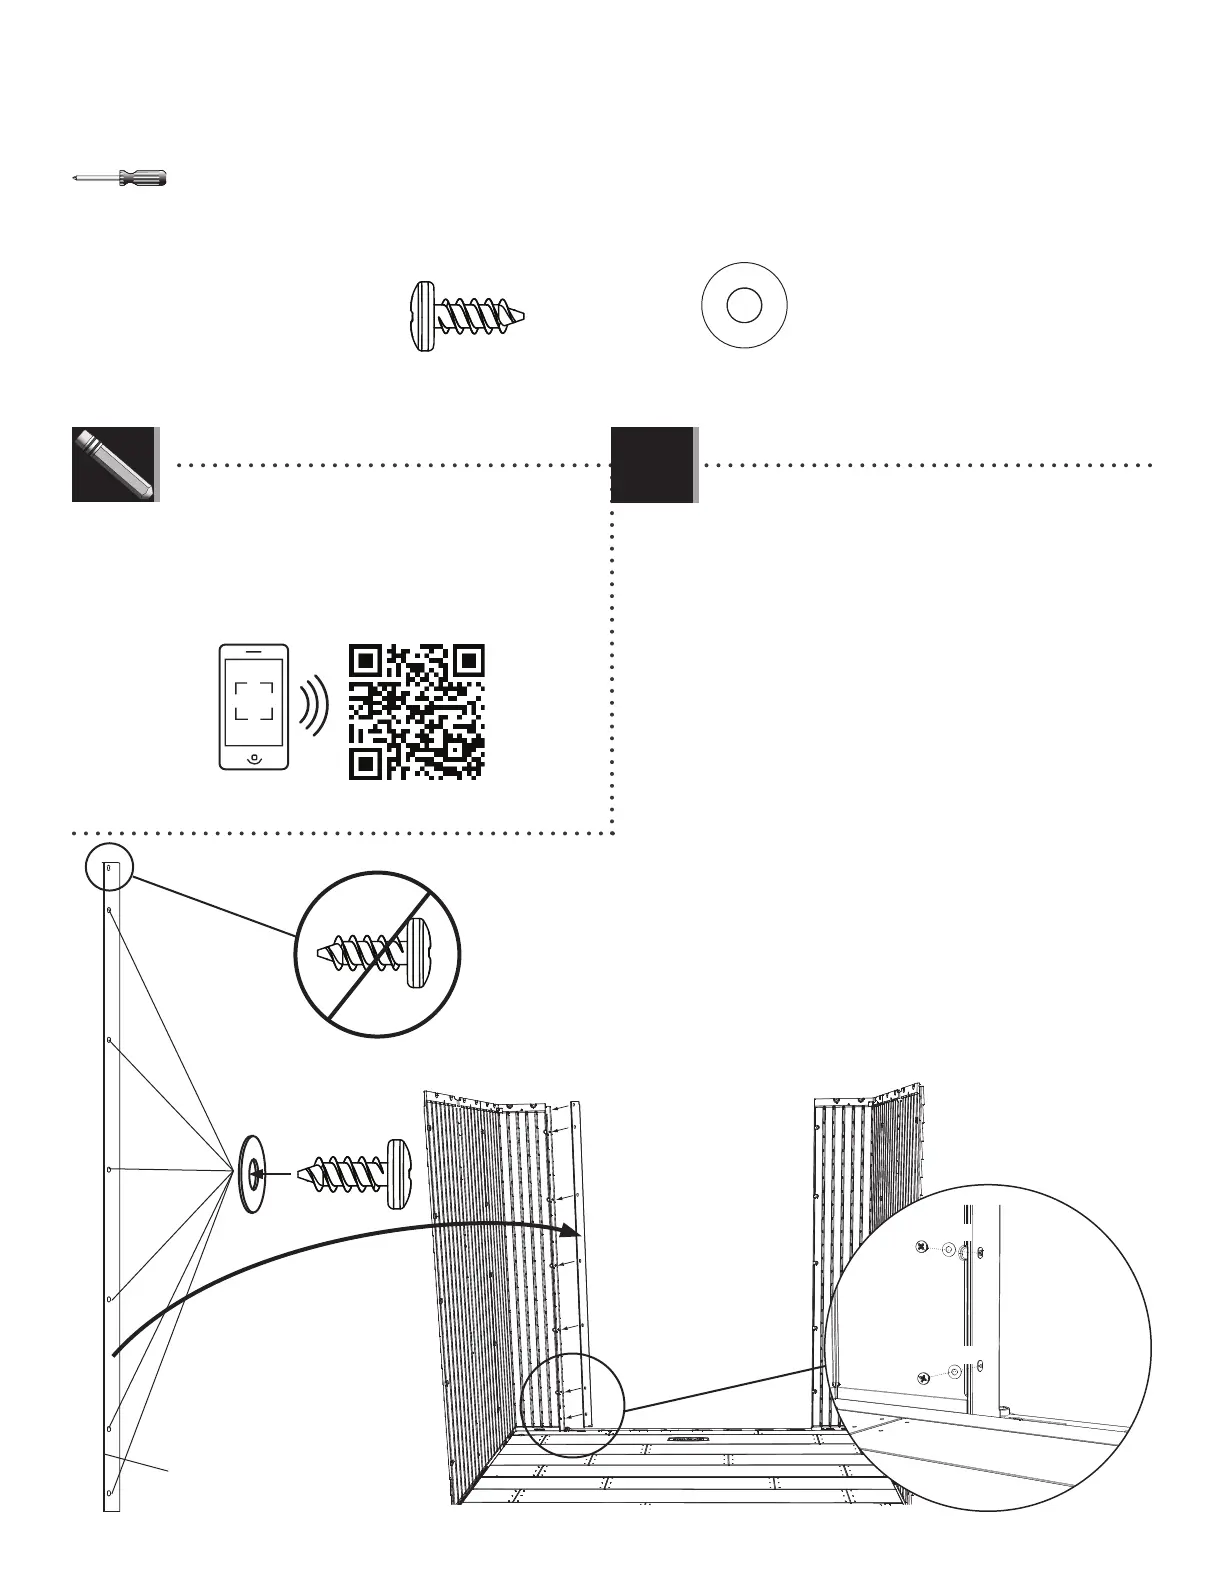
• Place the Right Door Jamb (BYB), the wider of the two
Jambs, onto the edge of the right, front Corner Wall
Panel. The Curved end curves toward the inside of
the shed. Align the holes in the Jamb with those in
the Corner Wall Panel. Secure the Jamb to the Panel
using six (6) Screws (ADZ). The top hole does not require a
Screw—yet.
• Mettez le montant droit (BYB), le plus large des deux
montants, sur le bord du panneau angulaire droit
avant. Le bord recourbé du montant courbe vers
l’intérieur de l’abri. Alignez les trous dans le montant
avec ceux du panneau angulaire. Attachez bien le
montant au panneau à l’aide de six (6) vis (ADZ). Le
trou supérieur n’exige pas encore d’une vis.
• Coloque la jamba derecha (BYB), la más ancha de las
dos jambas, en el borde del panel angular derecho
delantero. El borde curvado va hacia el interior de la
caseta. Alinee los agujeros en la jamba con ellos en
en panel angular. Sujete la jamba al panel usando
seis (6) tornillos (ADZ). El agujero superior no requiere un
tornillo todavía.
• Curved edge
• Bord courbé
• Borde curvo
ADZ
ADZ
BXZ
BXZ
• If you have trouble with this section, follow the code below to
view a video on how to assemble this section.
• Si vous avez des problèmes avec cette section, suivez le code en
bas pour voir un vidéo sur l’assemblage de cette section.
• Si tiene problemas con esta sección, siga el código debajo para
ver un video sobre el ensamble de esta sección.
http://go.lifetime.com/7doorinstall
LIFETIME
©
9.1