EasyManua.ls Logo

Lifetime 60186 User Manual

Lifetime 60186
32 pages
To Next Page IconTo Next Page
Page #1 background imageLoading...
Page #1 background image
3D ANIMATION
OF THE FULL ASSEMBLY
WATCH
SCAN THE
CODE
OR SEARCH
1201042
BEFORE ASSEMBLY:
Assemble on a level surface
At least 2 people recommended for setup
Ensure all hardware and parts are included and
free of damage.
TOOLS REQUIRED TABLE OF CONTENTS
Icon Legend...............................4
Warnings & Notices.....................5
Parts Identifi er............................6
Box Assembly..............................7
Lid Assembly............................14
Additional Warnings..................23
Cleaning & Care........................27
Registration.........................28
Warranty.............................29
7/16” (≈11 mm) (x2)
1/2” (≈13 mm) (x2)
3/8” (≈10 mm)
Pour le français, voir la page 2. Para el español, ver la página 3.
ASSEMBLY INSTRUCTIONS
MODEL #60091
116-GALLON
DECK BOX
MODEL 60186
FOR DOMESTIC USE ONLY!
IMPORTANT, RETAIN FOR FUTURE REFERENCE: READ CAREFULLY.
CONTACT LIFETIME CUSTOMER SERVICE:
Call: 1-800-225-3865
7:00 am–5:00 pm (Monday–Friday) MST
and 9:00 am–1:00 pm Saturday MST
(English, French, Spanish)
Live Chat: www.lifetime.com/customerservice
(click on “LIVE CHAT” tab)
For customer service in the United Kingdom and mainland Europe:
E-mail: cs@lifetimeproducts.eu
QUESTIONS?
MODEL# AND PRODUCT ID (both are needed when contacting us)
Model Number: 60186
Product ID:
COPY
Question and Answer IconNeed help?

Do you have a question about the Lifetime 60186 and is the answer not in the manual?

Lifetime 60186 Specifications

General IconGeneral
BrandLifetime
Model60186
CategoryOutdoor Storage
LanguageEnglish

Summary

Assembly Preparation

Assembly Area and Setup

Guidelines for preparing the assembly area and the number of people required.

Parts and Hardware Check

Verify that all components are present and undamaged before assembly.

Required Tools

Required Tools for Assembly

List of tools needed for the assembly process, including wrenches and screwdrivers.

Assembly Icon Legend

Interpreting Assembly Icons

Explanation of symbols used in the manual for parts, hardware, tools, and actions.

Safety Warnings and Notices

General Safety Precautions

Crucial safety instructions to prevent injury, property damage, and warranty voidance during assembly.

Product Usage Limitations

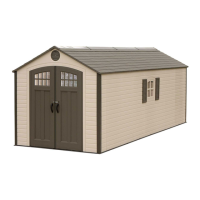
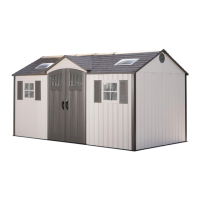
Information on product limitations, including not being a toy and not being waterproof.

Parts Identification

Plastic Part Identification

Identification of the plastic panels and components used in the deck box assembly.

Metal and Small Part Identification

Identification of metal parts, small components, and hardware for the deck box.

Box Assembly: Hardware and Parts

Box Assembly: Required Hardware

List of specific screws, bolts, and nuts required for assembling the deck box.

Box Assembly: Required Parts

Identification of the plastic and small parts needed for the main box assembly.

Box Assembly: Panel Connections

Connecting Rear and Floor Panels

Instructions for inserting tabs of the Rear Panel into slots of the Floor Panel.

Sliding Panels Securely

Procedure for sliding a panel to the right to secure its connection.

Box Assembly: Front Panel and Sliding

Connecting Front and Floor Panels

Instructions for inserting tabs of the Front Panel into slots of the Floor Panel.

Sliding Front Panel Securely

Procedure for sliding the Front Panel to the right to secure its connection.

Box Assembly: Side Panel Installation

Attaching Side Panels

How to place and secure side panels between front and rear panels.

Box Assembly: Securing Panels

Inserting Corner Screws

Instructions for inserting screws into the corners of the assembled box panels.

Box Assembly: Latch Installation

Attaching the Box Latch

Procedure for installing the box latch onto the front panel using hardware.

Box Assembly: Final Securing

Securing Box Tabs with Screws

Instructions for flipping the box and inserting screws into the tabs.

Lid Assembly: Hardware and Parts

Lid Assembly: Required Hardware

List of specific screws, bolts, and nuts required for assembling the lid.

Lid Assembly: Required Parts

Identification of metal, plastic, and small parts for the lid assembly.

Lid Assembly: Support Installation

Attaching Left Lid Support

Instructions for inserting and rotating the left lid support into the lid.

Lid Assembly: Support and Latch

Attaching Right Lid Support

Instructions for inserting the right lid support into the lid.

Installing the Lid Latch

Procedure for setting the lid latch in the lid and aligning holes with the support.

Lid Assembly: Securing Support

Securing Support to Lid

How to secure the lid support to the lid using screws and a socket wrench.

Lid Assembly: Hinge Preparation

Left Hinge Assembly

How the hinge components (BEP, BET, AAO) assemble for the left side of the lid.

Attaching Left Hinge

Instructions for inserting and rotating the left hinge into the lid.

Lid Assembly: Securing Hinges

Securing Left Hinge

Procedure for aligning and securing the left hinge to the lid with screws.

Lid Assembly: Right Hinge Attachment

Right Hinge Assembly

How the hinge components (BEP, BET, AAO) assemble for the right side of the lid.

Attaching Right Hinge

Instructions for attaching the right hinge to the lid, similar to the left hinge.

Lid Assembly: Final Attachment

Rotating Hinges and Placing Lid

How to rotate hinges and set the lid onto the rear panel of the box.

Attaching Hinges to Side Panels

Procedure for attaching the hinges to the side panels of the deck box.

Lid Assembly: Gas Spring Installation

Attaching Gas Springs

Instructions for attaching the gas springs to the ball studs for lid support.

Additional Warnings and Safety

Gas Spring Opening Limit

Warning regarding the gas spring's function and maximum lid opening angle.

Child Safety and Toy Warning

Important safety information about keeping fingers clear of hinges and product not being a toy.

Cleaning and Care

Product Maintenance Guide

Guidelines for cleaning polyethylene panels and caring for metal parts, including scratch repair.

Product Registration Process

Online Product Registration

Information on registering your product online, including benefits and privacy policy.

10-Year Limited Factory Warranty

Warranty Terms and Conditions

Details of the warranty coverage, exclusions, and procedures for making a claim.

Warranty Claim Procedures

Instructions on how to submit warranty claims, including required documentation.

Related product manuals