20
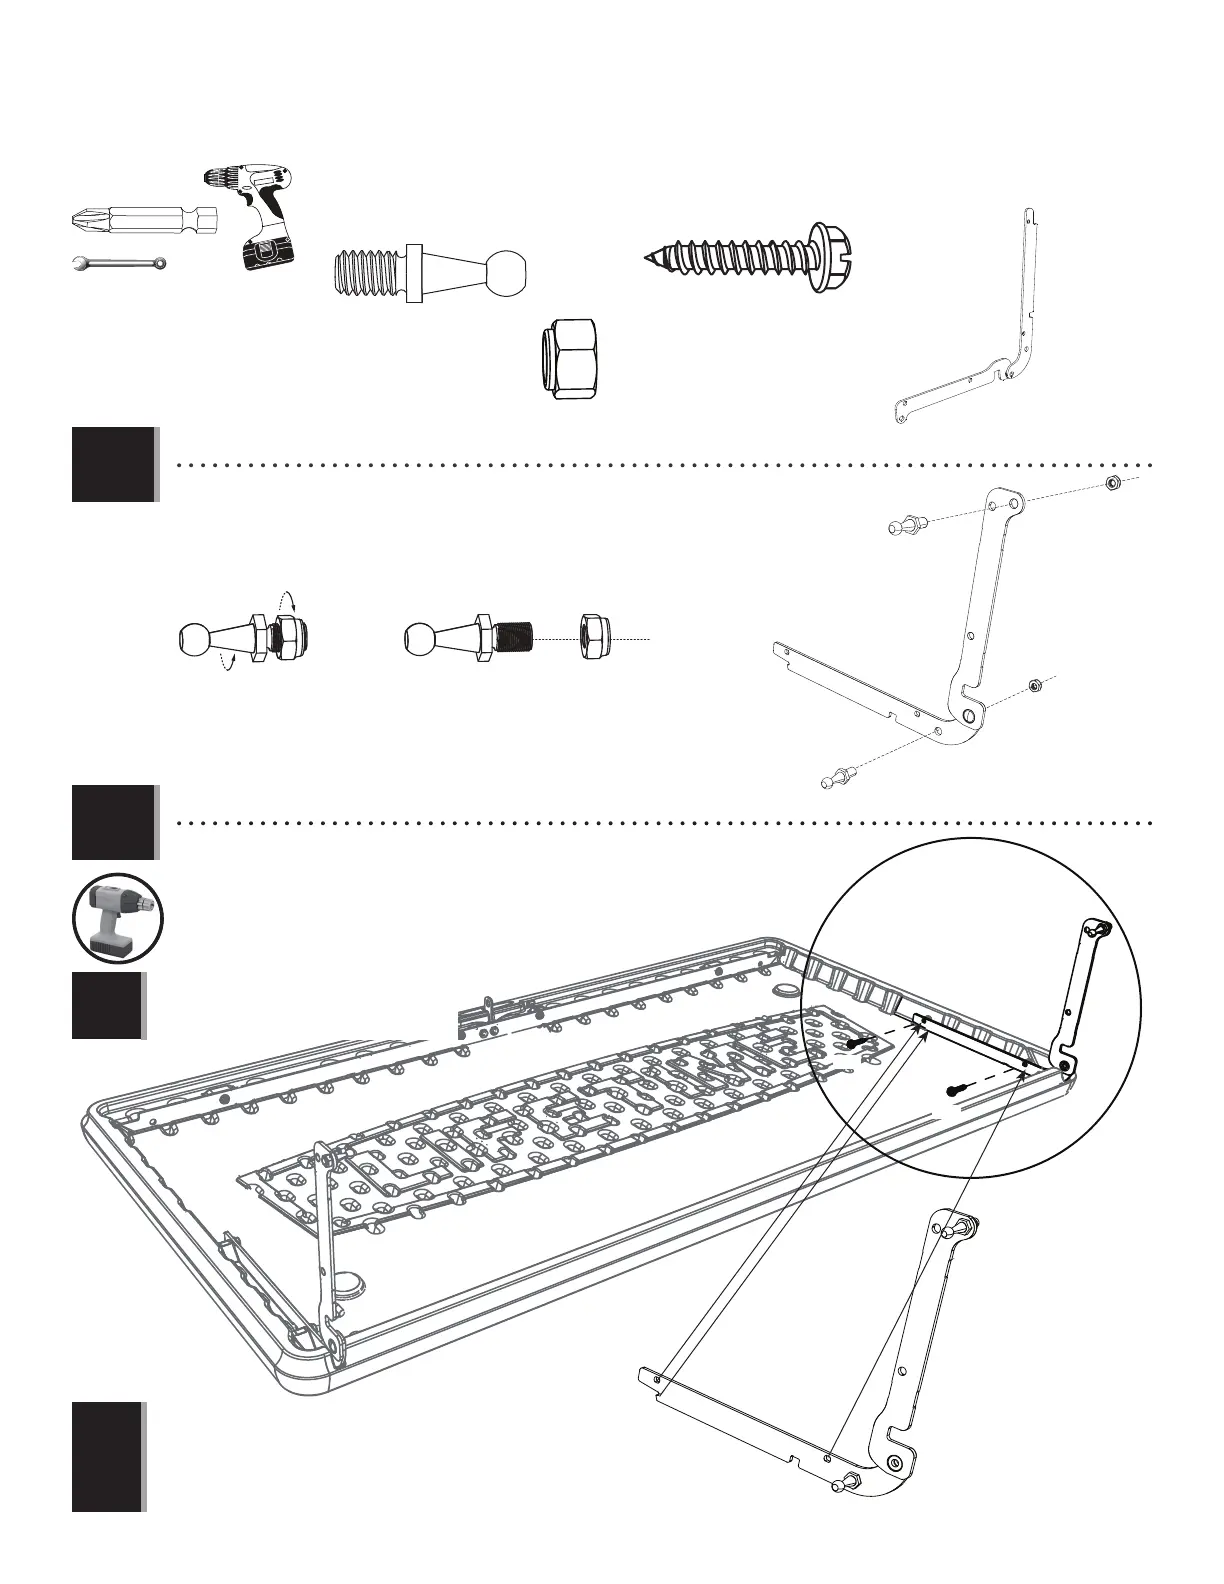
TOOLS AND HARDWARE REQUIRED / OUTILS ET QUINCAILLERIE REQUIS / INSTRUMENTAL Y HERRAJE REQUERIDOS
X SECTION 2 (CONTINUED) / SECTION 2 (SUITE) / SECCIÓN 2 (CONTINUACIÓN)
DRF (x2)
DRF
DRF
AAO
AAO
AAO
BET
BET
BET
BEP
1/2" (x2)
(13 mm) (x2)
AAO (x2)
BET (x2)
2.8
2.9
• The Hinge (BEP) goes together this way for the right side of the Lid.
• La charnière (BEP) se monte dans cette manière pour le côté droit du couvercle.
• La bisagra (BEP) se monta en esta manera para el lado derecho de la tapa.
• Attach the Right Hinge to the Lid as you did the Left Hinge.
• Attachez la charnière droite au couvercle comme vous l’avez fait avec la
charnière gauche.
• Sujete la bisagra derecha a la tapa tal como lo hizo para la bisagra
izquierda.
Note: Do not overtighten the Screws.
Remarque : Ne pas serrer excessivement les vis.
Nota: No apriete demasiado los tornillos.
!
Note: You can use a screwdriver, but we suggest using a drill.
Remarque : Vous pouvez utiliser un tournevis, mais nous recommendos que vous
utilisiez une perceuse électrique.
Nota: Se puede usar un destornillador, mas recomendamos que use un taladro
eléctrico.
!
BEP (x1)