21
TOOLS AND HARDWARE REQUIRED / OUTILS ET QUINCAILLERIE REQUIS / INSTRUMENTAL Y HERRAJE REQUERIDOS
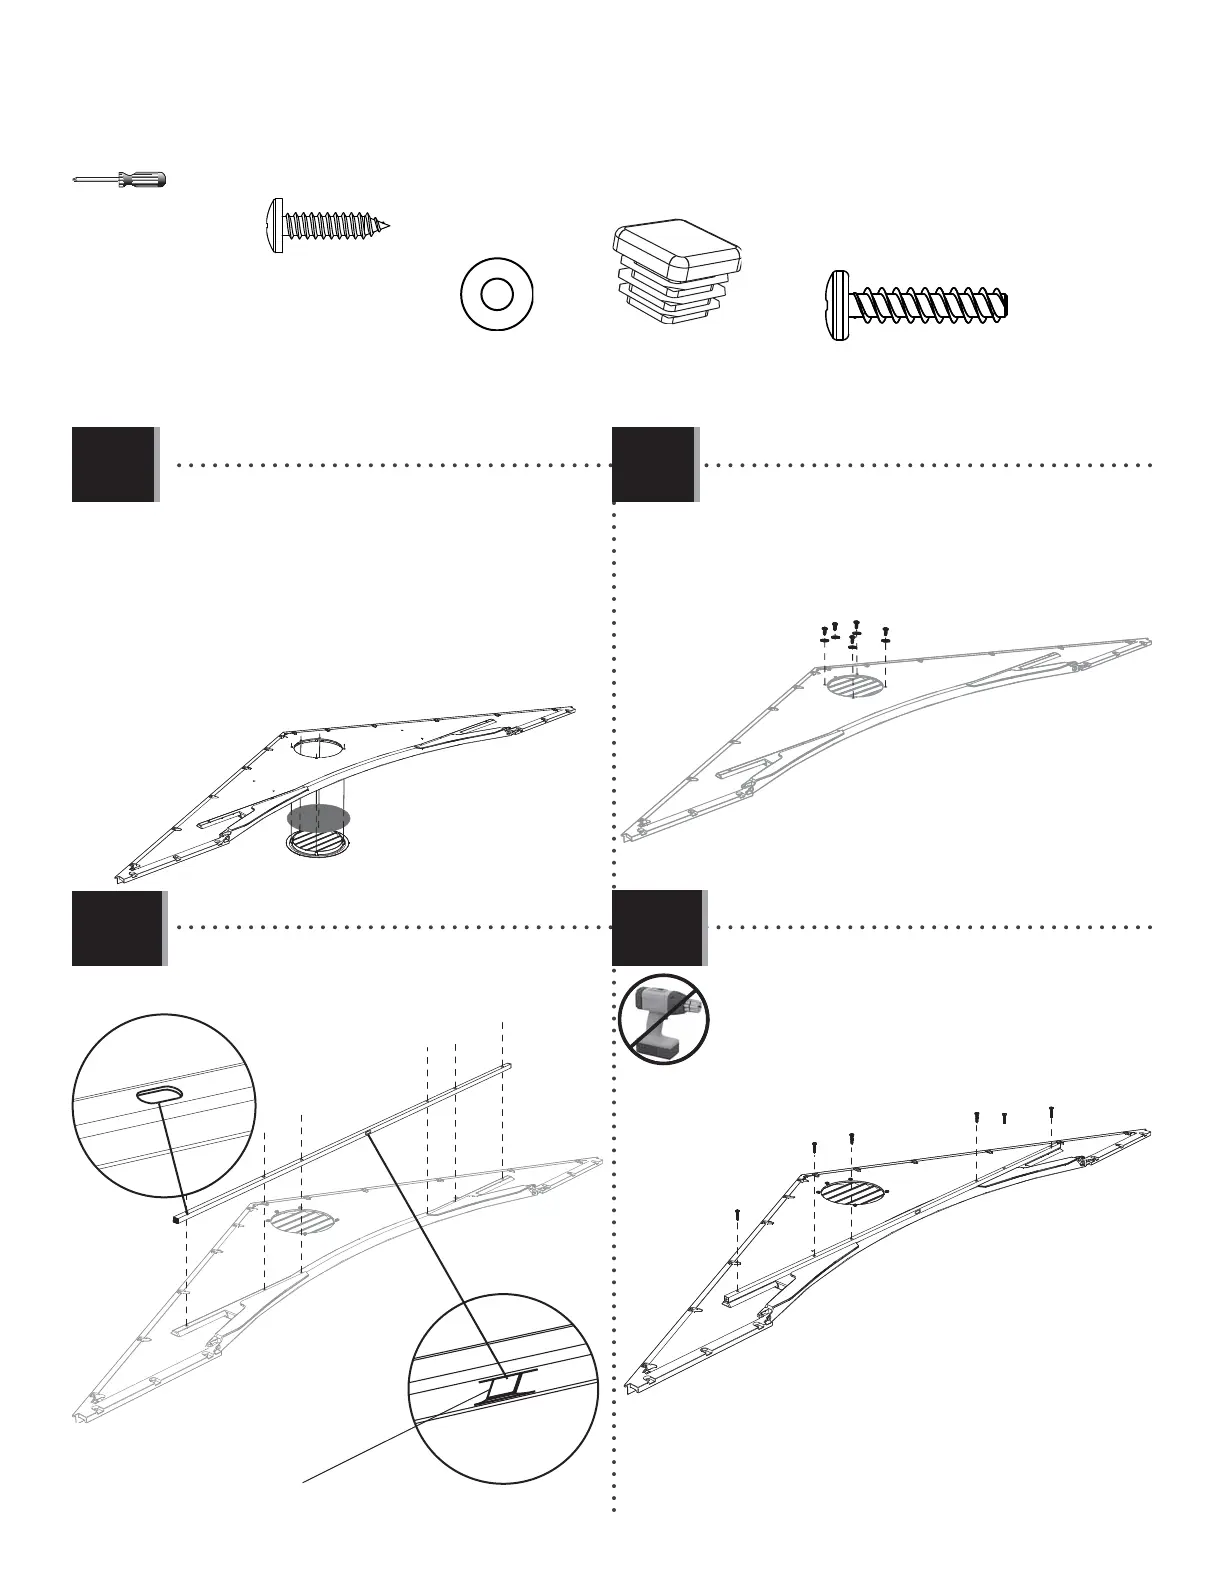
X SECTION 3 (CONTINUED) / SECTION 3 (SUITE) / SECCIÓN 3 (CONTINUACIÓN)
3.7
3.9
3.8
ADW (x5)
AEE (x5)
AIQ
AGF
AGP
ADW
AEE
AHS (x2)
AHS
AHS
AFE
• The fl at holes face away from the Gable.
• Les trous plats doivent être face à l’écart du pignon.
• Los agujeros planos dan hacia afuera.
• The dented hole faces downward.
• Orienter le trou fendu vers le bas.
• Orientar el agujero abollado hacia abajo.
• Place the Screen (AIQ) over the Vent (AGP), and
align the fi ve holes in the Vent with those in the
Entry Gable (AGF).
• Mettre la moustiquaire (AIQ) sur l’évent (AGP), et
aligner les cinq trous dans l’évent avec ceux du
pignon d’entrée (AGF).
• Colocar el mosquitero (AIQ) sobre la rejilla de
ventilación (AGP), y alinear los agujeros en la rejilla
con los de la fachada de entrada (AGF).
• Secure with the hardware provided.
• Attacher les uns aux autres de la quincaillerie
incluse.
• Sujetar los unos a los otros usando el herraje
incluido.
3.10
• Secure with the hardware provided.
• Attacher les uns aux autres de la quincaillerie
incluse.
• Sujetar los unos a los otros usando el herraje
incluido.
ADV
ADV
ADV
ADV ADV
ADV
ADV (x6)