10
TOOLS & HARDWARE REQUIRED / OUTILS ET QUINCAILLERIE REQUIS / INSTRUMENTAL Y HERRAJE REQUERIDOS
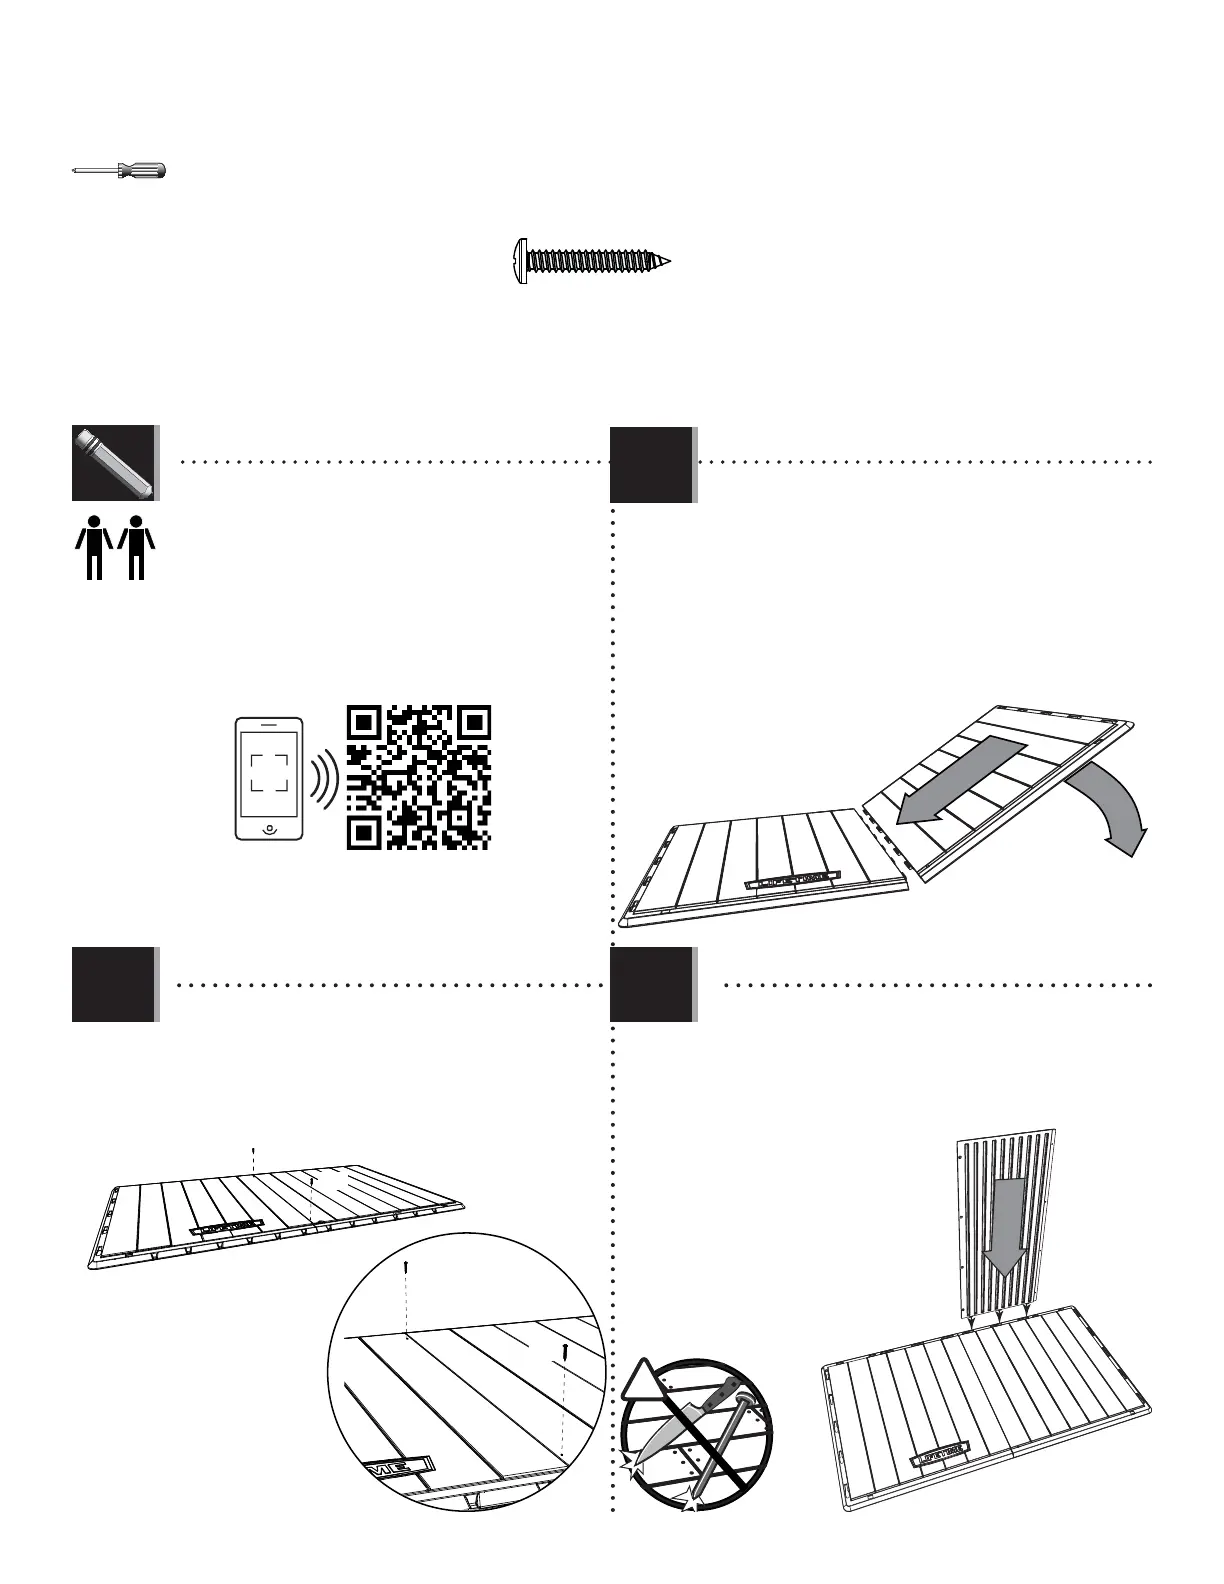
• Insert the tabs at the bottom of the panel (AHD)
into the 3rd, 4th, and 5th slots from the right in
the Floor panel.
• Insérez les languettes au bord inférieur du
panneau (AHD) dans les 3e, 4e, et 5e fentes du côté
droit dans le panneau de
plancher.
• Inserte las lengüetas al
borde inferior del panel
(AHD) dentro de las 3ª,
4ª, y 5ª ranuras del lado
derecho en el panel de
piso.
AHD
DRH
DRI
AYR (x2)
!
• Insert the Screws (AYR) into the divots in the Floor
Panels to secure them together.
• Insérez les vis (AYR) dans les marques dans les
panneaux de plancher pour attacher l’un á l’autre.
• Inserte los tornillos (AYR) en las marcas en los
paneles de piso para sujetarlos el uno al otro.
• Slide the tabs in the Floor panel (DRH) between those
in Floor panel (DRI) and underneath that panel. Lay
panel flat.
• Glissez les languettes du panneau de plancher (DRH)
entre celles du panneau de plancher (DRI) et sous ce
panneau. Mettez le panneau à plat.
• Deslice las lengüetas en el panel de piso (DRH) entre
ellas en el panel de piso (DRI) y debajo ese panel.
Aplane el panel.
AYR
AYR
AYR
AYR
X SECTION 1 (CONTINUED) / SECTION 1 (SUITE) / SECCIÓN 1 (CONTINUACIÓN)
1.2 1.3
• If you have trouble with this section, follow the code below
to view a video on how to assemble this section.
• Si vous avez des problèmes avec cette section, suivez le
code en bas pour voir un vidéo sur l’assemblage de cette
section.
• Si tiene problemas con esta sección, siga el código debajo
para ver un video sobre el ensamble de esta sección.
http://go.lifetime.com/hsboxfloorandwall
1.1
LIFETIME
©