13
TOOLS & HARDWARE REQUIRED / OUTILS ET QUINCAILLERIE REQUIS / INSTRUMENTAL Y HERRAJE REQUERIDOS
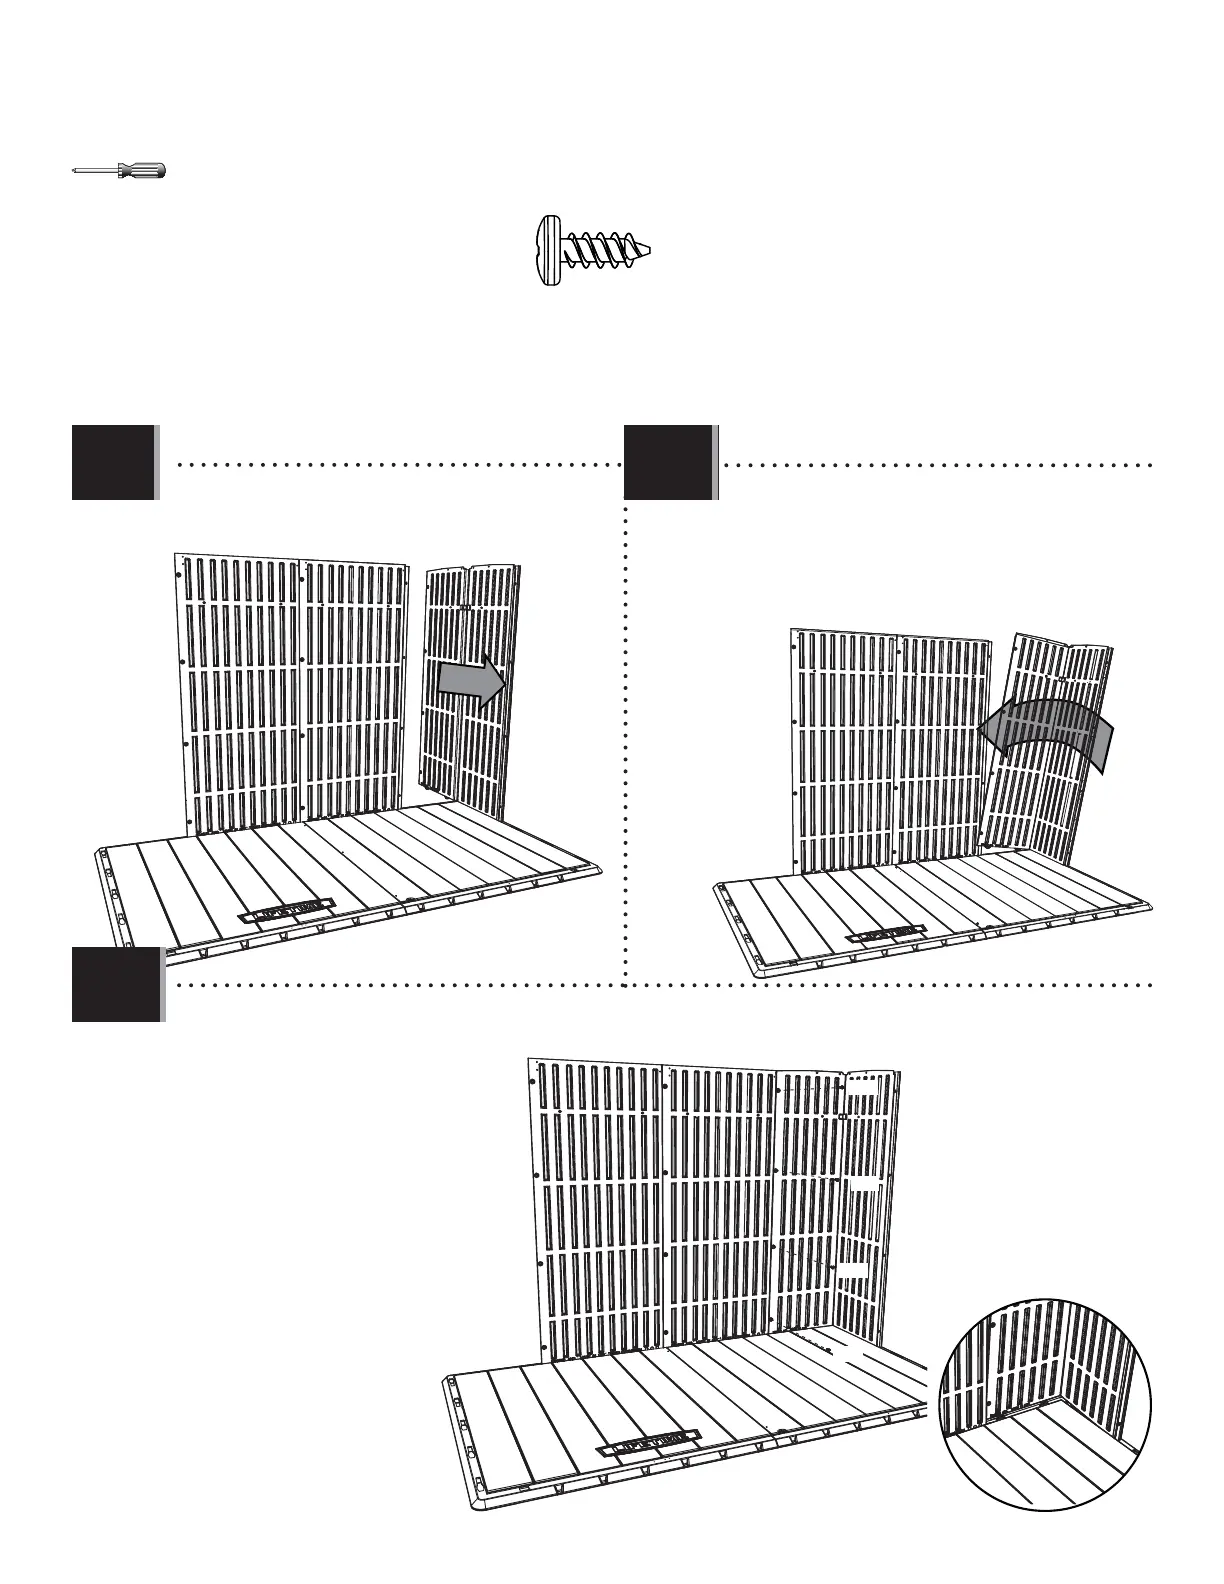
• Pull down on the panel to insert the two tabs at the bottom of the panel into the slots in the Floor panel. Secure
with four (4) Screws (ADZ).
• Tirez sur le panneau pour insérer les
deux languettes au bord inférieur du
panneau dedans les encoches dans le
panneau de plancher. Attachez-les à
l’aide de quatre (4) vis (ADZ).
• Tire para abajo el panel para
introducir las dos lengüetas al borde
inferior del panel angular adentro
de las muescas en el panel de piso.
Sujételos con cuatro (4) tornillos (ADZ).
• Tilt the panel as you bend it to get it in front of
the rear panel.
• Inclinez le panneau angulaire lorsque vous le pliez,
et positionnez-le devant du panneau arrière.
• Incline el panel al doblarlo para colocarlo en
frente del panel trasero.
ADZ
ADZ
ADZ
ADZ
ADZ (x4)
• Slide the panel forward.
• Glissez le panneau en avant.
• Deslice el panel hacia delante.
X SECTION 1 (CONTINUED) / SECTION 1 (SUITE) / SECCIÓN 1 (CONTINUACIÓN)
1.11
1.10
1.9