14
TOOLS & HARDWARE REQUIRED / OUTILS ET QUINCAILLERIE REQUIS / INSTRUMENTAL Y HERRAJE REQUERIDOS
X SECTION 1 (CONTINUED) / SECTION 1 (SUITE) / SECCIÓN 1 (CONTINUACIÓN)
AGN
ADZ (x12)
ADZ
ADZ
ADZ
ADZ
AGL
AGY
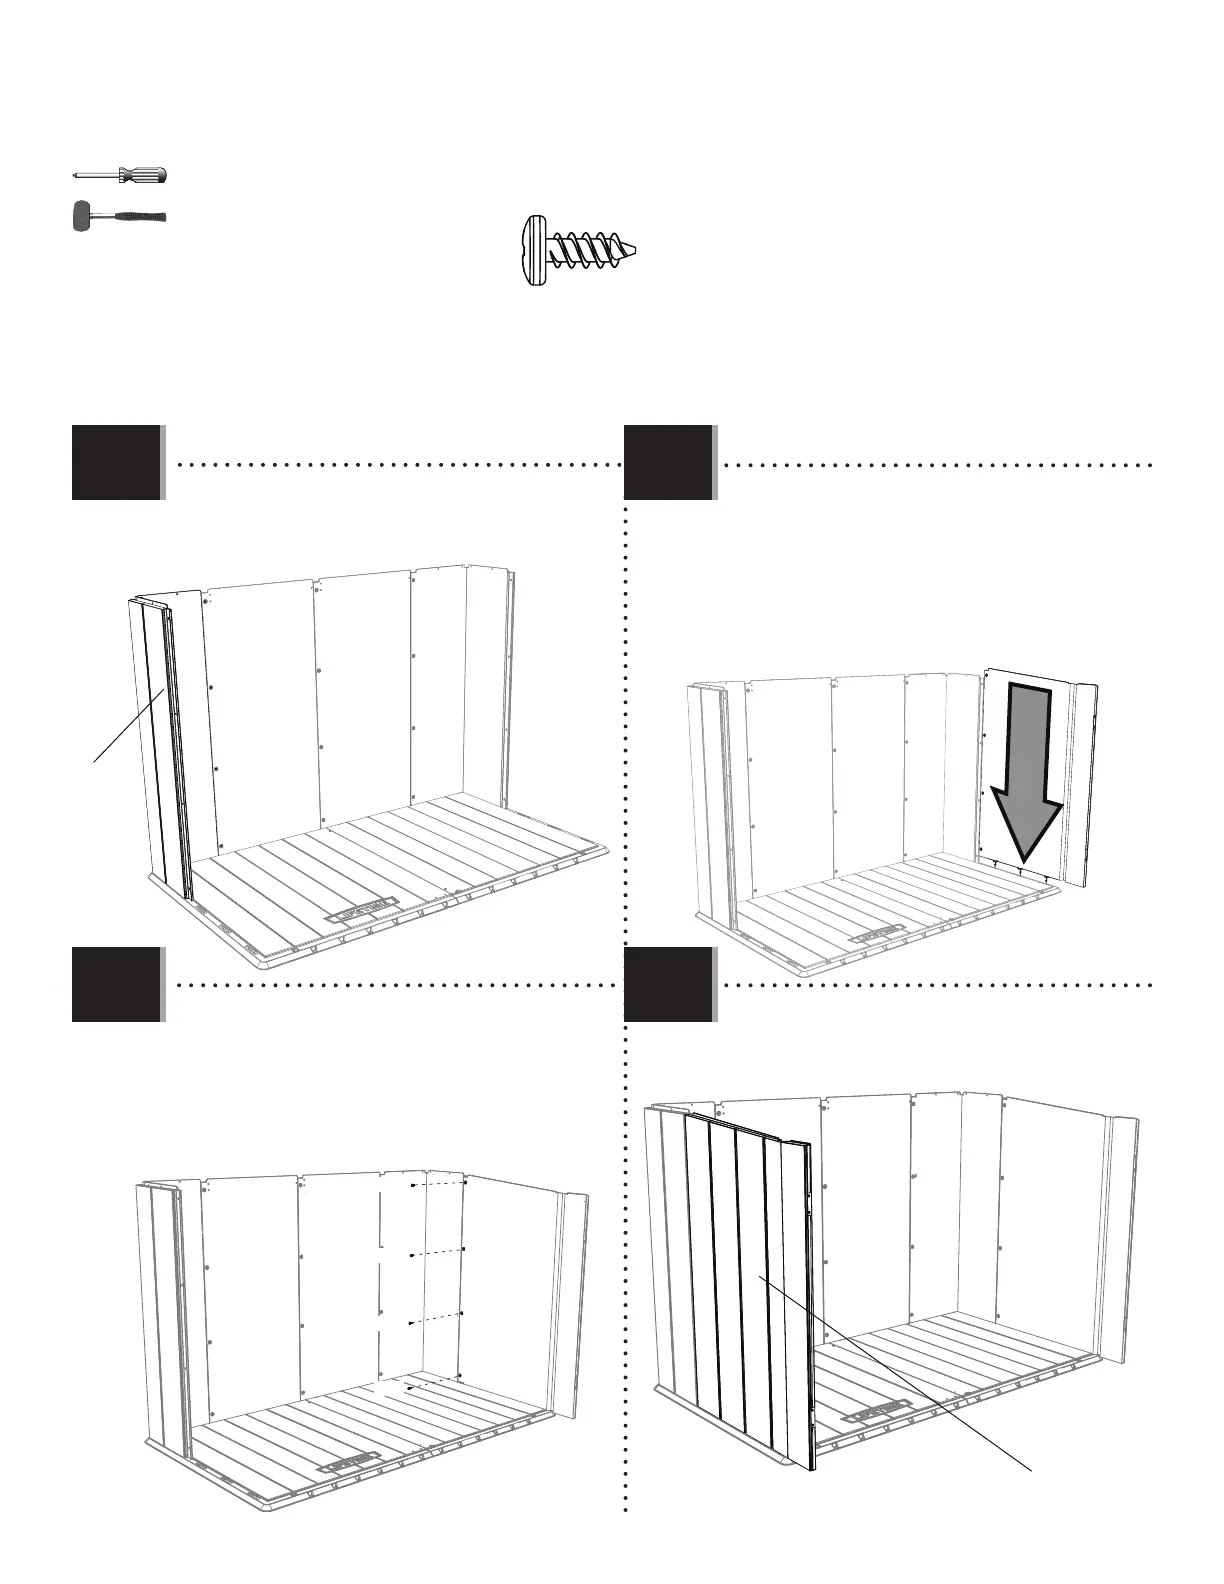
• Repeat steps 1.9–1.11 for the left side.
• Répétez les étapes 1.9 – 1.11 pour le côté gauche.
• Repita los pasos 1.9–1.11 para el lado izquierdo.
• Slide the panel toward the back, and secure it to
the Rear Corner Wall Panel with four (4) Screws (ADZ).
• Faites glisser le panneau en arrière, et attachez-
le au panneau mural angulaire arrière à l’aide de
quatre (4) vis (ADZ).
• Deslice el panel hacia atrás, y sujételo al panel
mural angular trasero con cuatro (4) tornillos (ADZ).
• Repeat steps 1.13–1.14 for the left side.
• Répétez les étapes 1.13 – 1.14 pour le côté gauche.
• Repita los pasos 1.13–1.14 para el lado izquierdo.
• Insert the three tabs at the bottom of Corner panel
(AGY) into the slots in the Floor.
• Insérez les trois languettes au bord inférieur
du panneau angulaire (AGY) dans les fentes dans le
plancher.
• Inserte las lengüetas al borde inferior del panel
angular (AGY) dentro de las ranuras en el piso.
1.14
1.15
1.13
1.12