14
TOOLS AND HARDWARE REQUIRED / OUTILS ET QUINCAILLERIE REQUIS / INSTRUMENTAL Y HERRAJE REQUERIDOS
SECTION 2 (CONTINUED) / SECTION 2 (SUITE) / SECCIÓN 2 (CONTINUACIÓN)
CTL (x4)
CTM (x4)
CTM
CTM
CTQ
CTL
CTL
CTP
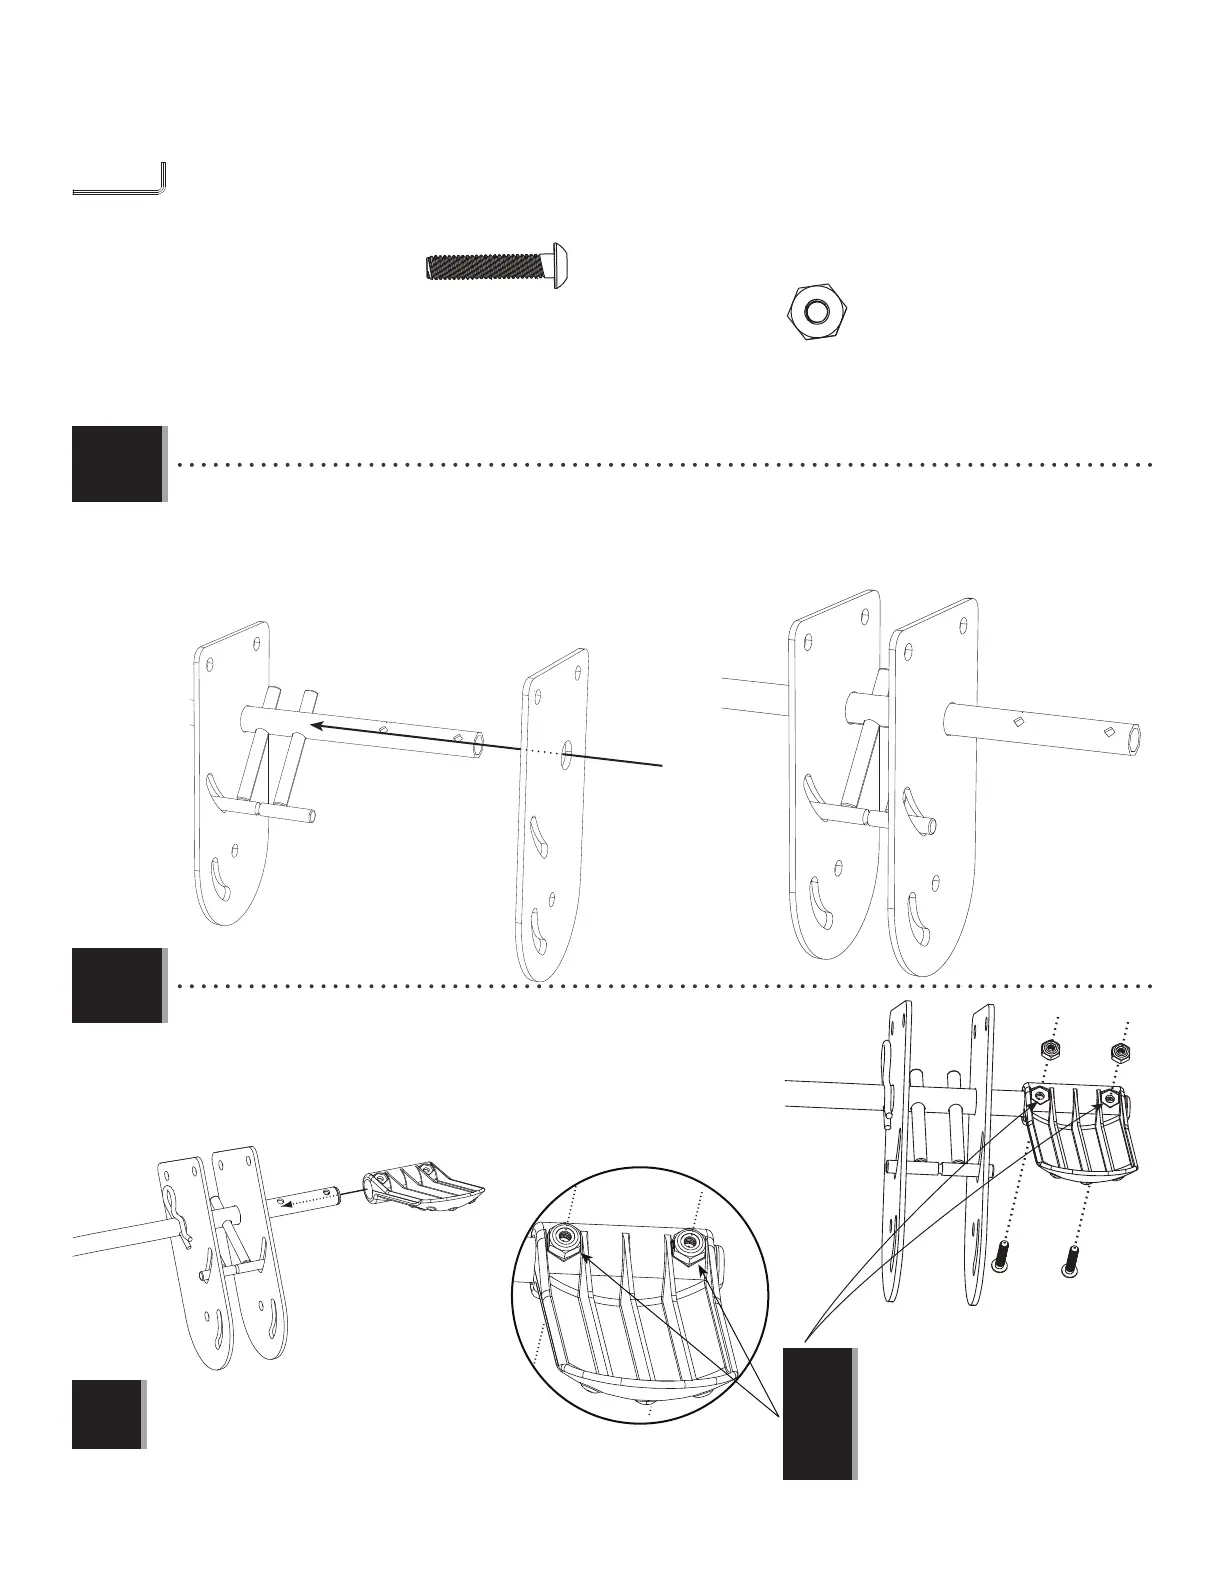
2.5
2.6
• Slide a Handle (CTQ) onto the Hinge as shown. Secure with the hardware
included.
• Faire glisser un levier d’ajustement (CTQ) sur la charnière comme indiqué.
L’attacher au tube d’articulation à l’aide de la quincaillerie incluse.
• Deslizar una palanca de ajuste (CTQ) sobre la bisagra como se muestra.
Sujetarla a la bisagra usando el herraje incluido.
Note: The Nuts (CTL) fi t into these nut-shaped
indentations.
Remarque : Les écrous (CTL) se fi xent dans
ces dépressions hexagonales.
Nota: Las tuercas (CTL) se encajan en estas
indentaciones hexagonales.
Note: Repeat steps 2.1–2.6 for the other side.
Remarque : Répéter les étapes 2.1 – 2.6 pour l’autre côté.
Nota: Repetir los pasos 2.1–2.6 para el otro lado.
!
!
• Slide another Adjustment Plate over the end of the Hinge Tube and Hinge Fork as shown.
• Faire glisser une autre plaque d’ajustement sur l’extrémité du tube d’articulation et de la fourche d’ajustement comme
indiqué.
• Deslizar otra placa de ajuste sobre el extremo del tubo de bisagra y del tenedor de ajuste como se muestra.