37
TOOLS AND PARTS REQUIRED / OUTILS ET PIÈCES REQUIS / INSTRUMENTAL Y HERRAJE REQUERIDOS
X SECTION 6 (CONTINUED) / SECTION 6 (SUITE) / SECCIÓN 6 (CONTINUACIÓN)
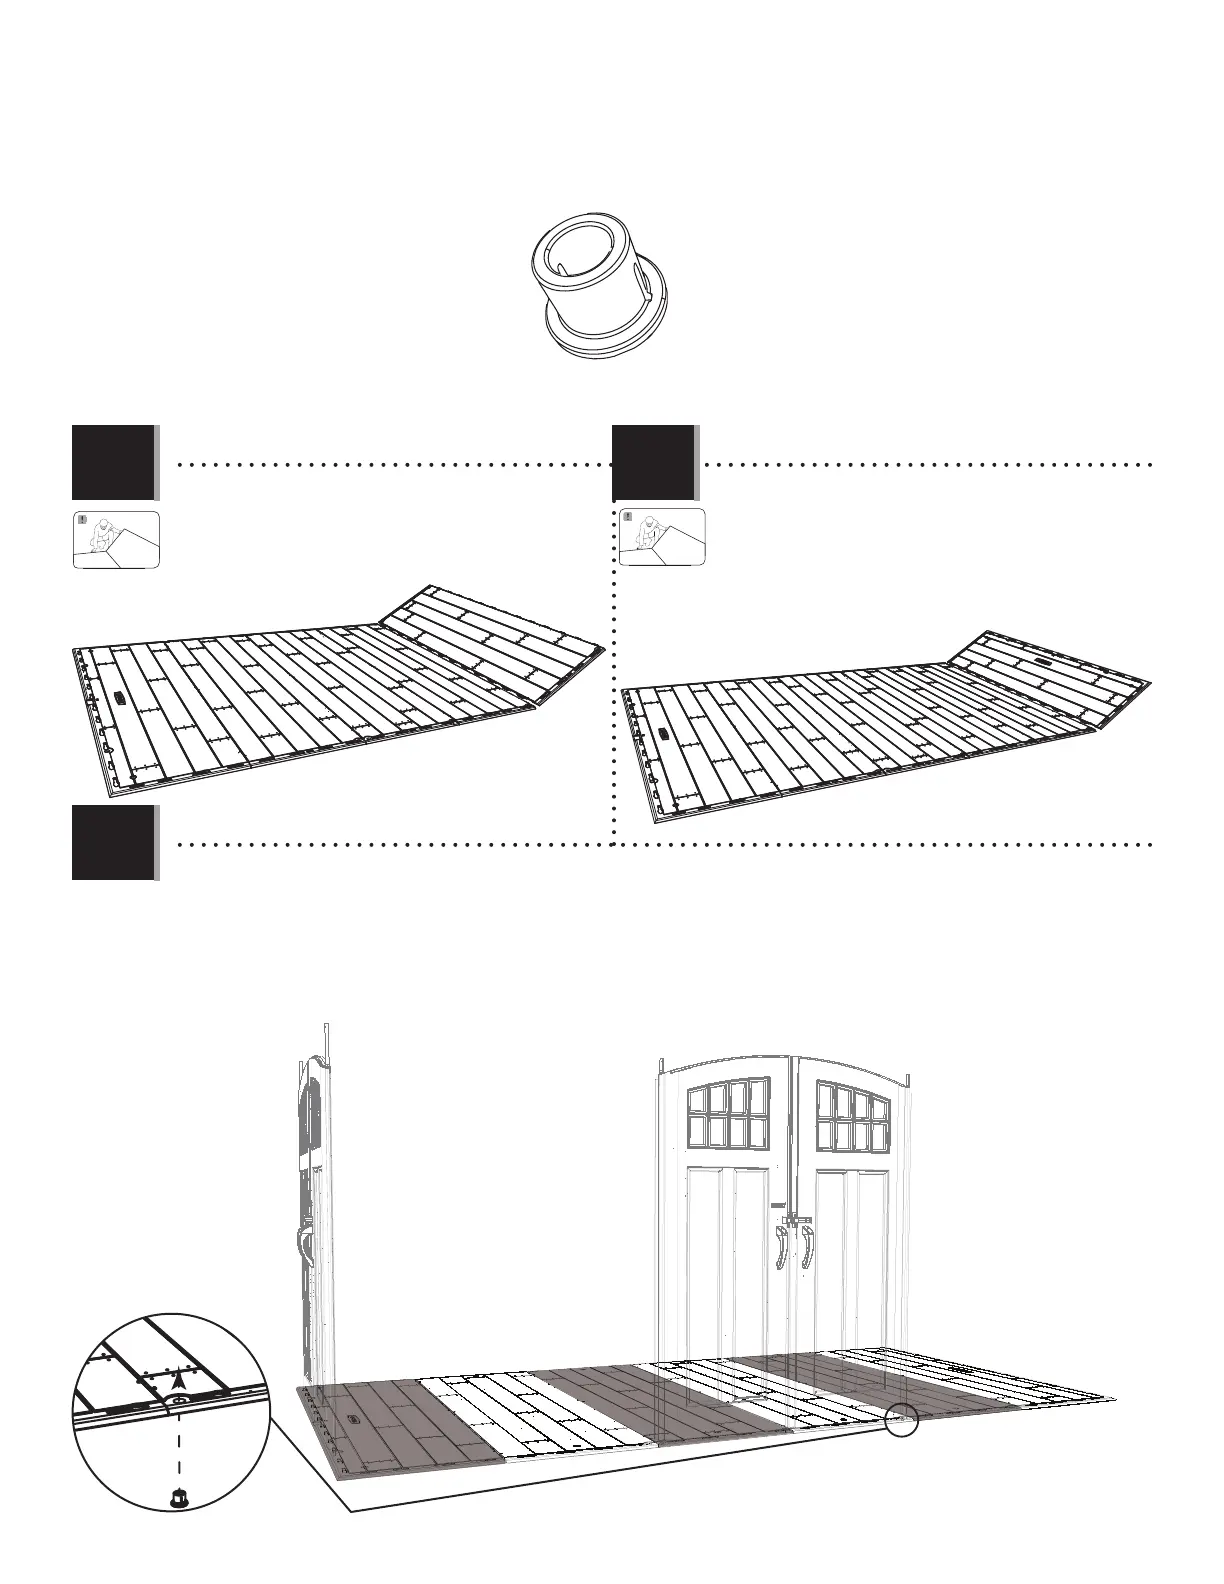
AHO (x1)
CUW
CUD
• Attach an Outer Floor Panel (CUW) to the Inner Floor
Panel.
• Attacher un autre panneau de plancher intérieur (CUW)
au panneau de plancher intérieur.
• Fijar otro panel de piso exterior (CUW) al panel de
piso interior.
6.4 6.5
6.6
• Repeat the last step.
• Répéter l’étape précédente.
• Repetir el paso anterior.
AHO
• Insert one Bushing (AHO) up through the hole indicated in the Floor. The slit in the Bushing should face away from the Floor. Save
the three remaining Bushings for the “Wall Assembly” section.
• Insérer une bague (AHO) à travers le trou indiqué dans le plancher. La fente dans la bague ne doit pas faire face au plancher.
Conserver les trois bagues restantes pour la section « Assemblages de murs ».
• Insertar un casquillo (AHO) por el agujero indicado en el piso. La rendija en el casquillo debe quedar en posición opuesta del piso.
Guardar los tres casquillos restantes para la sección «Ensamble de los muros».