26
TOOLS AND HARDWARE REQUIRED / OUTILS ET QUINCAILLERIE REQUIS / INSTRUMENTAL Y HERRAJE REQUERIDOS
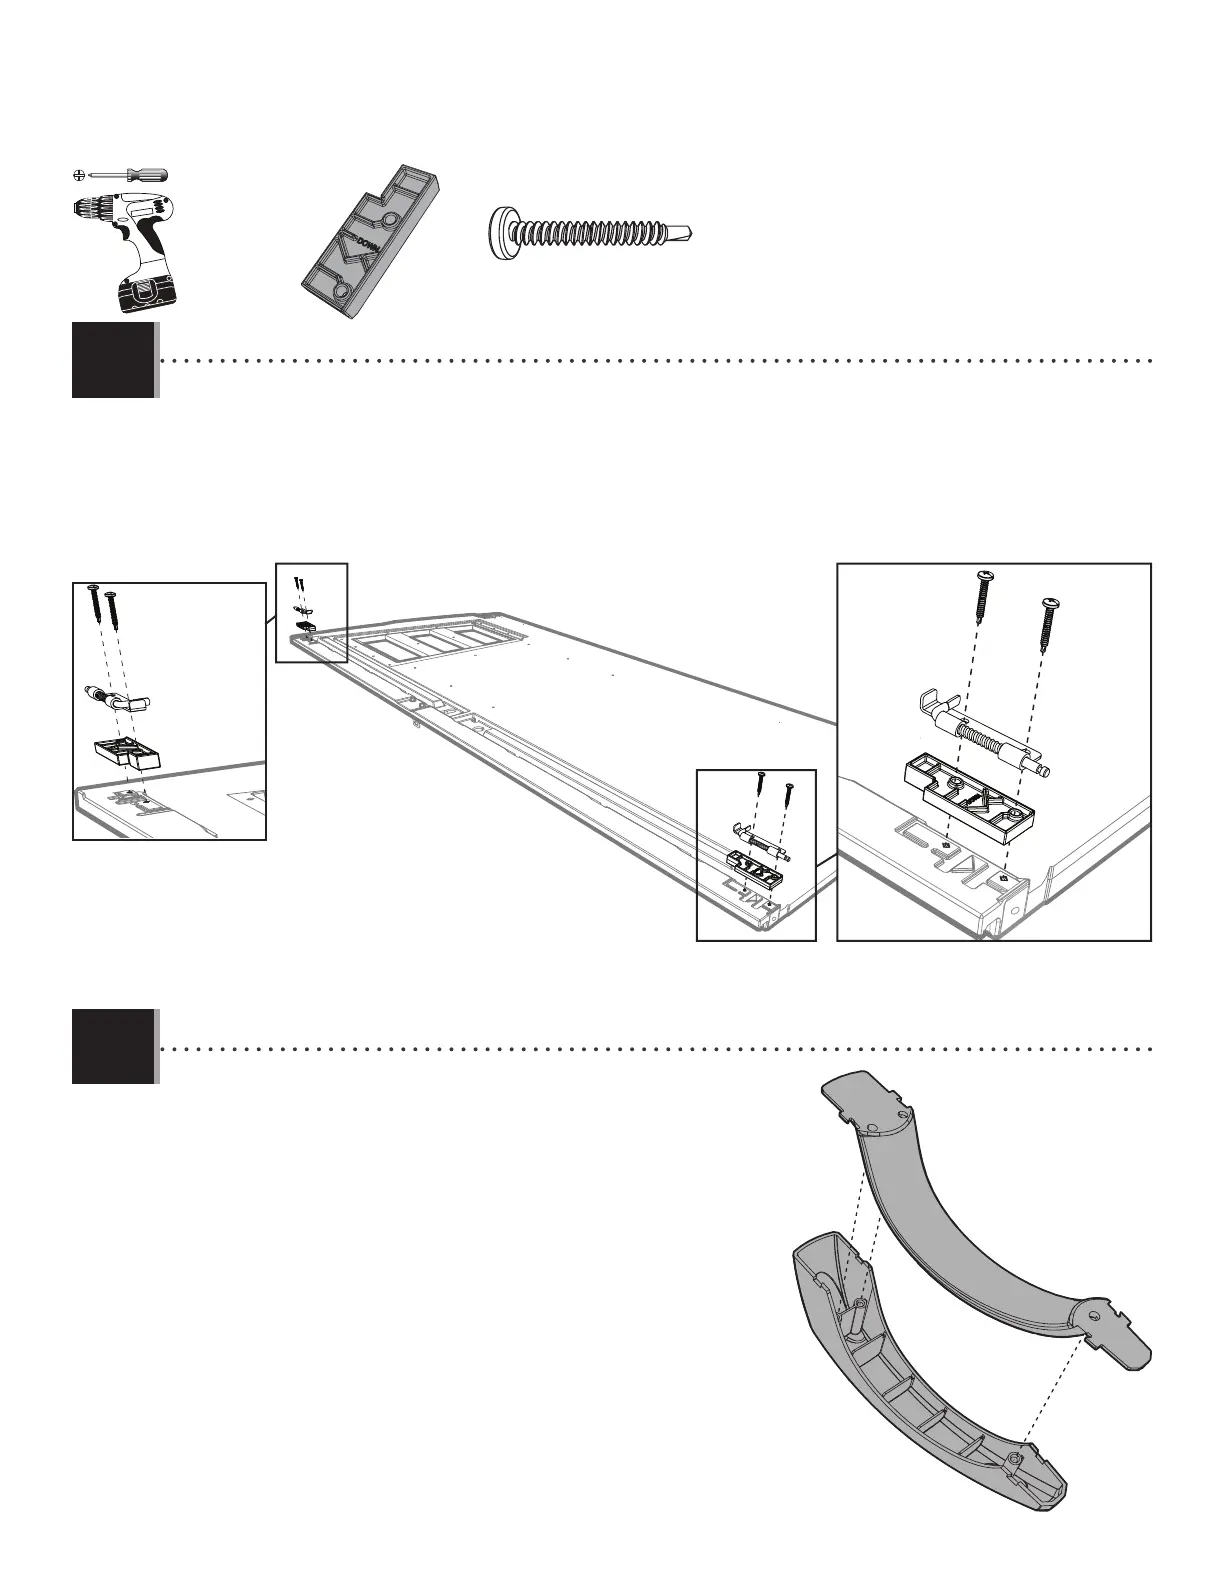
X SECTION 4 (CONTINUED) / SECTION 4 (SUITE) / SECCIÓN 4 (CONTINUACIÓN)
4.5
4.6
BYS
BYR
• Attach the two handle pieces (BYR & BYS) together as shown.
• Attachez les deux pièces de la poignée (BYR et BYS) comme illustré.
• Conecte las dos piezas del picaporte (BYR y BYS) como se muestra.
• Attach the locks (DGR & DGS) and spacers (ENP) to the top and bottom of the left door. If the pins in the locks do not move freely, loosen the
screws (ENO) just a tad.
• Attachez les verrous (DGR et DGS) et les pièces d’écartement (ENP) à la partie supérieure et inférieure à la porte gauche. Si les
verrous ne se déplacent pas librement, deserrez les vis (ENO) un pétit peu.
• Sujete los pasadores (DGR y DGE) y los espaciadores (ENP) al tope y al fondo de la Puerta izquierda. Si los pasadores no se mueven
libremente, afl oje los tornillos (ENP) un poquito.
DGR
ENO
ENO
ENO
DGS
ENP (x2)
ENO (x4)
ENP
ENP