18
TOOLS AND HARDWARE REQUIRED / OUTILS ET QUINCAILLERIE REQUIS / INSTRUMENTAL Y HERRAJE REQUERIDOS
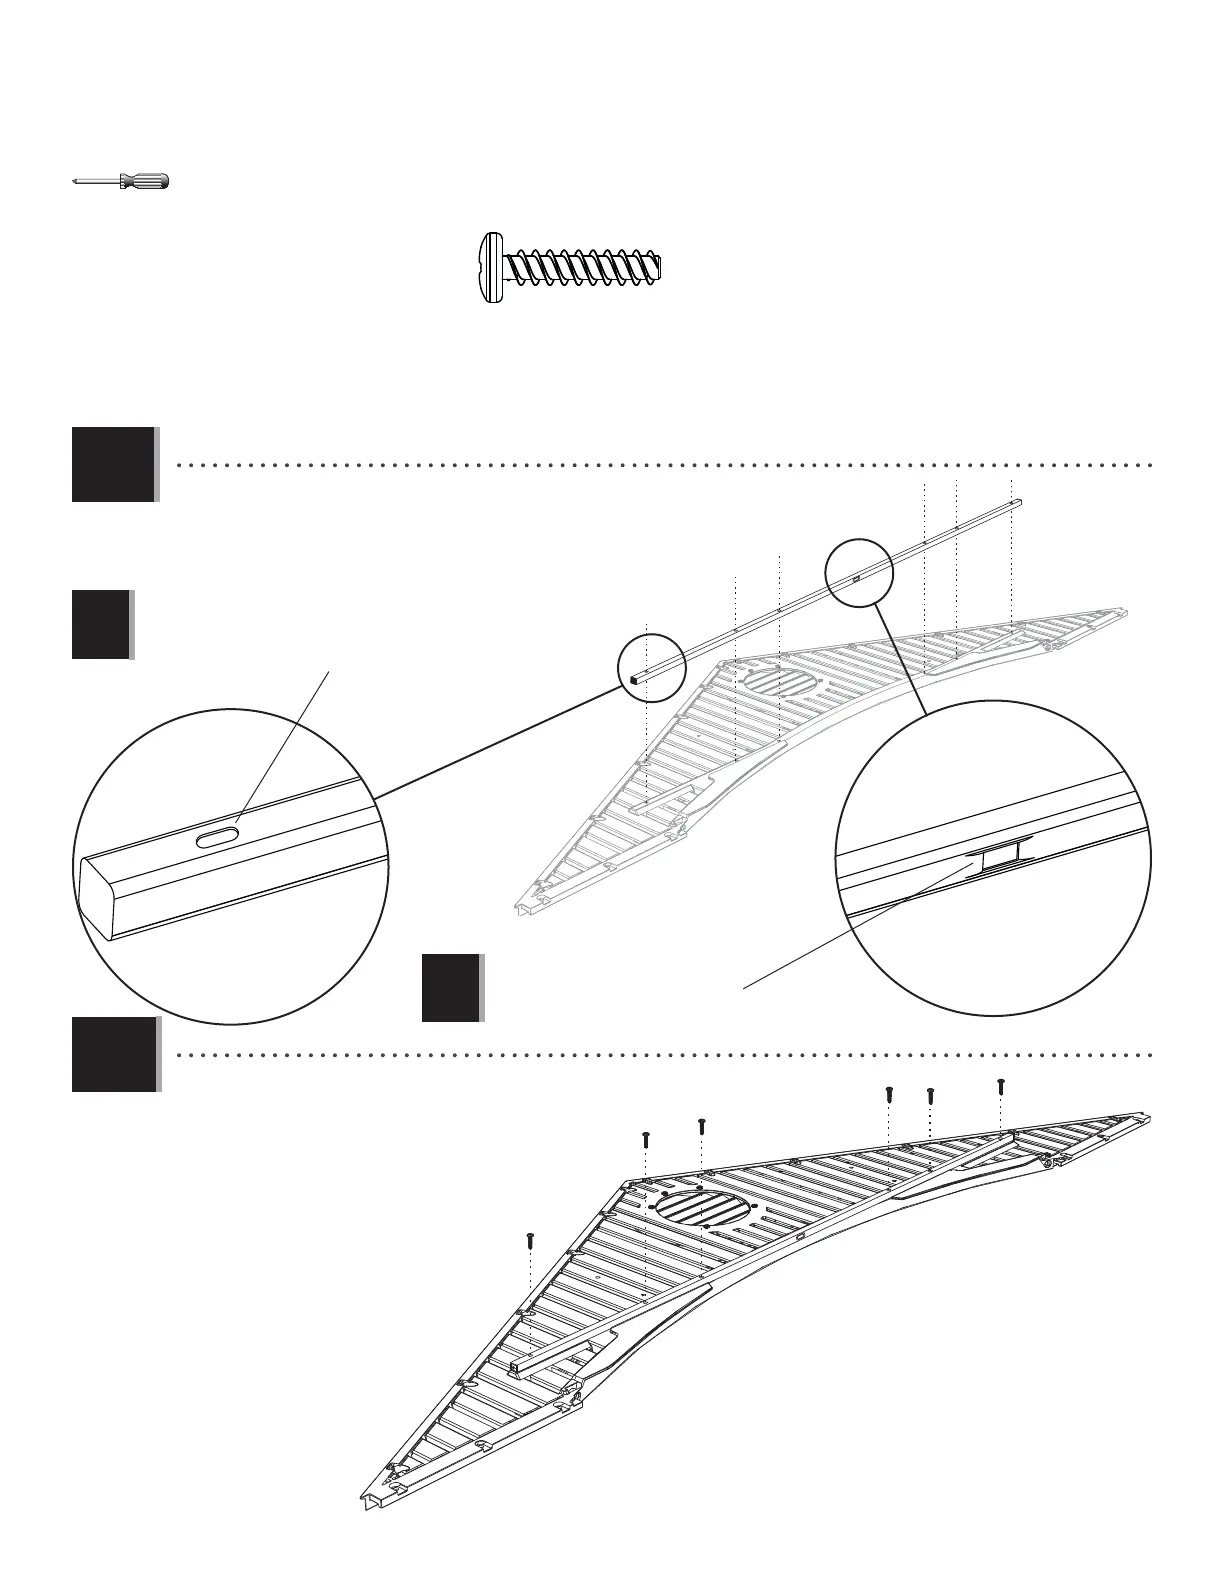
X SECTION 3 (CONTINUED) / SECTION 3 (SUITE) / SECCIÓN 3 (CONTINUACIÓN)
ADV (x6)
ADV
ADV
ADV
ADV
ADV
ADV
• Secure with the hardware included.
• Attachez-le en utilisant la quincaillerie incluse.
• Sujete los unos a los otros usando el herraje
incluido.
• Align the holes in the Header with those in the Gable.
• Alignez les trous dans le linteau avec ceux du pignon.
• Alinee los agujeros en el dintel con ellos en la fachada.
Note: The fl at holes face away from the Gable.
Note : Les trous plats doivent être face à l’écart du pignon.
Nota: Los agujeros planos dan hacia afuera.
Note: The dented hole faces downward.
Note : Orientez le trou fendu vers le bas.
Nota: Oriente el agujero abollado hacia abajo.
!
!
3.8
3.9