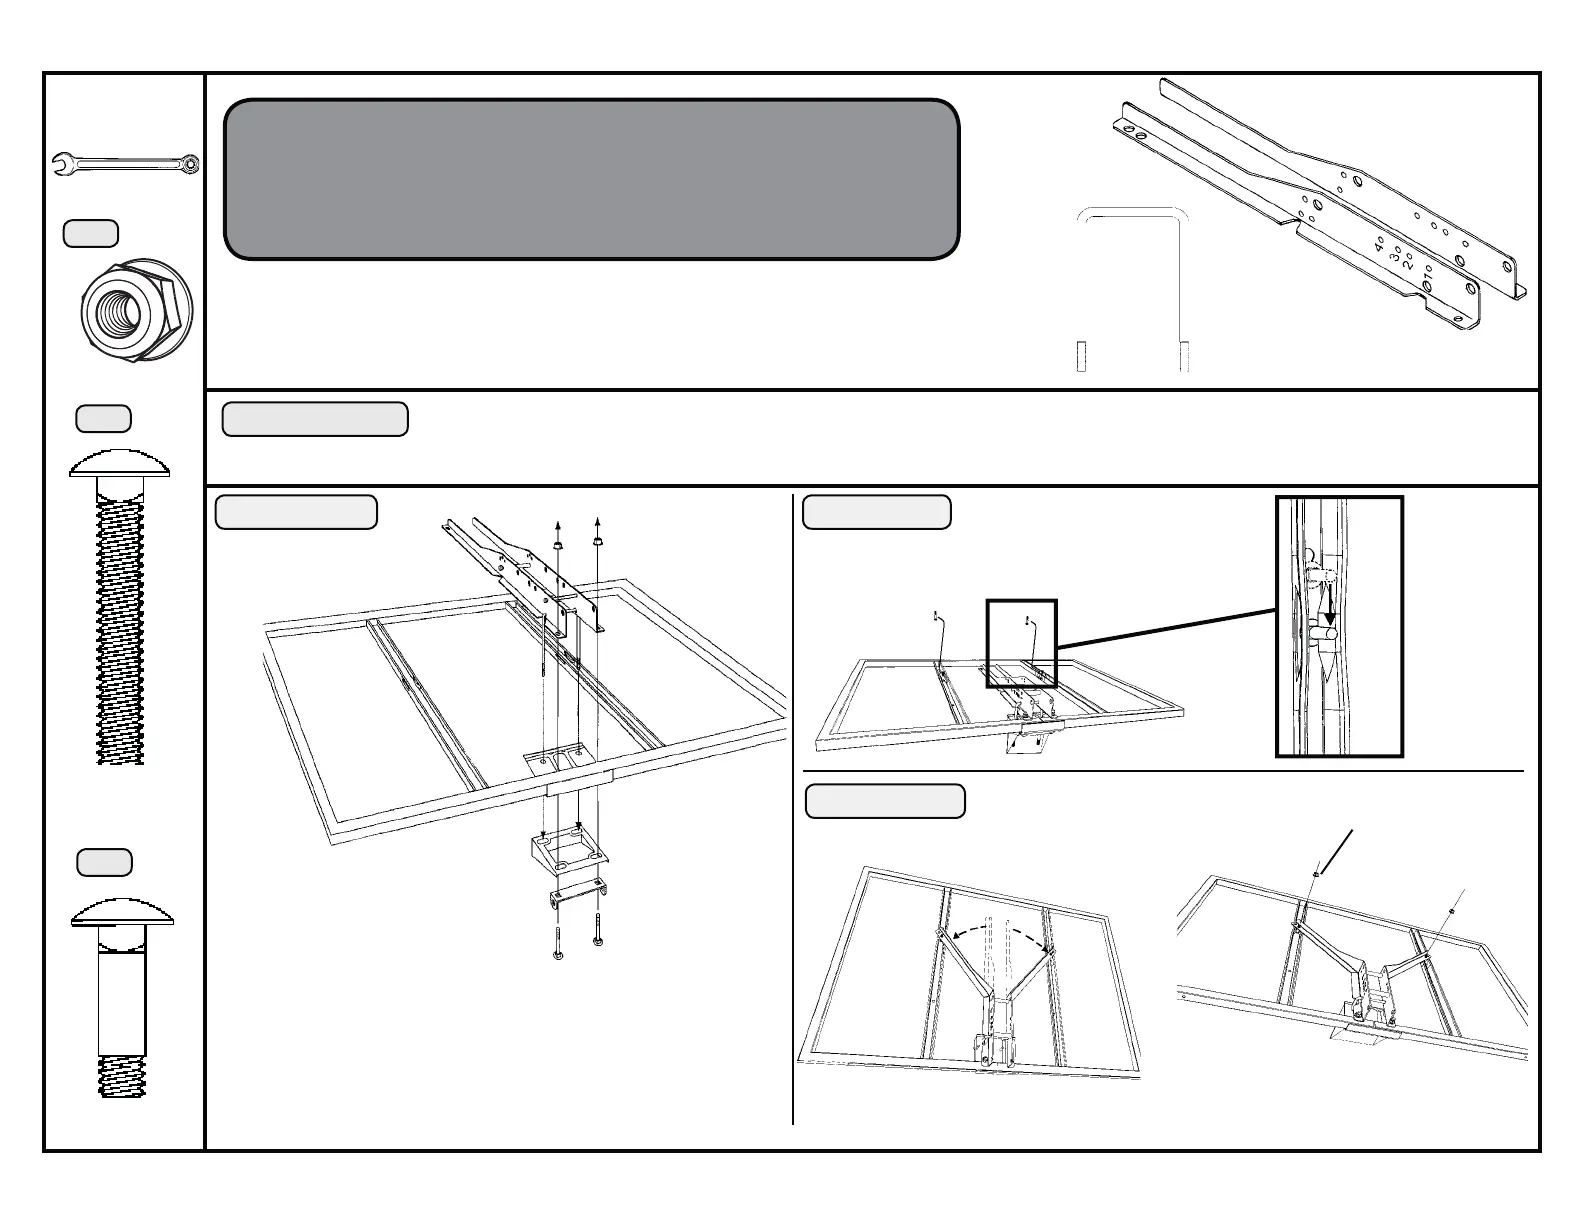
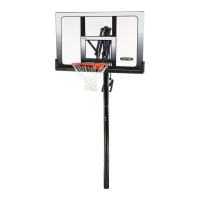
4
NOTE: The Backboard Brackets shown are Lifetime Products
®
models and are for illustration purposes only. If using Brackets
other than the Lifetime Products
®
models shown here, refer to the
instructions provided with the Brackets.
UB
RC
AH
RH
AD
STEP 1A
Required for this page:
RC
RH
(4)
(2)
OPTION 1
THIS OPTION IS FOR USE WITH BACKBOARD BRACKETS AND A U-BOLT.
ASSEMBLE THE U-BOLT (PROVIDED WITH THE BACKBOARD BRACKETS) TO THE BACKBOARD BRACKETS ACCORDING TO THE INSTRUCTIONS PROVIDED
IN THE POLE OR MOUNTING BRACKET UNIT.
If you have Backboard Brackets that come with a U-Bolt,
use Option 1 and the U-Bolt provided with the Brackets. If
the Backboard Brackets don’t include a U-Bolt, use Option
2 instead.
U-Bolt
Backboard
Brackets
Lay the Backboard (AB)
on a table or bench.
The U-Bolt (UB) goes
through the upper holes in
the Backboard.
Only hand tighten the Nuts (RH) now.
STEP 1B
RE
RE
RE
Slide the Carriage Bolt (RE) into
the crimped slot in each Back-
board channel.
RH
RH
Bend the Backboard Brackets out
so the lower holes go over the Car-
riage Bolts.
Do not overtighten these
Nuts.
LB
RB
Completely tighten the Nuts (RH) from
Step 1A.
To finish the assembly, turn to Page 6
STEP 1C
RE
1/2” Wrench
HD9136B
(2)
AB