40
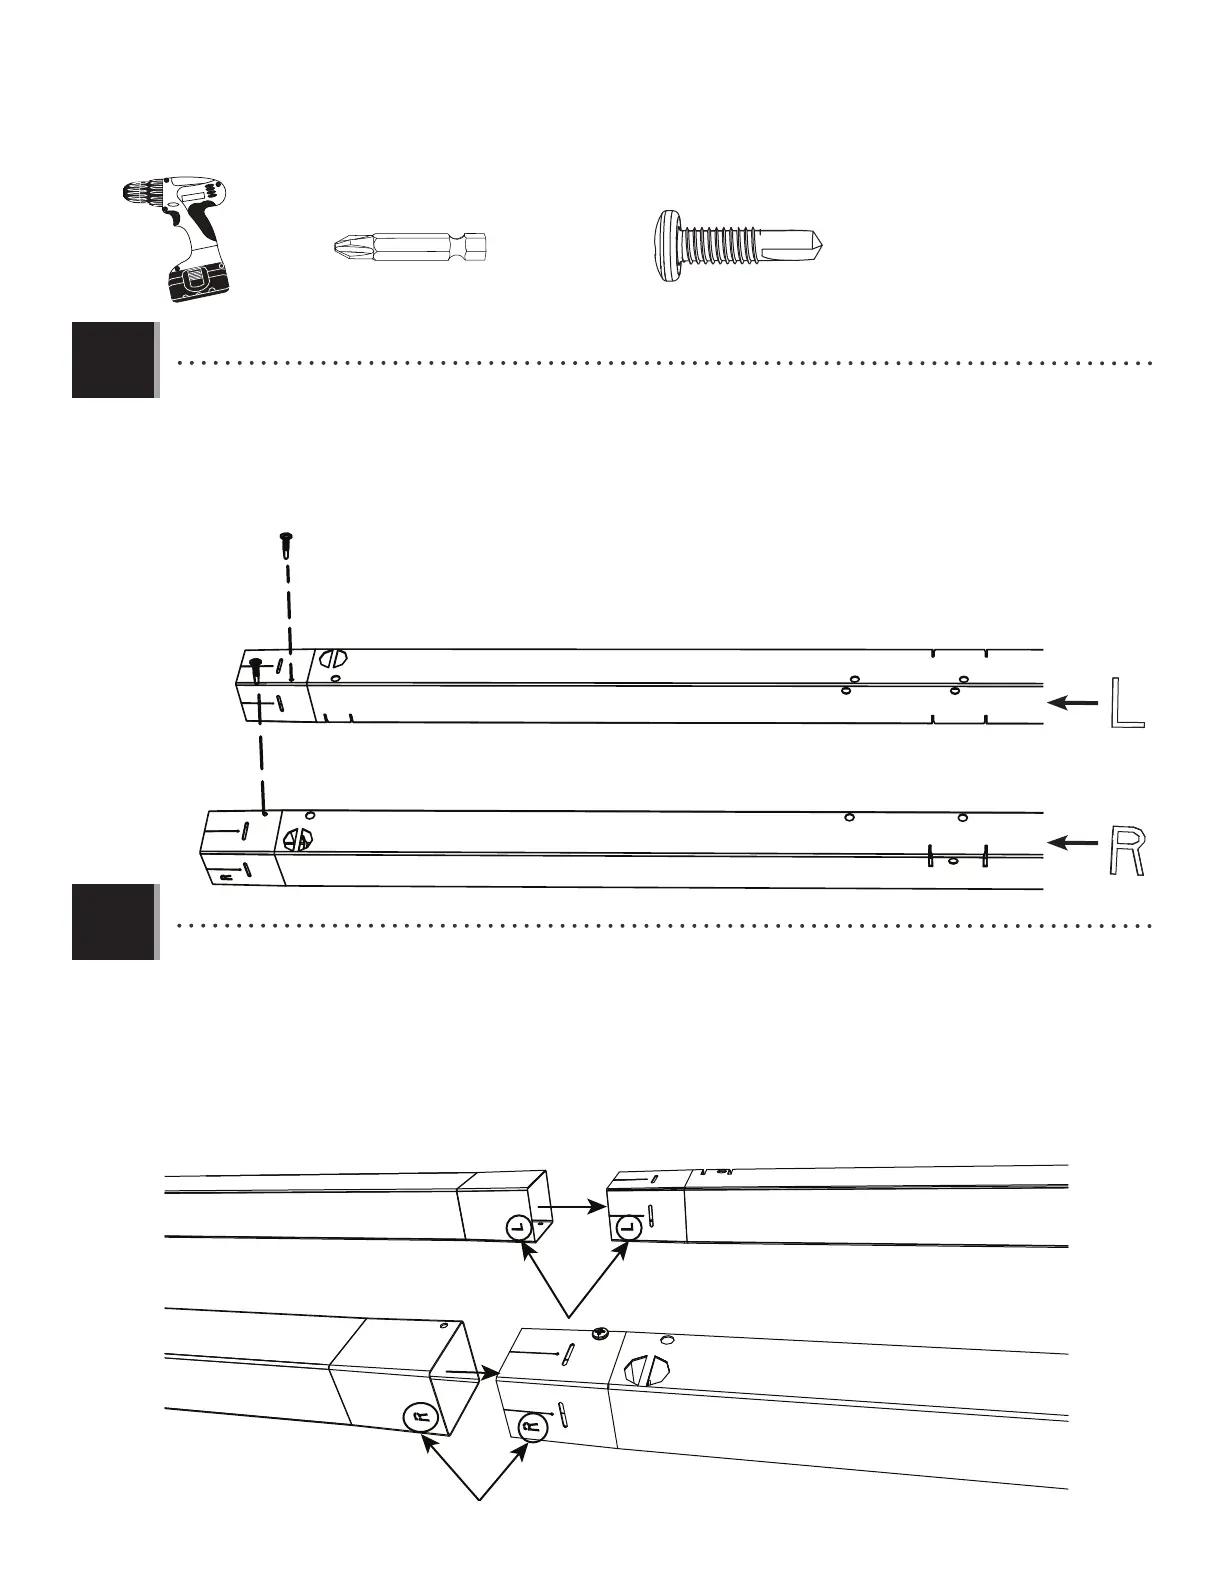
TOOLS AND HARDWARE REQUIRED / OUTILS ET QUINCAILLERIE REQUIS / HERRAMIENTAS Y HERRAJE REQUERIDOS
X SECTION 2 (CONTINUED) / SECTION 2 (SUITE) / SECCIÓN 2 (CONTINUACIÓN)
• Align the right and left Flare Poles (FBA and FBB) and the right and left Swaged Poles (FBC and FRN) by lining up the
L and R letters etched into the poles. Insert the Swaged Poles into the Flare Poles as far as they will slide until
snug.
• Alignez les poteaux évasés droit et gauche (FBA et FBB) et les poteaux rétreints droit et gauche (FBC et FRN) en alignant
les lettres L et R gravées dans les poteaux. Insérez les poteaux rétreints dans les poteaux évasés aussi loin que
possible.
• Alinee los postes con ensanchamiento (FBA y FBB) derecho e izquierdo y los postes ensamblados (FBC y FRN) derecho e
izquierdo alineando las letras L y R grabadas en los postes. Inserte los postes ensamblados en los postes con
ensanchamiento hasta donde se deslicen y ajusten.
2.1
FBB
FRN
FBA FBC
CUZ (x2)
• Line up the Swaged Poles (FBC, FRN) as shown in the image below. Drill a Self-drilling Screw (CUZ) in the location
shown below.
• Alignez les poteaux rétreints (FBC, FRN) comme indiqué dans l’image ci-dessous. Insérez une vis autotaraudeuse
(CUZ) dans l’endroit indiqué ci-dessous.
• Alinee los postes ensamblados (FBC, FRN) como se muestra en la siguiente imagen. Inserte un tornillo autorroscante
(CUZ) en la ubicación indicada abajo.
3.2
CUZ
CUZ
(1)
(1)
2.2
FRN
FBC