77
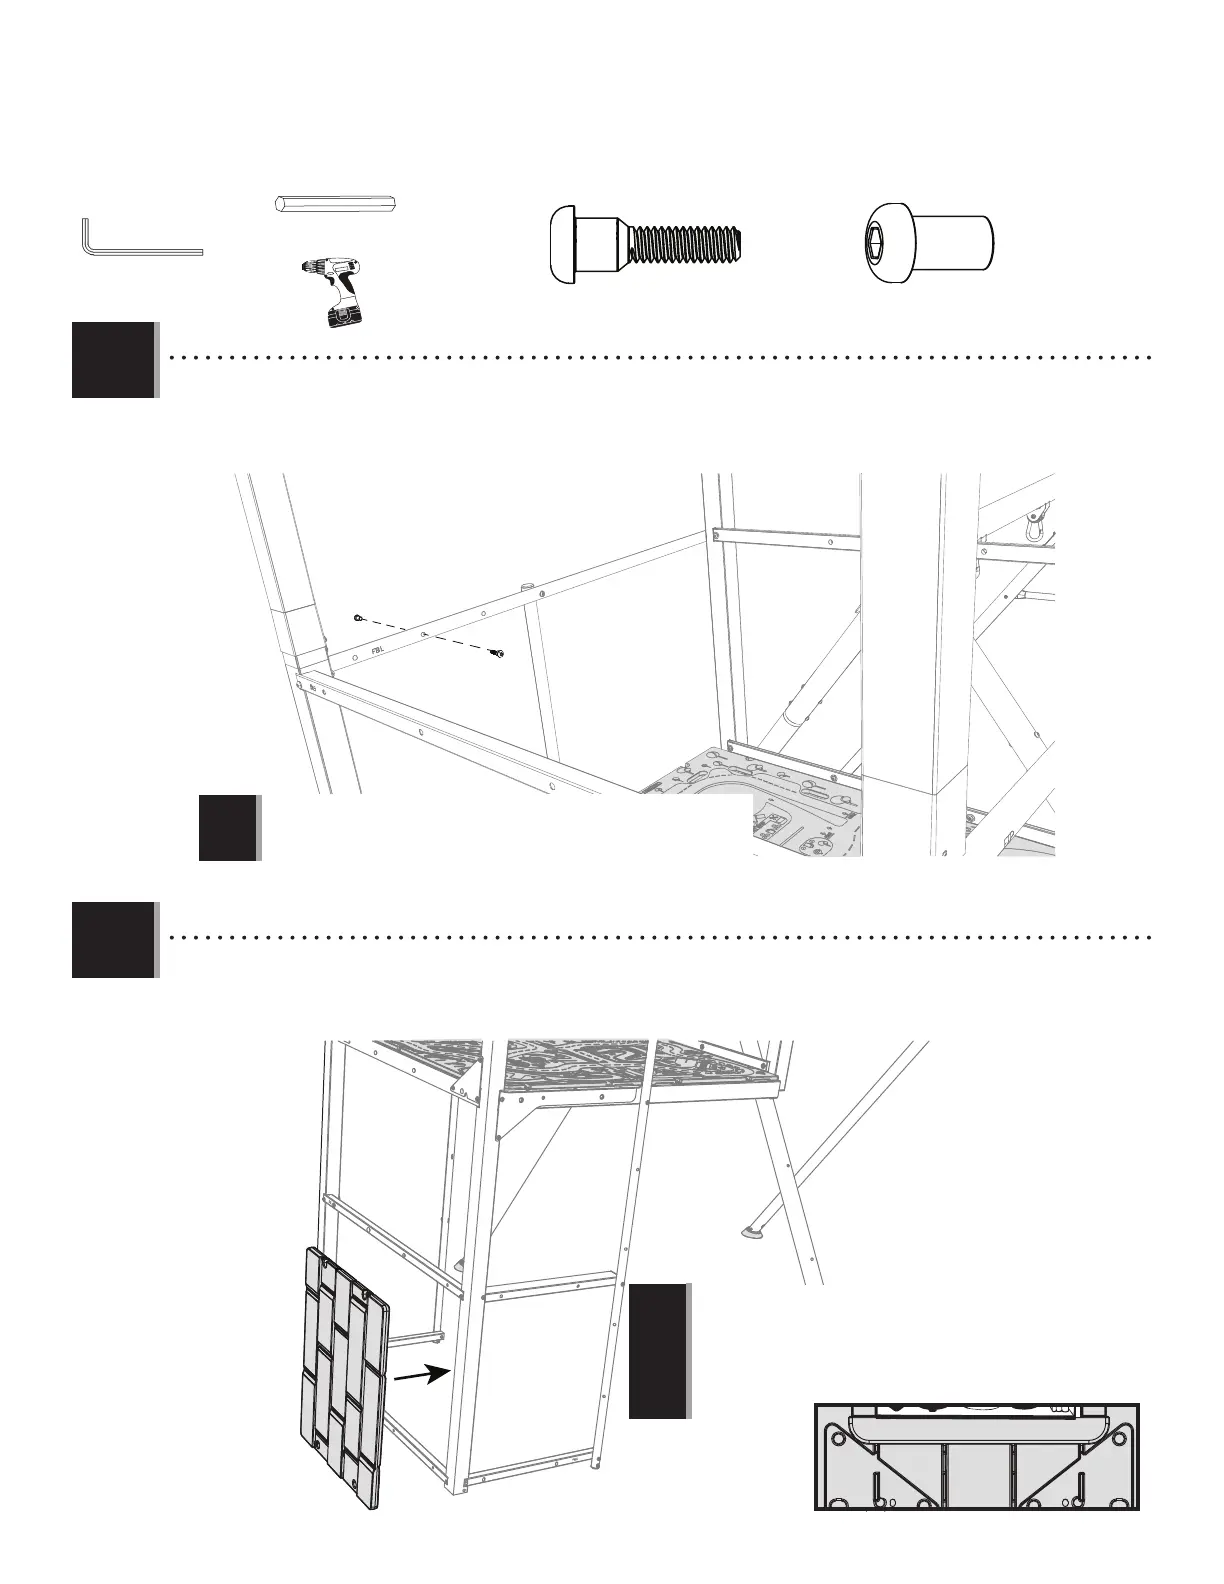
TOOLS AND HARDWARE REQUIRED / OUTILS ET QUINCAILLERIE REQUIS / INSTRUMENTAL Y HERRAJE REQUERIDOS
X SECTION 3 (CONTINUED) / SECTION 3 (SUITE) / SECCIÓN 3 (CONTINUACIÓN)
6
3.1
• Secure the extra hole in the left-side Deck Hand Rail (FBL) with the hardware indicated.
• Fixer le trou supplémentaire dans la main courante gauche du pont (FBL) avec la quincaillerie indiquée.
• Asegure el orifi cio adicional en la barandilla de la cubierta del lado izquierdo (FBL) con los elementos indicados.
3/16 in/po (≈5 mm)
(2)
BTS
DXX
FBL
DXX (x1)
BTS (x1)
!
• This hardware will plug an unused hole.
• Ce matériel va boucher un trou inutilisé.
• %STOSELEMENTOSSEINTRODUCIR¶NENORIlCIOSSINUSAR
(1)
(1)
3.2
• Place the Store Front Panel (FJC) against the lower deck rails.
• Placer le panneau avant de la devanture (FJC) contre les rails inférieurs du pont.
• Coloque el panel frontal tipo tiendita (FJC) contra los rieles de la cubierta inferior.
FJC
• The Activity Panel (FJC) has triangular indentations at the bottom of
the panel. These indentations will face toward the deck.
• Le panneau d’activités (FJC) est doté d’indentations triangulaires
au bas du panneau. Ces indentations feront face au pont.
• El panel para actividades (FJC) tiene hendiduras triangulares en la
parte inferior del panel. Estas hendiduras estarán orientadas hacia
la plataforma.
!