16
X SECTION 3 (CONTINUED) / SECTION 3 (SUITE) / SECCIÓN 3 (CONTINUACIÓN)
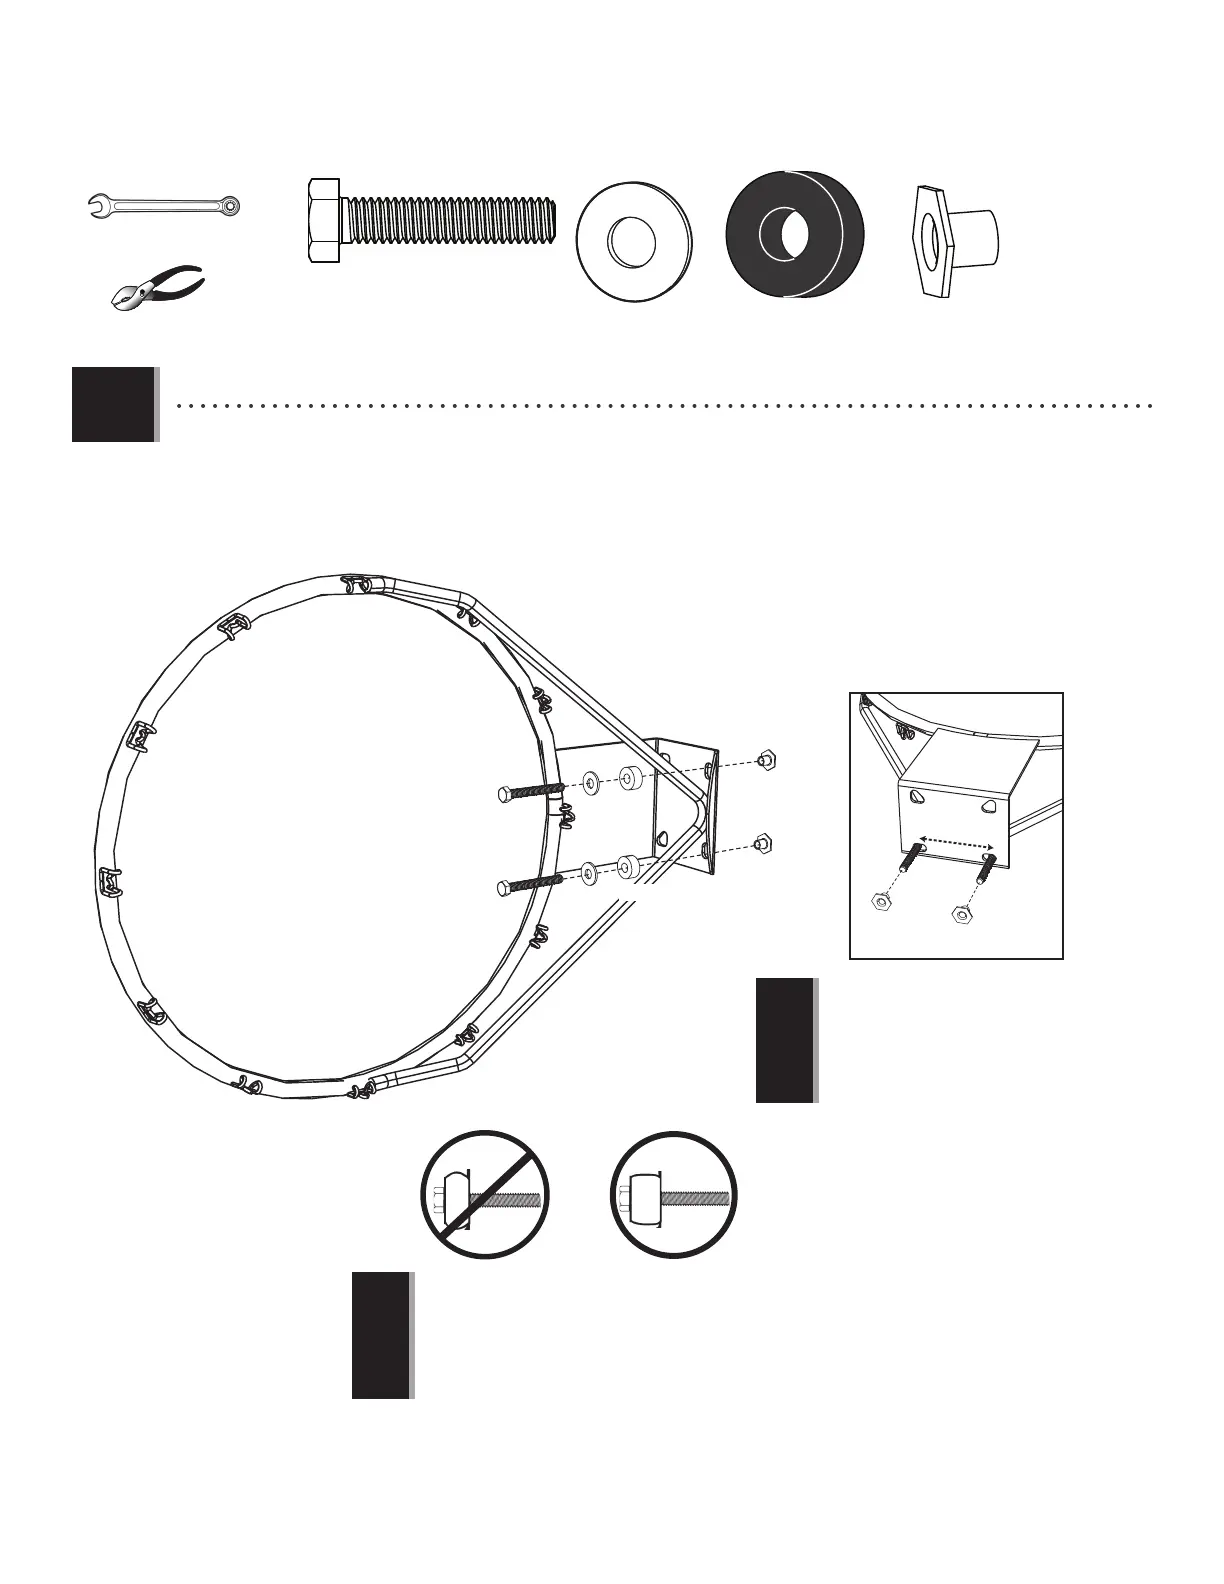
TOOLS AND HARDWARE REQUIRED / OUTILS ET QUINCAILLERIE REQUIS / HERRAMIENTAS Y HERRAJE REQUERIDOS
3.1
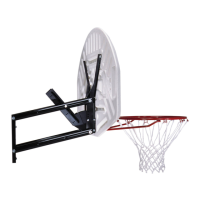
• Insert two Bolts (AAM) with Washers (ABD) and Rubber Washers (ABF) through the holes indicated in the back of the Rim (ALX) as
shown. Secure the hardware with two T-Nuts (AAJ).
• Insérez deux boulons (AAM) avec des rondelles (ABD) et des rondelles en caoutchouc (ABF) à travers les trous dans la partie arrière
de l’anneau (ALX) comme illustré. Fixez la quincaillerie à l’aide de deux écrous hexagonaux en « T » (AAJ).
• Inserte dos pernos (AAM) con rondanas (ABD) y rondanas de goma (ABF) por los agujeros indicados en la parte posterior del aro
(ALX) como se muestra. Fije el herraje con dos tuercas hexagonales en « T » (AAJ).
• Ensure that the Tap Bolts (AAM) are positioned
on the outside edge of the holes as shown.
• Assurez-vous de positionner les boulons (AAM)
vers le bord extérieur des trous comme illustré.
• Asegúrese de ubicar los pernos (AAM) cerca el
borde exterior de los agujeros como se muestra.
• Do not overtighten the hardware so much that the Rubber
Washers bulge as shown.
• Ne pas serrer excessivement les accessoires pour que les
rondelles en caoutchouc se gonfl ent comme illustré.
• No apriete demasiado el herraje para que las rondanas de
goma sobresalgan como se muestra.
!
!
1/2” (≈13 mm)
ABD (x2)
ABF (x2)
AAM (x2)
ABF
ABF
AAJ
AAM
ABD
ABF
ALX
AAM
AAM
AAJ
AAJ
AAJ (x2)
(x2)
(x1)
AAJ
AAM
ABD
ABF