29
TOOLS AND HARDWARE REQUIRED / OUTILS ET QUINCAILLERIE REQUIS / HERRAMIENTAS Y HERRAJE REQUERIDOS
X SECTION 5 (CONTINUED) / SECTION 5 (SUITE) / SECCIÓN 5 (CONTINUACIÓN)
ALM
ALH
7”
ABB (x1)
AAZ (x1)
9/16" (14 mm) (x2)
AAZ
ABB
AKC
AKC
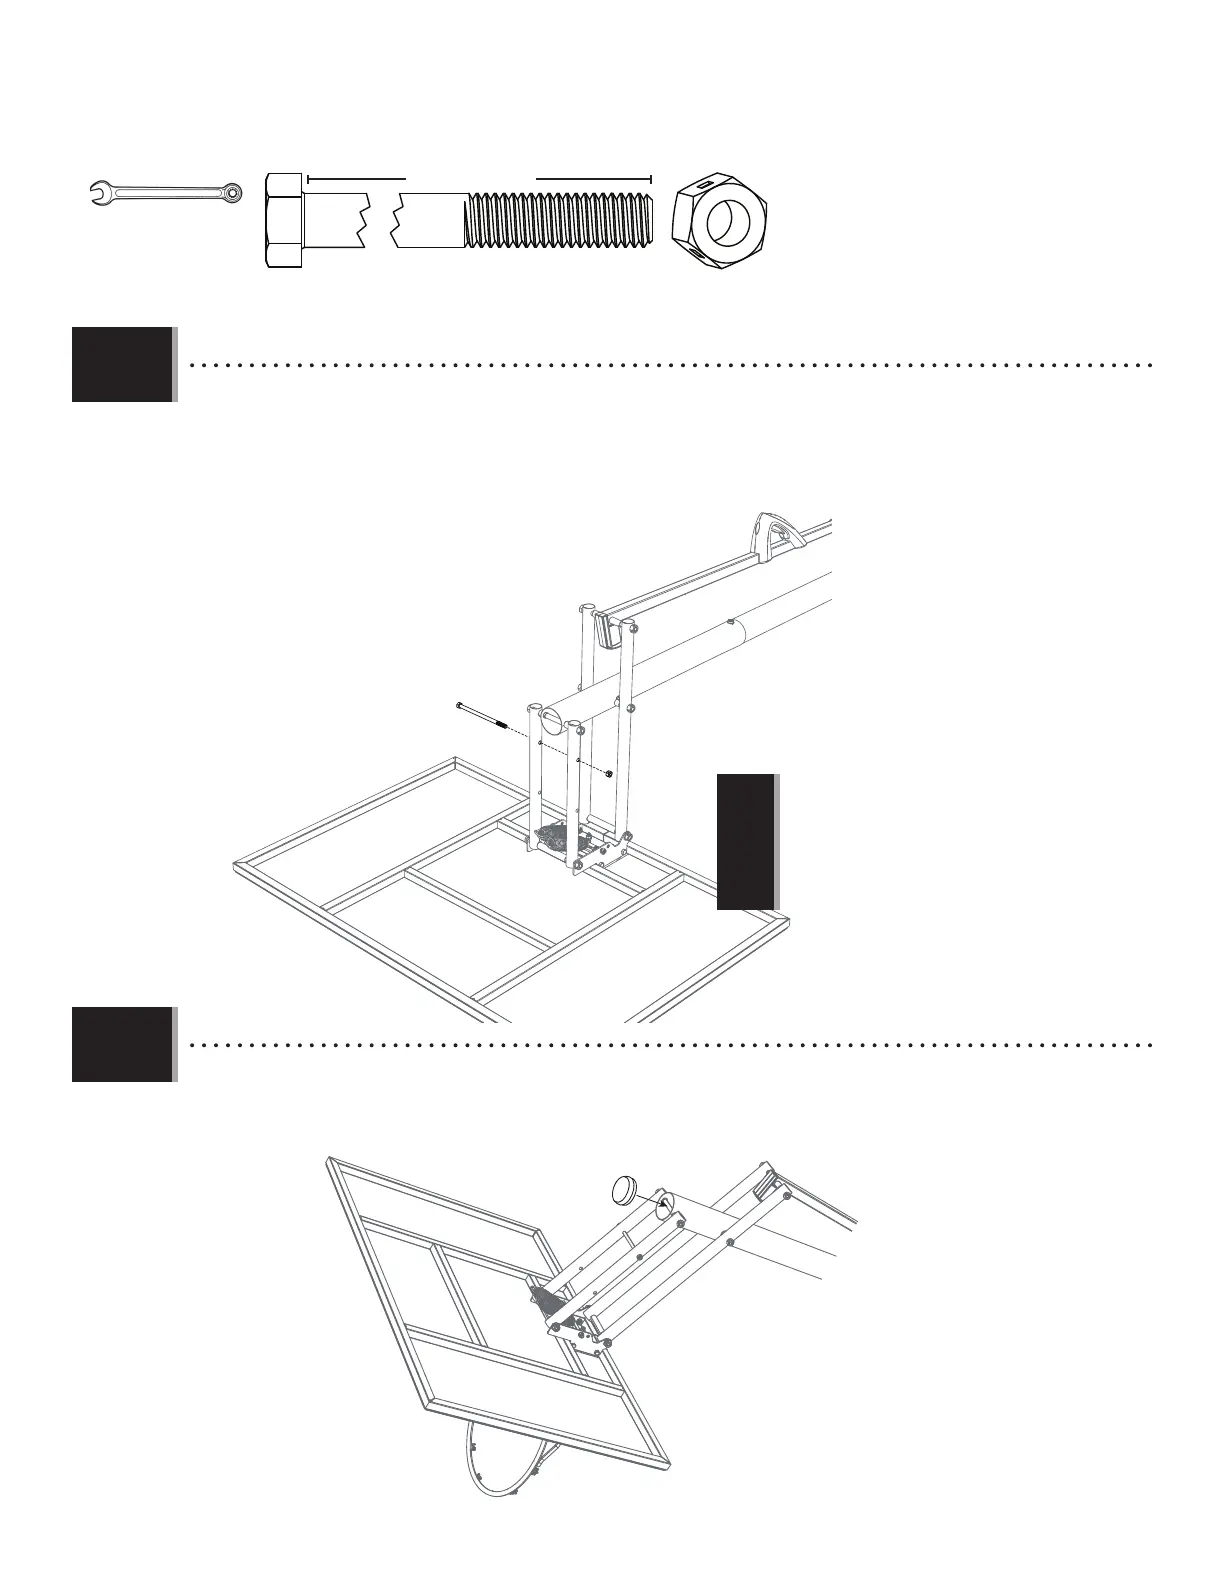
5.10
• Insert the Hex Bolt (AAZ) through the holes in the Short Extension Arms (AKC) that are closest to the Pole. Secure the Bolt to
the Short Extension Arms with the Centerlock Nut (ABB).
• Insérez le boulon hexagonal (AAZ) à travers les trous dans les bras de rallonge courts (AKC) qui sont le plus proche du
poteau. Attachez le boulon aux bras en utilisant l’écrou de blocage central (ABB).
• Inserte el perno hexagonal (AAZ) por los agujeros en los brazos de extensión cortos (AKC) que están más cercanos al
poste. Sujete el perno a los brazos usando la tuerca de bloqueo central (ABB).
5.11
• Insert the Pole Cap (ALM) into the Top Pole (ALH) as shown.
• Insérez le capuchon de poteau (ALM) dans le poteau supérieur (ALH) comme illustré.
• Inserte el tapón de poste (ALM) en el poste superior (ALH) como se muestra.
• Tighten the Centerlock Nut until it is fl ush
with the end of the Bolt.
• Serrez l’écrou de blocage central jusqu’à ce
qu’il soit au ras de l’extrémité du boulon.
• Apriete la tuerca de bloqueo central hasta
que esté a ras del extremo del perno.
!
7” (17,8 cm)
(Not actual length)
(Non illustré à la longueur réelle)
(No está ilustrado al tamaño real)