16
TOOLS AND HARDWARE REQUIRED / OUTILS ET QUINCAILLERIE REQUIS / HERRAMIENTAS Y HERRAJE REQUERIDOS
X SECTION 3 (CONTINUED) / SECTION 3 (SUITE) / SECCIÓN 3 (CONTINUACIÓN)
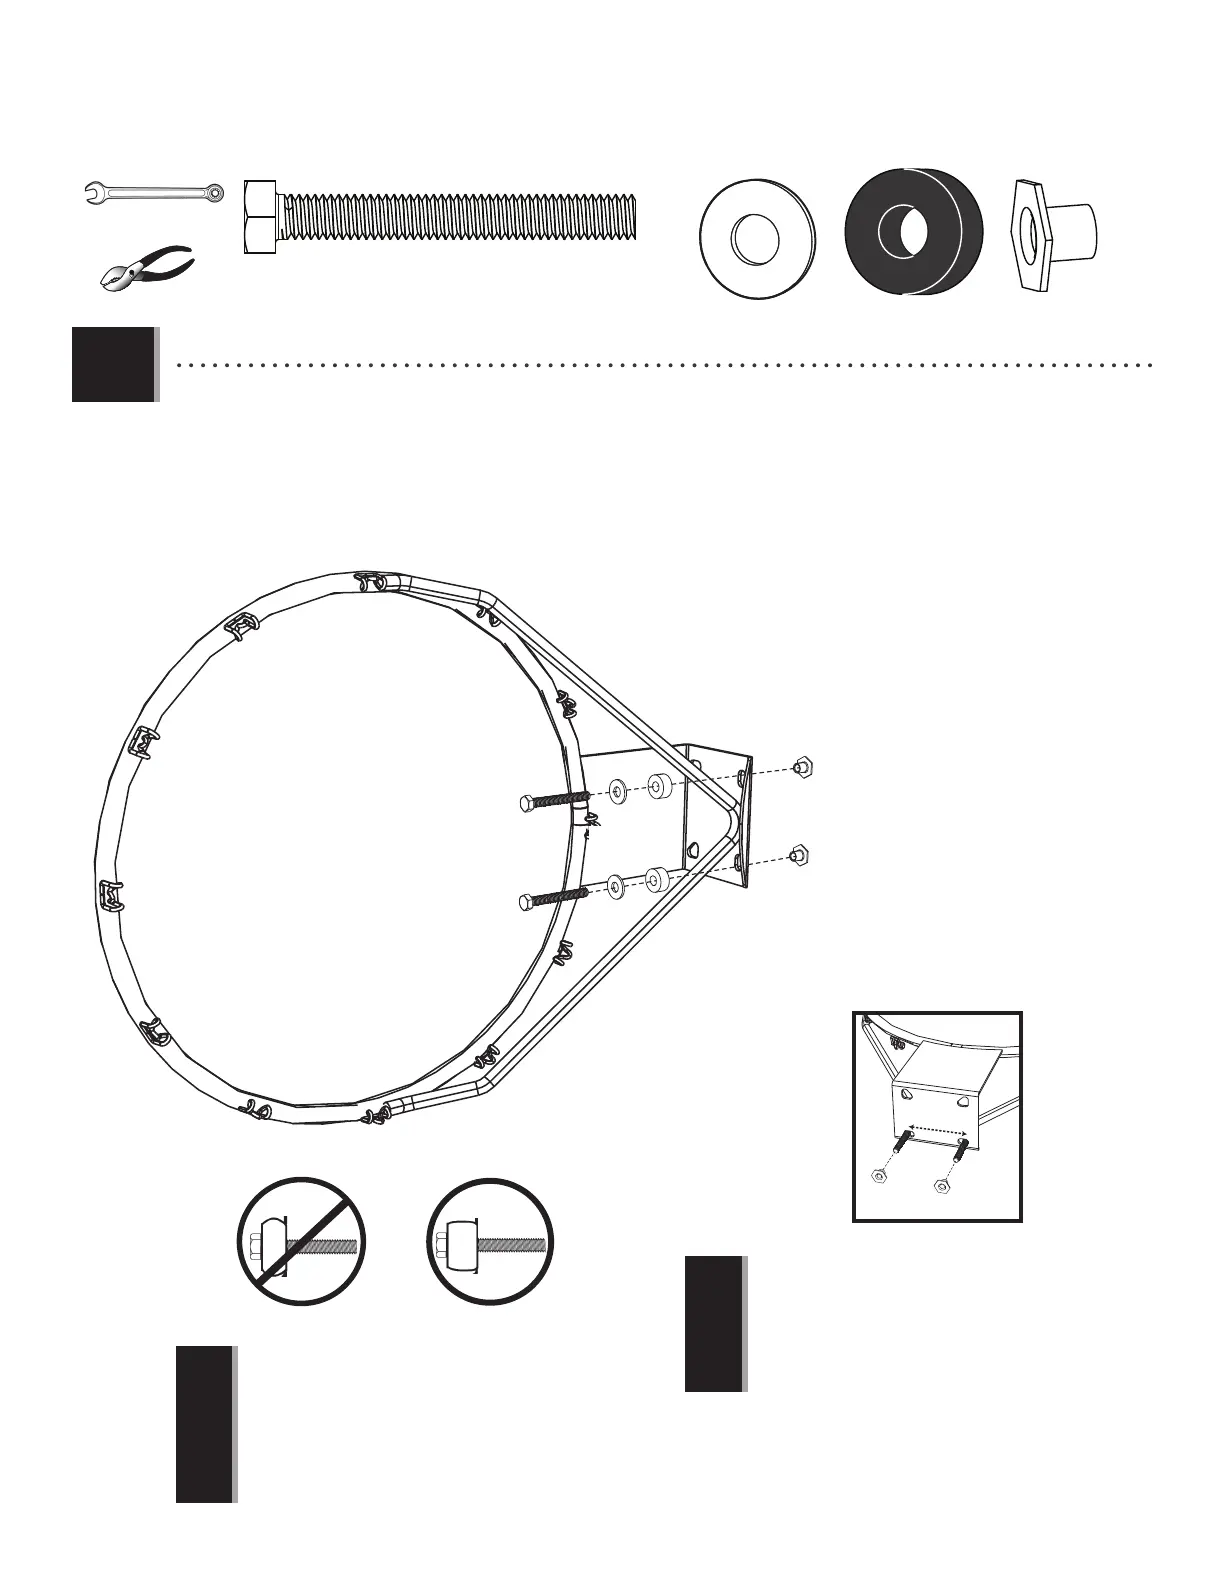
• Make sure that the Tap Bolts (AAJ) are positioned on
the outside edge of the holes as shown.
• Vérifi ez que les boulons tout fi leté (AAJ) sont placées
sur le rebord extérieur des trous, comme illustré.
• Asegúrese de que los bulones de rosca entera (AAJ) queden
ubicados en la parte externa de los agujeros, tal como se
muestra.
• Do not overtighten the hardware so that the
Rubber Washers (ABF) bulge outward as shown.
• Ne pas trop serrer les accessoires pour que les
rondelles en caoutchouc (ABF) dépassent vers
l’extérieur, comme illustré.
• No ajuste en demasía las tuercas, para evitar que
las arandelas de goma (ABF) se deformen, tal
como se muestra.
3.3
• Insert two Tap Bolts (ABG), two Washers (ABD), and two Rubber Washers (ABF) through the bottom holes in the back of the Rim
(ALX) as shown, and secure the hardware with two Hex T-Nuts (AAJ).
• Introduisez deux boulons tout fi leté (ABG), deux rondelles (ABD) et deux rondelles en caoutchouc (ABF) dans les trous
du bas à l’arrière de l’anneau (ALX), comme illustré, et fi xez les accessoires avec deux écrous à pointes à enfoncer
hexagonaux (AAJ).
• Inserte dos perno de toda rosca (ABG), dos arandelas (ABD), y dos arandelas de goma (ABF) a través de los agujeros
inferiores de la placa trasera del aro (ALX) en la forma mostrada, y asegure el conjunto con dos tuercas
hexagonales en «T» (AAJ).
1/2"
AAJ (x2)
ABD (x2)
ABF (x2)
ABG (x2)
ABF
ABF
AAJ
ABG
ABD
ABF
ALX
Correct
Incorrect
ABG
ABG
AAJ
AAJ
ALX
!
!