“Riviera” LightHeaded™ Bed
Assembly Instructions
www.LightHeadedBeds.com
Model #20197 Full size, Cheshire Cherry
Model #20327 Full size, Black
Model #20330 Full size, White
9/17/2015
1168346 B
Step 6
Step 7
F
Page 4
L
1. If using a mattress only and your side rails have been
placed into the top two metal pins in the vertical slot on
the headboard and footboard legs, screw 1 long and 1
short support leg (EPW) together. Repeat to make 3
extended legs.
2. Have your assistant lift the middle of the wooden slats;
align the center support rail from headboard to footboard,
using the center set of pre-drilled holes. Screw 1 extended
leg through the center support rail (EPV) and into the
receiver in the middle wooden slat.
3. Replace the slats and move to the foot of the bed and
screw another extended leg through the center support rail
and into the receiver in the end wooden slat.
4. Repeat with final extended leg at the head of the bed.
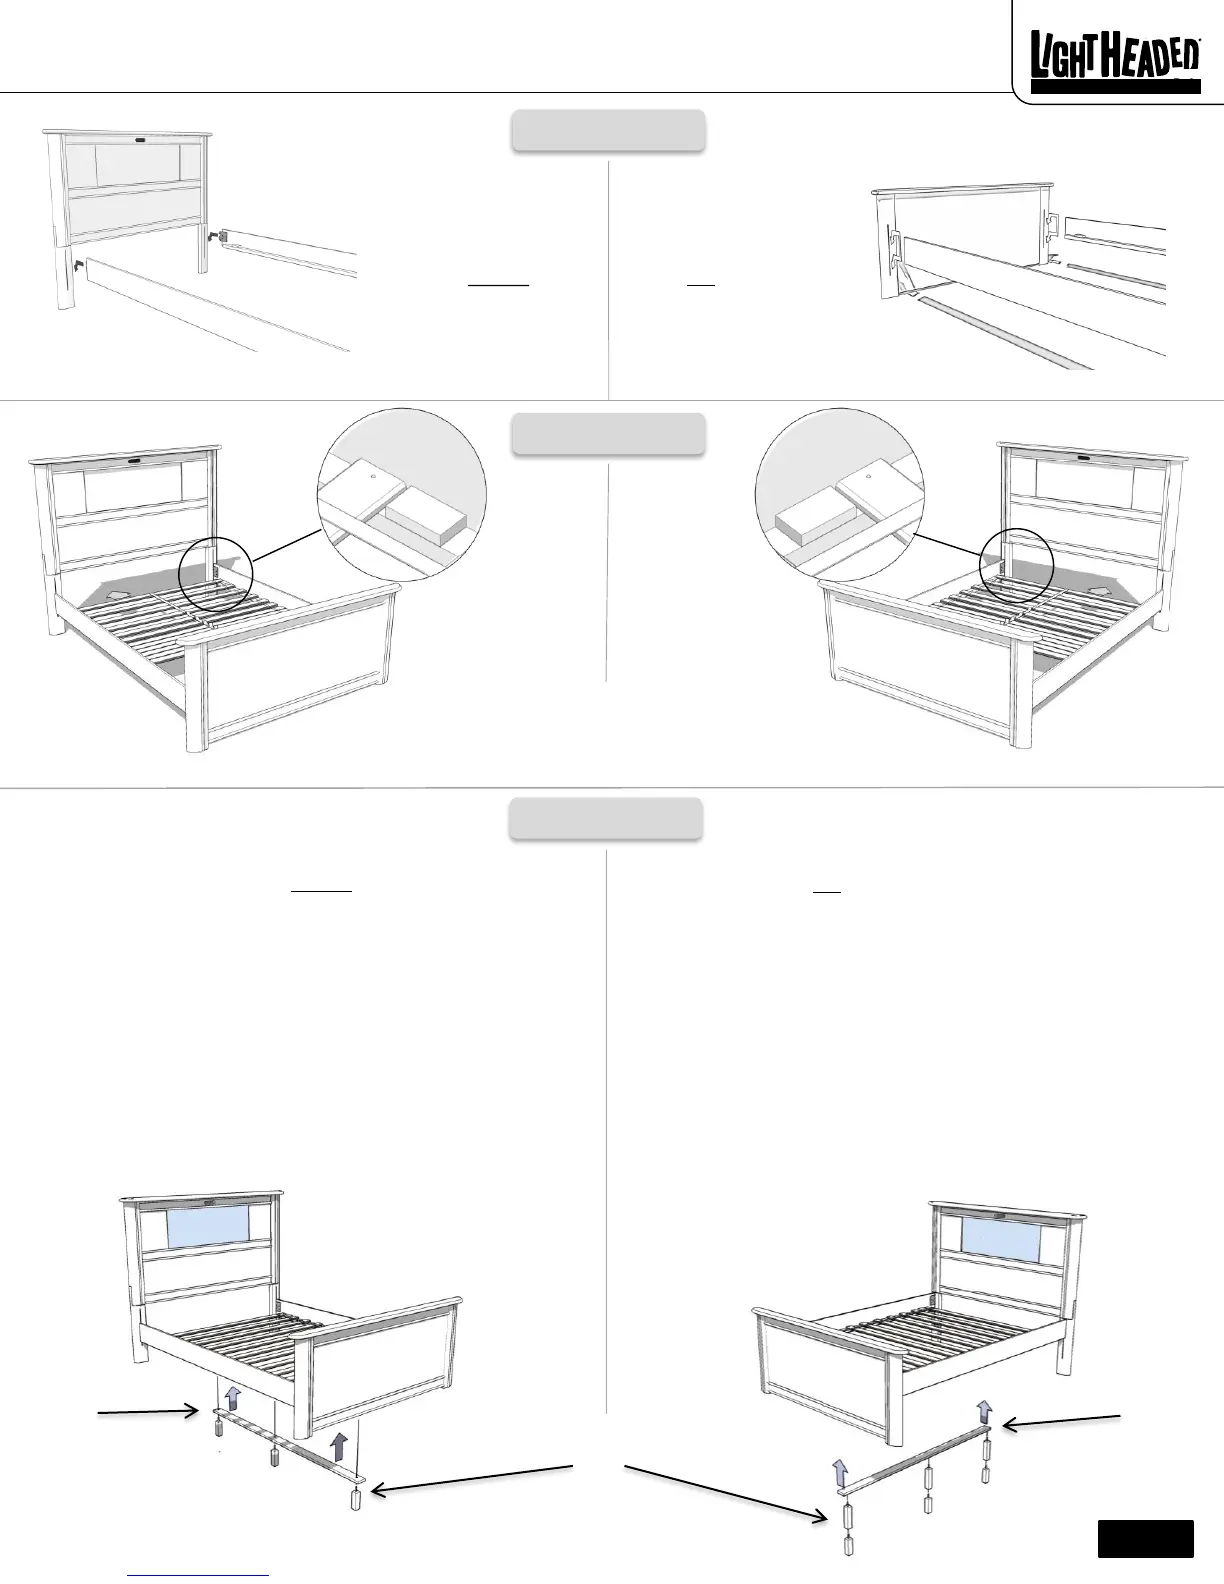
If you’re using a box
spring and mattress,
hook your wooden
side rails (EPR, EPS)
onto the bottom two
metal pins in the
vertical slot on the
headboard and
footboard legs.
If you’re using a
mattress only, hook
your wooden side
rails (EPR, EPS) onto
the top two metal
pins in the vertical
slot on the headboard
and footboard legs.
Step 5
Rollout wooden slats (EPT) onto your side rails so
that the two end slats lock into place with the wood
blocks near the headboard and footboard.
1. If using a box spring and mattress and your side rails
have been placed into the bottom two metal pins in the
vertical slot on the headboard and footboard legs,
choose the short support legs with cap end (EPW).
2. Have your assistant lift the middle of the wooden slats;
align the center support rail from headboard to
footboard, using the center set of pre-drilled holes.
Screw 1 support leg through the center support rail
(EPV) and into the receiver in the middle wooden slat.
3. Replace the slats and move to the foot of the bed and
screw another support leg through the center support
rail and into the receiver in the end wooden slat.
4. Repeat with the final support leg at the head of the bed.
M
EPT
EPT
EPV
EPV
EPW
 Loading...