8
USER INSTRUCTIONS LIGHTFORCE.COM
WARNING
ALWAYS disconnect power before disassembly of light.
ALWAYS wear safety glasses when handling any bulb.
DO NOT handle the glass section of the bulb.
NOTE: Wearing clean cotton gloves is recommended while handling
internal components.
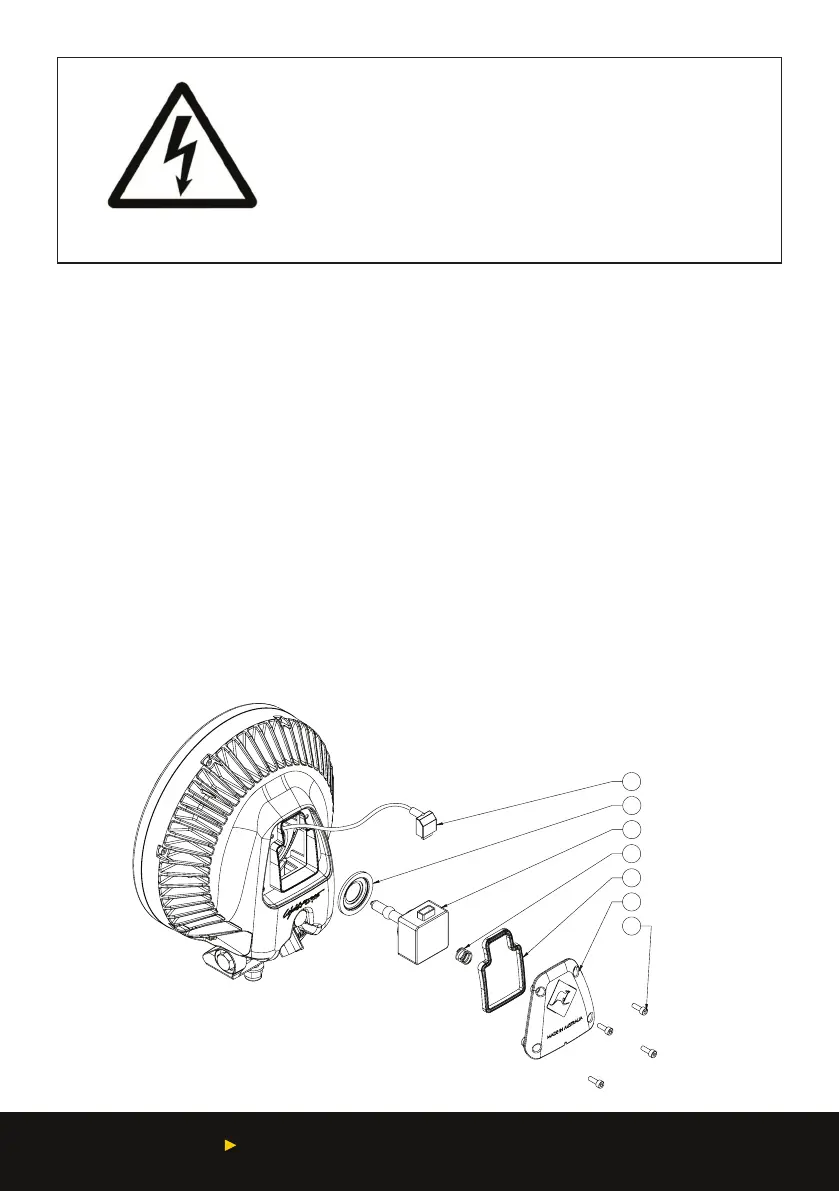
HID BULB REPLACEMENT
1. Disconnect power and remove the light from vehicle
2. Place light face down then evenly remove the four socket head screws (1) (using a 3mm hex
key) from the rear cover (2)
3. Remove the rear cover, then remove the globe by inverting the light and allowing the globe
to fall free of the housing (Note: the focal ring (5) may come out with the globe)
4. Place light face down
5. Disconnect cable from the HID bulb (3) by pulling on bulb connector (4) rmly and place bulb
on a at surface
6. Re-locate the focal ring into the reector with the stepped face facing inwards
7. Connect new HID bulb to connector (4)
8. Carefully position new HID bulb into focal ring (5)
9. Ret rear cover to housing ensuring the rear cover seal (6) and spring (7) are still in place. If
seal becomes dislodged ret to the rear cover.
10. Ret the four socket head screws to the specied torque of 2.5 Nm.
ELECTRICAL SHOCK
1
2
3
4
5
6
7