Page
General Instructions l
Installation Instructions
Quick set-up and install l
Mounting Rackmount Models in a Standard 19 Inch Rack ll
Mounting Wallmount Models to the Wall ll
Changing the supply voltage lll
Connecting the supply lV
Connecting the outputs V
Changing the supply input phase order Vl
User Instructions
Connecting the control inputs 1
Front panel controls and features 2
Cooling and DMX fan control 2
Using the dimmer without a control desk 3
Using the Paradime Patchpack 3
Using the dimmer with remote controls 4
Control Modes 5
Menu system and user options 6
Diagram - menu structure 11
Reference Section
Maintenance 12
System Messages 13
Specification 14
Spares List 15
Warranty Statement, Repairs Procedures 16
CONTENTS
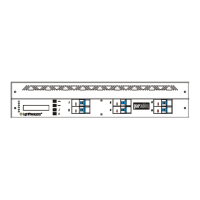
Rackmount Models
Instruction manual
Front and rear mounting cheek set
6 x 0.4m patch cables (patchpack only)
Single phase links (10A models only - packed inside the dimmer)
Wallmount Models
Instruction manual
Single phase links (10A models only - packed inside the dimmer)
Rackmount Models
Service Plates, see page V
Wallplates, see page 4
Additional Patch Leads, see page 13
DMX/Analogue Cables, see page 13
Wallmount Models
Wallplates, see page 4
XLR/DIN Input Plate, see page 1
LightProcessor Paradime, all variants, version 21, September 2003
ACCESSORIES PACKED WITH THE PRODUCT
OPTIONAL EXTRAS