7. Firmware Upgrade DA2DVI-DL – User's Manual 24
7
Firmware Upgrade
products by giving a few tips on how to start and by explaining the features of
contact support@lightware.eu.
Î
Î
Upgrading Steps in a Nutshell
Step 1. Installing the Lightware Bootloader Software.
Step 2.
upgrade.
Step 3. Connecting the Lightware device and the computer via USB
port.
Step 4. Starting the Lightware Bootloader application.
Step 5. Establishing the connection with the device.
Step 6.
Step 7. Starting the upgrade process.
Step 8. Restarting the device.
Detailed Instructions
Use the Lightware Bootloader application to upgrade the device’s
USB cable.
Step 1. Installing the bootloader application.
Step 2.
Step 3. Connecting the Lightware device and the computer via USB port.
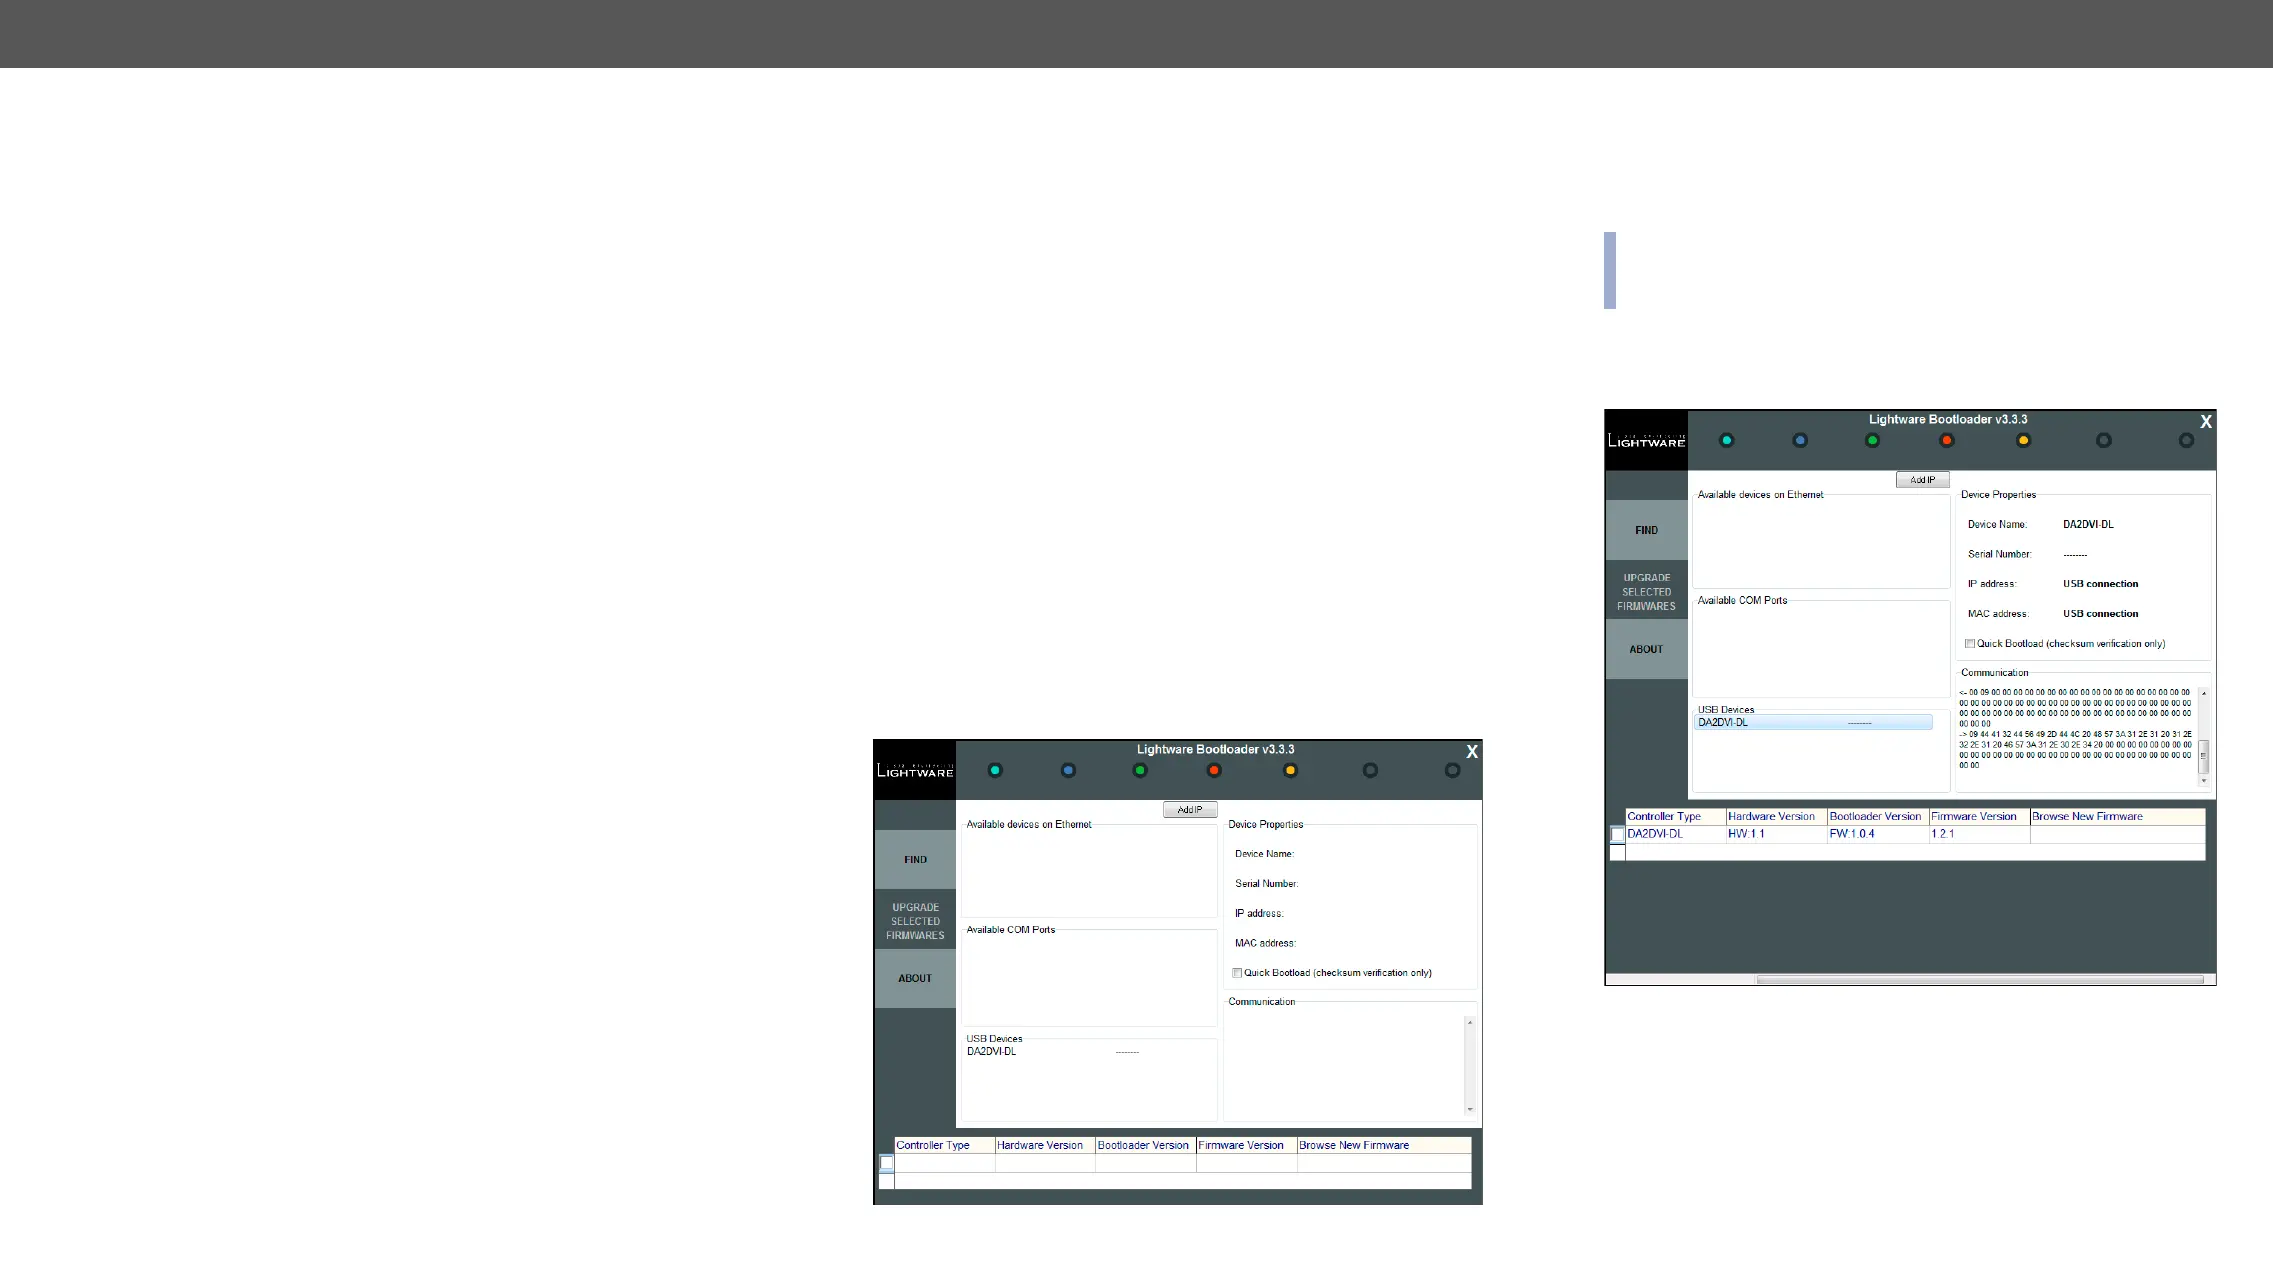
Step 4. Starting the Lightware Bootloader application.
Step 5. Establishing the connection with the device.
Check the USB Devices
name, then click YES
take few seconds to get all information from the device.
ATTENTION! The bootloader application will restart the device
when it establishes the connection. All connected DVI sources and
monitors will act as if the device was powered down.
Step 6.
After the connection is made, the device properties, and the installed
controller module is displayed.