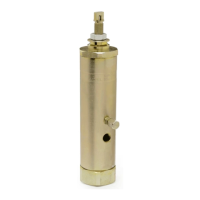
b. If the valve body sticks in the injector
body, turn injector right side up and use a 7/16
to 1/2" brass or wooden dowel rod to gently tap
the valve body out of the injector body.
4. To remove the indicator stem packing (item
#6) from the adjustment adapter (item #3),
remove the adjustment screw (item #1) from the
adjustment adapter. Use a blunt object, such as
a wooden dowel, placed into the adjustment
screw hole to gently push the washer (item #5)
and packing out of the adjustment adapter, from
the bottom side.
Reassembly Instructions:
1. Clean all injector components, and carefully
inspect all parts for wear, replacing parts as
necessary. (See trouble shooting chart for
guidance.)
2. Start reassembly by pre-assembling the valve
body, by installing the two packings (items #13)
into the valve body (item #16), followed by the
spacers (items #12). Install the O-rings (items
#15) and back-up rings (items #14) into the
grooves on the outside of the valve body. (See
valve body detail, for correct assembly
sequence.) Apply a liberal amount of grease to
O-rings on outside of valve body, and gently
push the pre-assembled valve body into the inlet
adapter (item #18).
3. Install O-ring (item #4) onto the inlet adapter
(item #18). Install inlet adapter into the injector
body, and tighten by hand assuring that the valve
body slides into it's respective bore in the
injector body. Tighten the inlet adapter to the
injector body.
4. Apply a liberal coating of grease to the slide
valve assembly (item #11). Insert the slide valve
assembly through the top of the injector into the
valve body packings (item #13), which should
already be installed into the bottom of the
injector body. Apply a liberal coating of grease
to the piston bore in the injector body. Drop in
the spring (item #9), and place the spacer (item
#19) inside the spring.
5. Install the O-ring (item #7) on the piston
assembly (item #7). Apply a liberal coat of
grease to the piston, O-ring, and indicator rod.
Place the piston assembly into the piston bore of
the injector body. Install O-ring on adjustment
adapter (item #3). Install washer (item #5) and
packing (item #6) into adjustment adapter.
Apply grease to the O-ring on the adjustment
adapter and the mating bore in the top of the
injector body. Carefully slide the pre-assembled
adjustment adapter over indicator pin on the
piston assembly (item #8), screw adjustment
adapter into the injector body hand tight, then
tighten with wrench. Reinstall adjustment screw
(item #1) into adjustment adapter.
Page 3

 Loading...