OPERATING MANUAL
STEP 1: ASSEMBLY
Assembling the StaticSure is fast and easy.
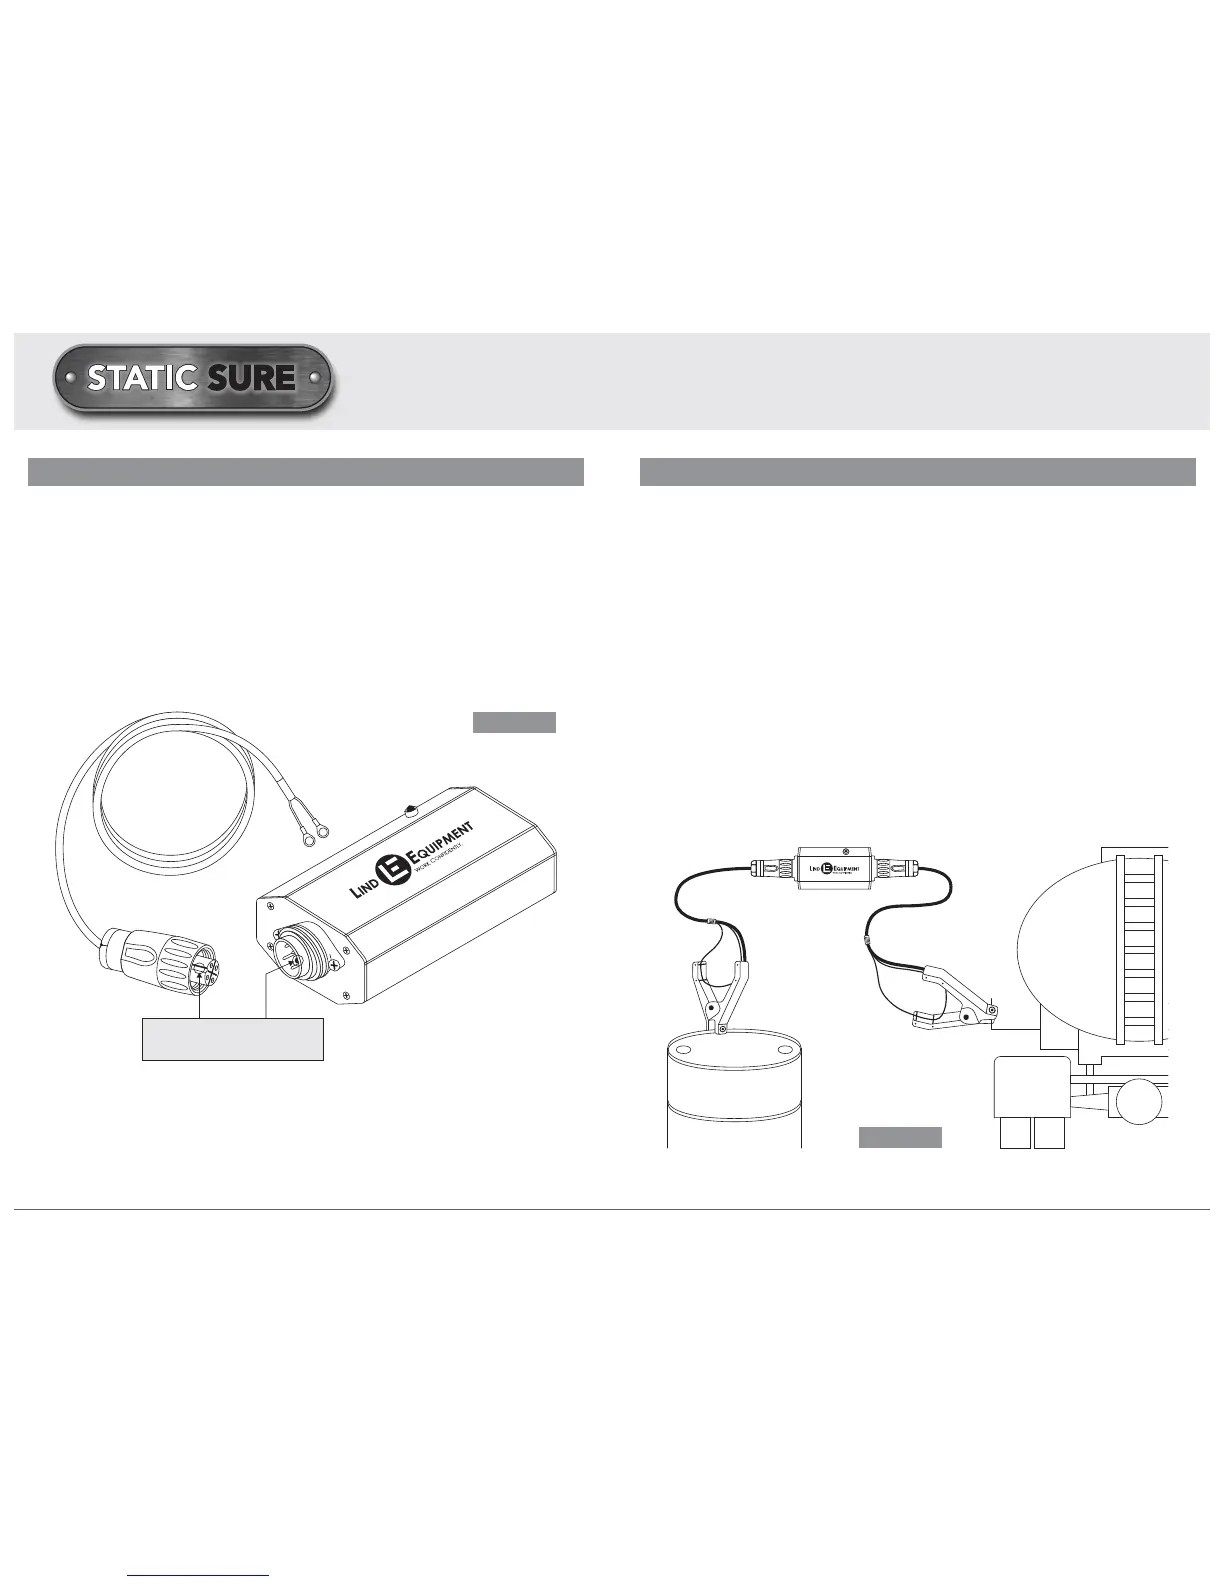
+ Plug each of the two (2) cables into opposite ends of the StaticSure device
and tighten them securely.
+ Either cable can be plugged into both sides of the device - there is no right or
wrong side.
+ Ensure that the ridge (FIGURE 1) on the device connector aligns with the groove
in the cable connector prior to pushing and tightening.
HOW TO USE THE StaticSure
STEP 2: SET UP
a) Bonding Applications: Bonding refers to creating a link between two objects using
a conductive material (e.g. a wire) in order to ensure that they remain at the same
electrical potential, thus reducing risk of static discharge between the objects.
+ The device can be attached to the objects that you wish to bond using either a
lug terminal which can be bolted to an object, or a hand clamp.
+ Once the cables have been assembled per STEP 1, you should attach one side
of the StaticSure assembly to one of the objects you wish to bond using either a
clamp or a lug termination.
+ You must ensure that metal to metal contact is made by either the jaws of the
clamp or the lug terminal in order to establish proper continuity.
+
If the red light is flashing after attaching this side, you do not have good metal to
metal contact and should reattach this side until the light goes off.
+
The other side of the assembly is now ready to be attached to the second object
that you wish to bond (FIGURE 2), but first the device should be tested.
+ See STEP 3 for testing instructions.
HOW TO USE THE StaticSure
4 LIND EQUIPMENT LTD. T: 877.475.LIND www.lindequipment.net LIND EQUIPMENT LTD. T: 877.475.LIND www.lindequipment.net 5
FIGURE 1
FIGURE 2
Align groove on connector
with pin on receptacle