Page 26 of 29 TP1B013–1 English
Sep 2014
29
How To Use QuickSwitch Plus
Product Selection
Linx 7900
After the communication settings are configured, you can create a message (called, for
example, ‘BEANS TEMPLATE’) which you can associate with several different products.
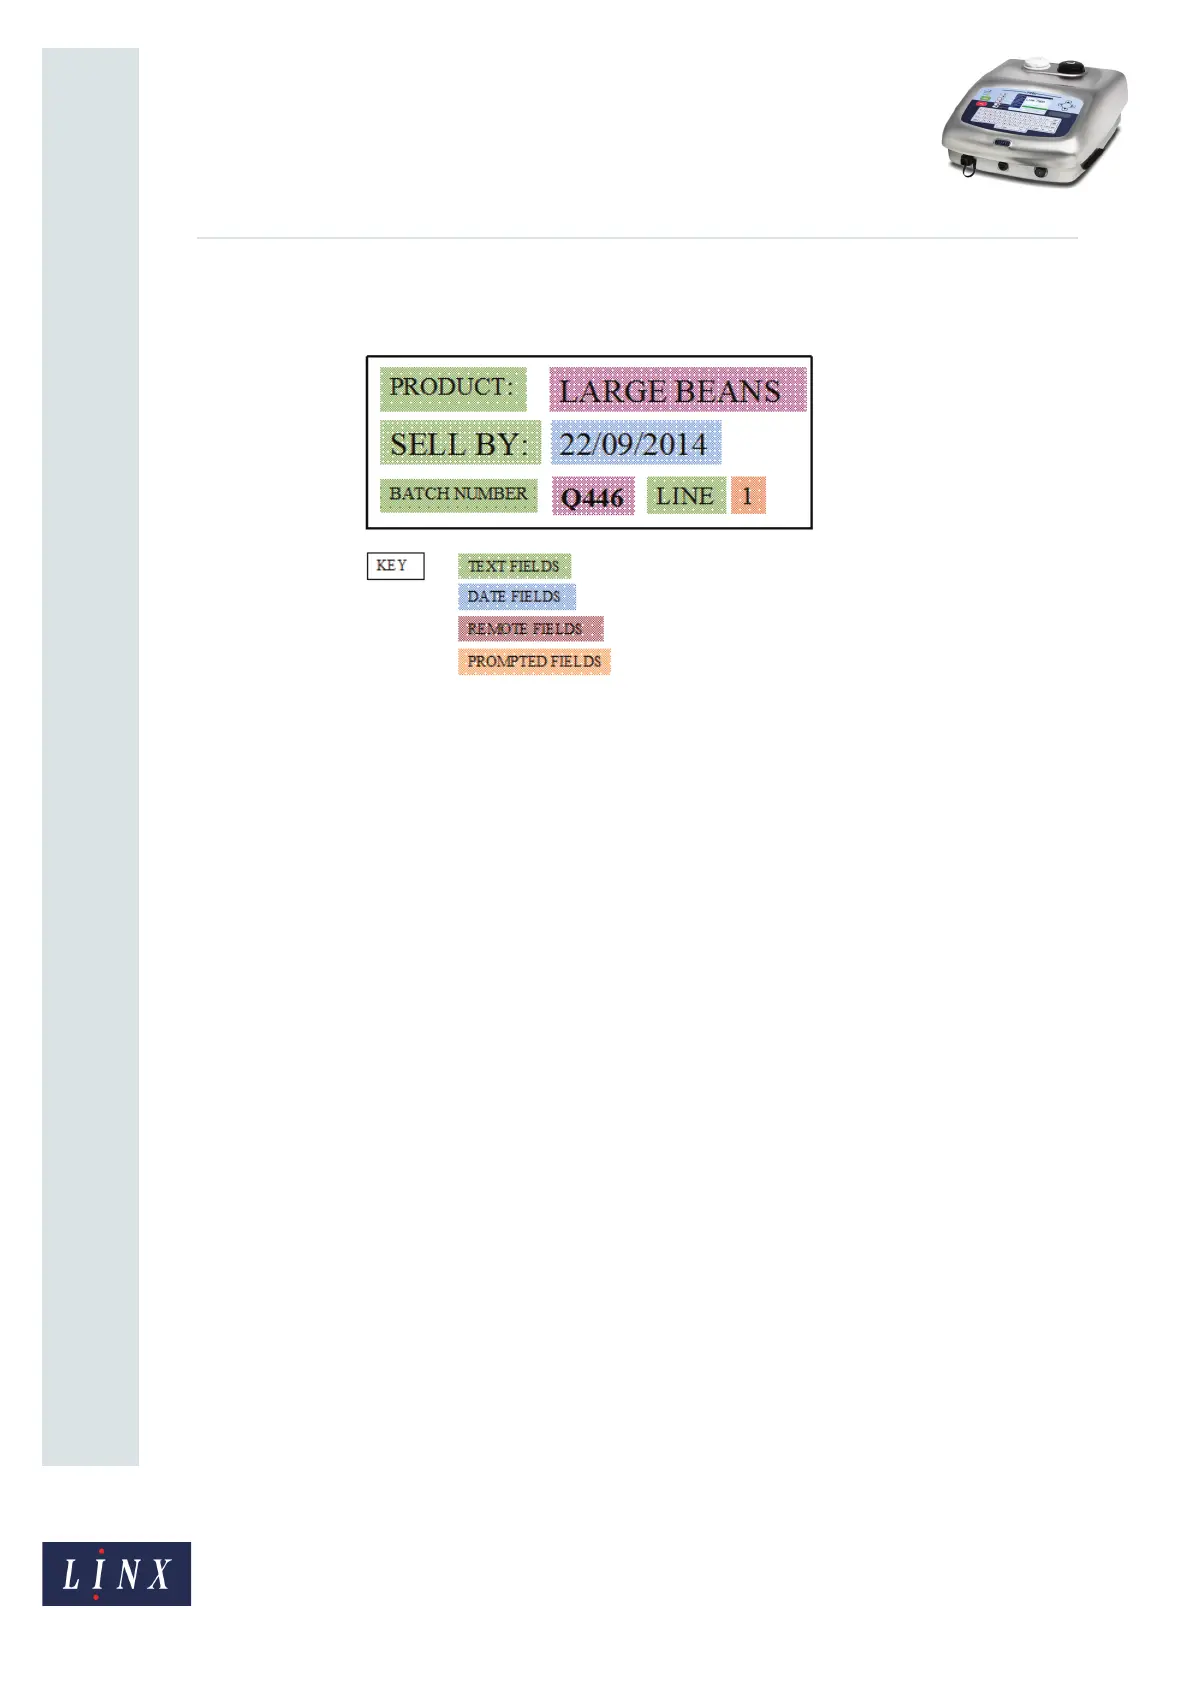
Figure 36. Example message template
As shown in Figure 36, the example message contains four text fields, a date field, two
remote fields, and a prompted field. The prompted field allows you to enter manually enter
the number of the production line before you print the message.
In the above example, you can scan a barcode to enter the product name and batch number
in the remote fields. The barcode can also contain a date offset that changes the sell-by date.
When you create the remote fields in the message, you are recommended to set the Auto
Reload option on the Insert Remote Field page to No. Otherwise, data that was previously
used for the remote field is reloaded when the printer restarts.
NOTE: If the barcode input already contains data that includes a sell-by date, you could
replace the date field in the message with another remote field, and then get the
date from the scanned barcode.
After you create your message, you can select it to print, and then configure the print
parameters (for example, Print Delay and orientation). If required, you can use the remote
fields editor to insert test values for the remote fields in the message.
NOTE: Any new product selection that you create uses the current print parameters and
message parameters as default values. If required, you can change the values (see
‘Edit product selection parameters’ on page 22).