Page 9 of 38 FA69356–2 English
Jun 2013
38
How To Create Date and Time
Formats
Linx 5900 & 7900
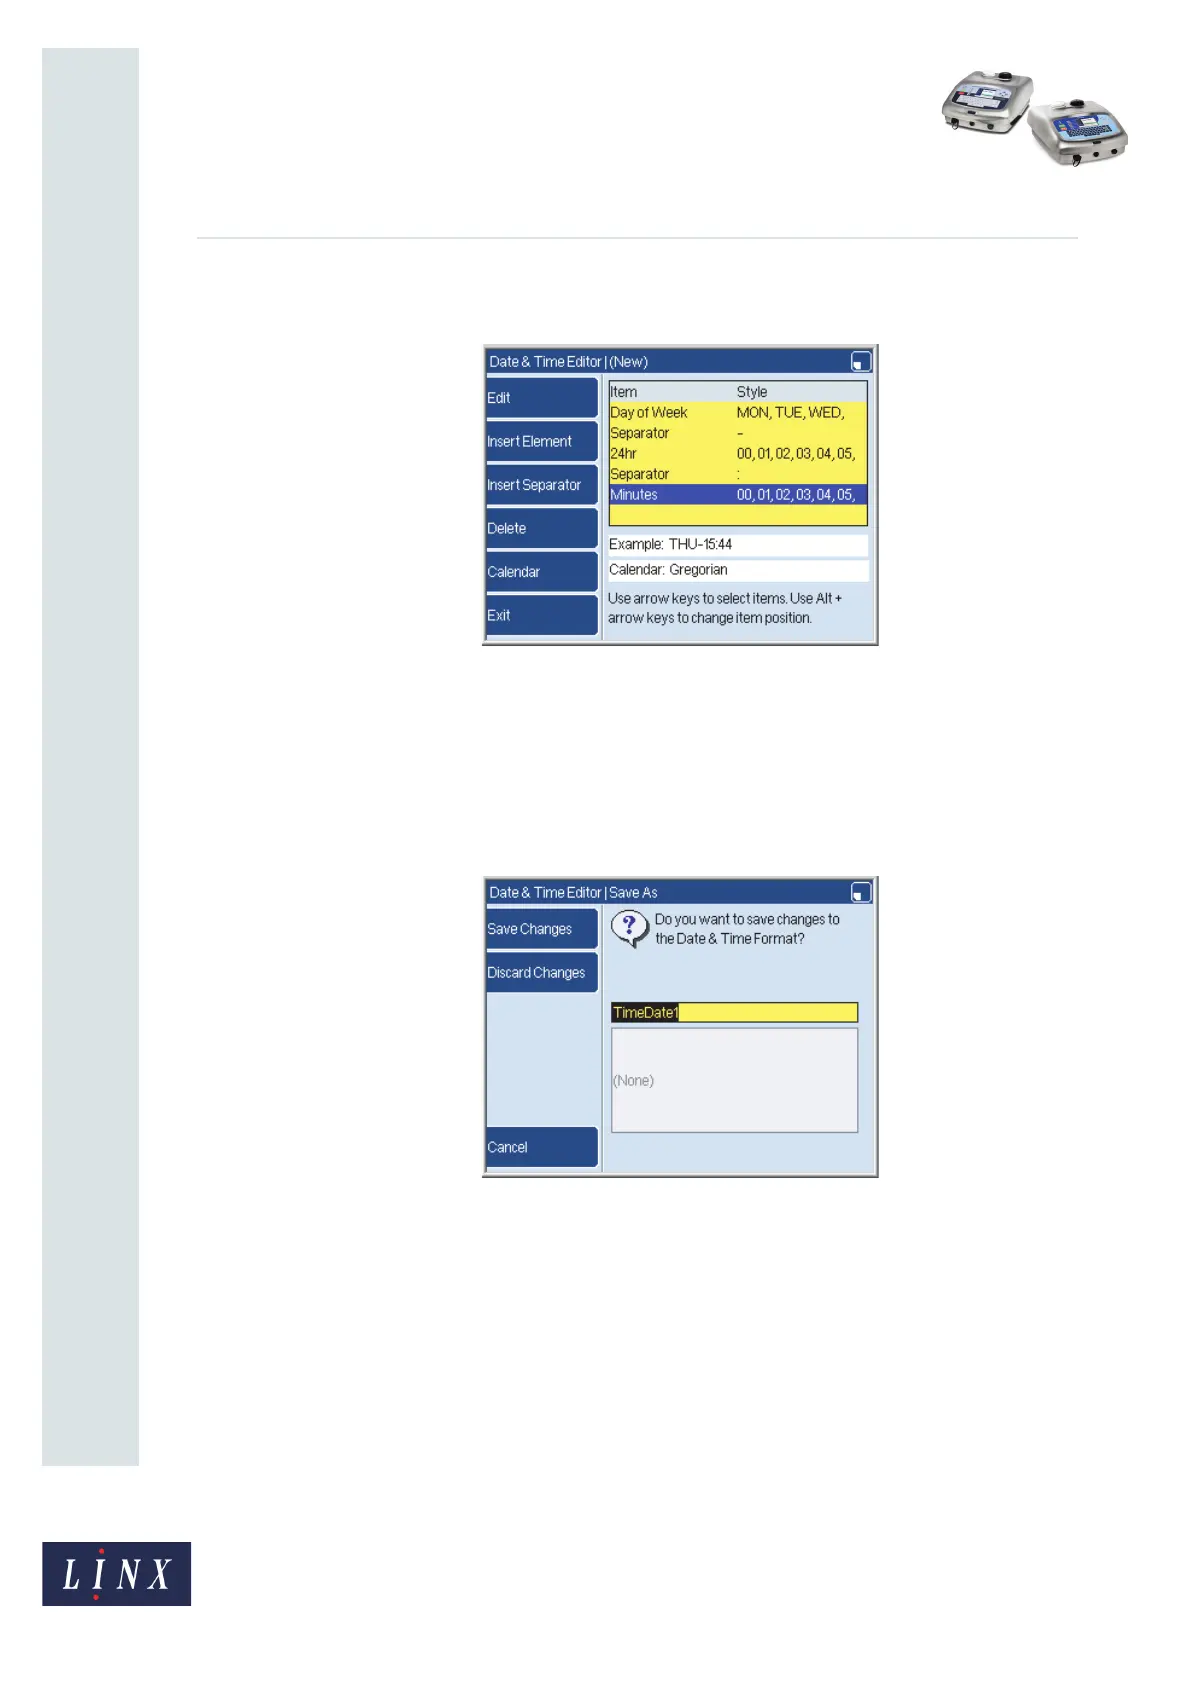
7 Repeat steps 4 to 6 to add the second element, the second separator, and the third
element. The completed format is shown below.
Figure 10. Complete format
You can see an example of the complete format next to the word “Example” on the Date &
Time Editor page.
Save your format
When the Date and Time format is completed, press the Exit key to display the Save As
page.
Figure 11. Save As page
You can save the format or discard your changes, or change the default name that is shown.
Press the Cancel key to return to the previous page. The box below the default name shows
the names of other formats that you created. If there are no customized formats, the box is
empty as shown in Figure 11.
If you use an existing name, the printer displays a warning that your changes are seen in all
messages that use the format.
2.1.3 Edit key
At the Date & Time Store page (Figure 4 on page 6), you can use an existing format instead
of a blank format when you begin to create a new format. The method you use to build the
format is the same.
69195
69197