EasyManua.ls Logo

Little Giant SAFETY RAILS - User Manual

Little Giant SAFETY RAILS
2 pages
Print Icon
To Next Page IconTo Next Page
Loading...
!
Make sure arms are fully locked before
use. Never attempt to adjust or reposition
SAFETY RAILS while in use. Only use
SAFETY RAILS on LITTLE GIANT ladders
with factory-installed
tracks.
WARNING
Never lean ladder with SAFETY RAILS
contacting wall in this mode. Do not
stand on top two rungs without SAFETY
RAILS arms installed in walkthrough
mode, and never work from top two rungs.
YOU CAN LOSE YOUR BALANCE.
SAFETY RAILS are for stability only. Do not
lean, push or pull on them, which can cause
ladder to move.
WARNING
INSTALLATION:
WALKTHROUGH MODE:
1. Squeeze and hold main lock handle to retract locking pin.
2. Slide SAFETY RAILS arm on track and into desired position (walk-
through, standoff or storage).
3. Release handle and slide arm into position until pin fully locks inside
hole.
1. With ladder in its straight ladder mode and laid on
ground, install arms to siderail tracks, extending
past top of ladder. NOTE: Slide arms onto track
at end away from ladder’s feet (Fig. A).
2. Use extension locks to extend arms until they are
fully extended (Fig. B).
3. Make sure main lock handles and extension
locks are fully locked before use. Main lock
handle alignment can be confirmed with labels
on ladder’s rail (Fig. C).
4. Set ladder up as described on ladder’s labels, but
with top rung at or just below top support point
(Fig. D).
5. Grip SAFETY RAILS firmly as you reach top
of ladder, and as you step through onto roof or
elevated platform.
6. When remounting ladder from above, hold
SAFETY RAILS and turn to face ladder before
descending.
IMPORTANT: To remove arms from walkthrough mode,
you must lift up slightly to disengage safety lock
feature before unlocking main lock handles.
Main lock
handle
Tool hook
Extension
lock
Spring pins
Wall pad
Tracks
(lock holes)
(Walkthrough Mode) (Standoff Mode)(Storage Mode)
MAIN LOCK HANDLES
Press and hold
To unlock: To lock:
Release
Pin retracts Pin engages
EXTENSION LOCKS
A. Slide on
toward foot
B. Fully
extend
Read and follow all instructions on SAFETY RAILS and on ladder.
FAILURE TO DO SO COULD RESULT IN INJURY OR DEATH.
DANGER
C. Confirm lock alignment
Squeeze and hold
To unlock: To lock:
Release
Pin retracts Pin engages
D. Set top rung at
or just below top
support point
Top
support
point
Scan QR code to view
safety/instructional video
USER INSTRUCTIONS
Question and Answer IconNeed help?

Do you have a question about the Little Giant SAFETY RAILS and is the answer not in the manual?

Summary

Safety Rails Installation Steps

Retract Locking Pin

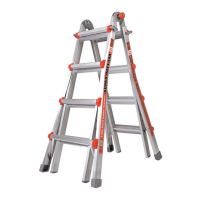
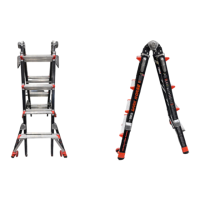
Squeeze and hold the main lock handle to retract the locking pin for installation.

Positioning Rails on Track

Slide the SAFETY RAILS arm onto the track into the desired position.

Engage Main Lock Pin

Release handle and slide arm until the pin fully locks into the hole.

Installation Safety Precautions

Ensure arms are fully locked before use. Never adjust or reposition while in use.

Walkthrough Mode Usage

Ladder Setup and Extension

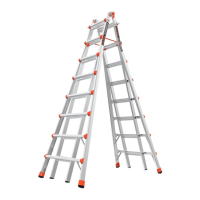
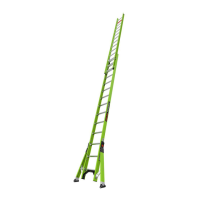
Install arms, extend, ensure locks are engaged, and position ladder top.

Using Rails for Stability

Grip rails when reaching the top and use them to face the ladder when descending.

Removing Rails from Mode

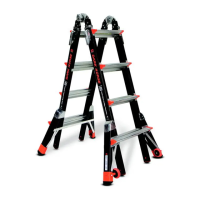
Lift slightly to disengage safety lock before unlocking main handles.

Safety Rails Warnings and Lock Operation

Critical DANGER Statement

FAILURE TO DO SO COULD RESULT IN INJURY OR DEATH. Read all instructions.

Main Lock Handle Operation

Instructions and diagrams for unlocking and locking the main handles.

Extension Lock Operation

Steps for sliding, extending, confirming alignment, and setting top rung.

Walkthrough Mode Dangers

Warning against over-reaching or leaning on rails in this mode.

Standoff Mode Usage

Standoff Mode Installation Steps

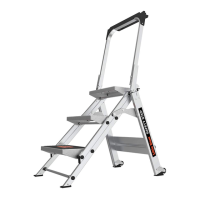
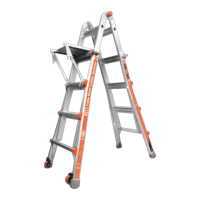
Install arms, extend, rotate wall pads, and lock pins before setup.

Standoff Mode Warnings

Avoid over-reaching. Keep body centered. Limit tool weight on approved hang zone.

Safety Rails Maintenance and Warranty

Maintenance Guidelines

Keep clean, in storage, protected, and lubricate every six months.

Limited 1-Year Warranty

Covers defects in workmanship/materials. Repair/replacement. Freight paid by customer.

Little Giant SAFETY RAILS Specifications

General IconGeneral
BrandLittle Giant
ModelSAFETY RAILS
CategoryLadders
LanguageEnglish

Related product manuals