Do you have a question about the LiveU Solo HDMI and is the answer not in the manual?
Describes the LiveU Solo HDMI as a professional-grade wireless video encoder for one-touch streaming.
Quick start-up for live streaming by connecting to VBOX Video HD2.
Maintain viewer engagement with a reliable, high-quality stream.
Transmit high-quality streams from challenging locations with poor network conditions.
Stream HD videos to platforms like Facebook Live, YouTube, and Twitch.
Utilizes LRT™™ for adaptive bitrate and error correction for stable streams.
Manage streaming, preview video, and check connectivity/battery status via unit or portal.
Details bit rate, battery life, dimensions, weight, and operating temperature.
Critical warning against submerging the unit in water to prevent damage.
Lists the main components included in the LiveU Solo HDMI package.
Details optional accessories like power cables and adaptors.
Lists additional power supply options for HD2 and LiveU Solo units.
Details the optional rechargeable Li-ion battery pack for the unit.
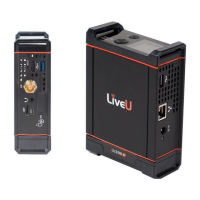
Explains connectivity via cellular, Ethernet, and WiFi.
Details how the encoder connects to the internet via the strongest or bonded method.
Describes data packet transmission and reassembly by the cloud server.
Encoder uses real-time data for optimal video encoding and connection selection.
Emphasizes the need for 4G dongles in areas with poor Ethernet/WiFi.
Modems are not supplied; users must arrange them separately.
Recommends modems with IP address changing capability to avoid conflicts.
Advises using two 4G SIM cards from different providers for reliable connection.
Details the unit's battery life and recommended charging time.
Outlines three methods for charging the unit's battery via the DC IN port.
Indicator LED behavior during charging (red) and full charge (green).
Notes that the battery can be charged while the unit is operational.
Recommends keeping the unit plugged in for readiness.
Location for checking battery status on the LCD and Web Portal.
Step 1: Setting up HDMI output on the VBOX unit.
Step 2: Configuring the connected USB dongles for internet access.
Step 3: Initial configuration of the LiveU Solo HDMI unit.
Step 4: Establishing the physical connection between the two units.
HDMI output requires frame rate set to 30 fps.
Steps for configuring HDMI output via the setup software.
Option to enable audio alongside video output.
Saving the configuration settings to an SD card or USB stick.
Steps for powering on and loading the configuration.
Steps for configuring HDMI output and audio using the VBOX Video App.
Step 1: Activating the 4G SIM cards before insertion.
Steps for inserting dongle into PC and changing IP address.
Example of configuring a specific USB dongle model.
Emphasizes the importance of keeping the LiveU Solo HDMI firmware updated.
Step 1: Placing the LiveU Solo HDMI into its protective pouch.
Steps for connecting USB dongles to the unit and securing them.
Step 9: Connecting the external power source to the DC IN port.
Automatic connection of dongles upon powering on the unit.
Step 1: Accessing the portal login page via web browser.
Steps for signing up as a new user and verifying the account.
Note: One account can register up to five LiveU Solo HDMI encoders.
Requirement of having a Web Portal Account before registering the unit.
Detailed steps for turning on the unit and registering it via the portal.
Method to find the unit's serial number using the front panel joystick.
How the registered unit appears in the Solo Web Portal with status information.
Reviewing and configuring Ethernet or WiFi connections.
Note: Cannot connect to a WiFi network that has a landing page.
Explains LiveU's LRT™™ protocol for reliable video transmission.
LRT™™ is an additional subscription, not included as standard.
Note: LRT subscriptions take up to 1 hour to activate.
Importance of selecting the correct Zone for optimal bonding server usage.
Enables Low Delay Mode to reduce delay, suitable for time-sensitive content.
After registration, set up a streaming destination via the Solo Web Portal.
Utilizes APIs for integration with common live streaming platforms.
Shows integration with platforms like Facebook, YouTube, and Twitch.
Requires copying ingress URL and stream key for certain platforms.
Option to use RTMP for platforms not listed, allowing manual configuration.
Connection between VBOX Video HD2 HDMI and LiveU Solo HDMI via HDMI cable.
Preview shown on LCD; input type (1080p30) displayed on Solo Web Portal.
Initiating streaming via the 'GO LIVE' button or the unit's Power button.
Recommends starting streams from the LiveU Solo Web Portal for managed services.
Portal notifies when streaming, shows 'Now LIVE', and bandwidth breakdown.
Live streaming status and total current bandwidth shown on the LCD screen.
Process for stopping the stream via the Web Portal or unit's Power button.
Procedure to turn off the unit by holding the Power button for 5 seconds.
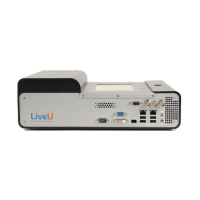
| Input Ports | HDMI |
|---|---|
| Video Resolution | Up to 1080p60 |
| Output | HDMI |
| Streaming Protocols | RTMP, SRT |
| Network Connectivity | Wi-Fi, Ethernet |
| Weight | 0.5 kg |
| Encoding | H.264 |
| Latency | Less than 1 second |