EasyManua.ls Logo

LOCKEY E-DIGITAL User Manual

LOCKEY E-DIGITAL
7 pages
To Next Page IconTo Next Page
Page #1 background imageLoading...
Page #1 background image
USER MANUAL
Product : KEYPAD ELECTRONIC KNOB & LEVER LOCK
Purchase Date :
Name & Address of Distributor :
Limited Warranty Statements
1. Warranty
2. Exclusions
3. Limited of Liability
4. Reminder
Lockey Digital Systems Inc. . (hereafter “LDS”) warrants the Product to be free
from defects in material and workmanship for a period of 12 months
from the original date of purchase.
If you discover a defect in the Product covered by this warranty, we will repair or
replace the item at our option, using new or refurbished components.
This warranty covers defects in manufacturing discovered while using the
Products as recommended by LDS rather than occurred by the act of God,
and damages caused by misuse, abuse, and unauthorized modication.
LDS will not be held liable for incidental or consequential losses or damages
to any act of God.
Service requirement shall be subject to the presentation of this warrant card
and defective parts to the manufacture LDS.
The warranty card will not be reissued if lost.
LOCKEY DIGITAL SYSTEMS INC.
Mt. Pleasant Michigan (989) 773-2363
www.lockeyusa.com
TEMPLATE
45 40 35
1-3/4" 1-9/16" 1-3/8"
Fit here on door edge
FOR BACKSET 70mm (2-3/4”)
FOR BACKSET 60mm (2-3/8”)
Mark 1" (25.4mm) hole at
center of door edge.
Ø
Ø54mm (2-1/8")
1
2
3
4
5
6
7
8
9
0
1
2
3
4
5
6
7
8
9
0
Attention : Do not use power tools
Question and Answer IconNeed help?

Do you have a question about the LOCKEY E-DIGITAL and is the answer not in the manual?

LOCKEY E-DIGITAL Specifications

General IconGeneral
BrandLOCKEY
ModelE-DIGITAL
CategoryLocks
LanguageEnglish

Summary

Limited Warranty Statements

Warranty Coverage

Covers product defects in material and workmanship for 12 months from purchase.

Exclusions and Liability

Lists items not covered by warranty and limits liability for damages.

Installation Instructions

Backset Adjustment

Adjusts the latch mechanism for 60mm or 70mm backsets to fit the door.

Door Marking and Drilling

Uses a template to mark holes and instructs drilling for the lockset and latch.

Latch Installation

Guides installing the latch and faceplate flush with the door edge.

Installation Steps Continuation

Install Strike Plate

Details installing the strike plate into the door frame for proper alignment.

Keypad and Receiver Installation

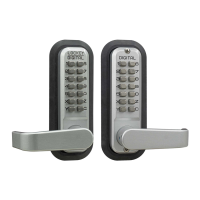
Guides attaching the keypad assembly, mounting plate, and receiver module.

Lock Operation and Features

Lever Handing and Button Overview

Steps to change lever handing and description of keypad button functions.

Specifications and Indicators

Details power, low battery, illuminated indicators, and audible signals.

Code Management Basics

Covers preset codes, setting new user/programming codes, and deletion.

Core Lock Functions

Explains how to lock/unlock, activate auto-lock, mute, and code protection.

Function Programming

User Code Programming

Procedures for adding, deleting, and managing user codes for access.

System Configuration

Steps to change the programming code, autolock settings, and restore defaults.

Related product manuals