EasyManuals Logo

Lockly SECURE PRO User Manual

Lockly SECURE PRO
30 pages
To Next Page IconTo Next Page
To Previous Page IconTo Previous Page
Page #11 background imageLoading...
Page #11 background image
Right
or
Left
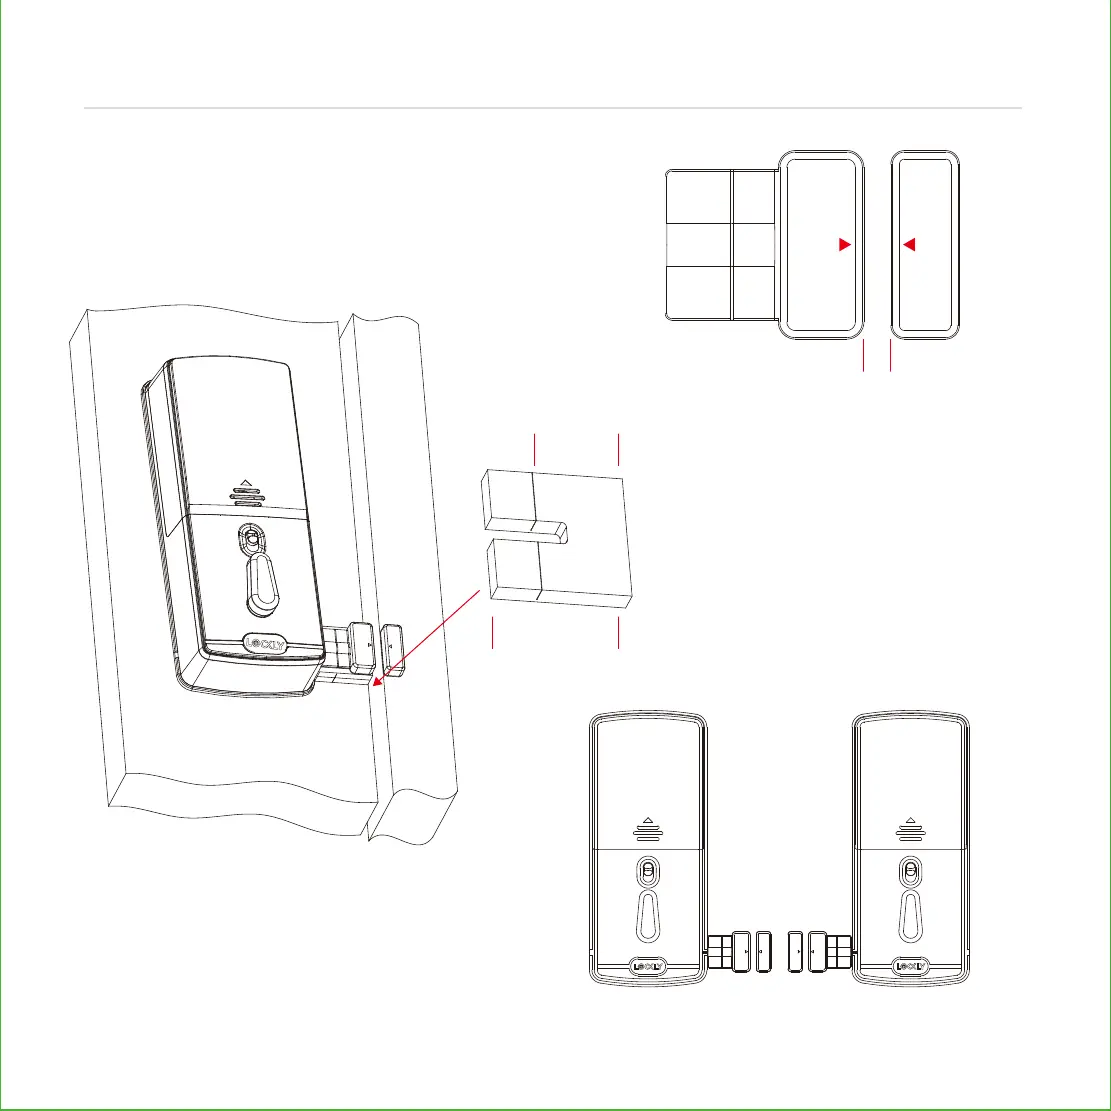
When installing the door sensors, make sure the
arrow on the wired sensor (P) aligns to the arrow
of the sensor magnet (Q) as close as possible.
The sensors need to be as close
to level as possible. If needed,
use the adhesive foam pad(s)
to adjust the height of the wired
sensor.
Sensors can be positioned on either left
or right side (see page 10).
2-3/4" (70mm)
2-3/8" (60mm)
3/4" (20mm)
Foam pad
(P) (Q)
9
PREPARING DOOR SENSORS FOR INSTALLATION
Step 4
continued

Questions and Answers:

Question and Answer IconNeed help?

Do you have a question about the Lockly SECURE PRO and is the answer not in the manual?

Lockly SECURE PRO Specifications

General IconGeneral
Lock TypeDeadbolt
ConnectivityWi-Fi, Bluetooth
Fingerprint SensorYes
Voice Assistant CompatibilityAmazon Alexa, Google Assistant
Mobile AppLockly App
Power Source4 AA batteries
Backup KeyYes
MaterialZinc alloy
Operating Temperature-4°F to 140°F (-20°C to 60°C)
Battery LifeUp to 1 year
Auto-LockYes
Weather ResistanceYes
InstallationDIY
Door Thickness1 3/8” to 2”
BacksetAdjustable 2 3/8” or 2 3/4”
Warranty2 years

Related product manuals