EasyManuals Logo

Lockly SECURE PRO User Manual

Lockly SECURE PRO
30 pages
To Next Page IconTo Next Page
To Previous Page IconTo Previous Page
Page #9 background imageLoading...
Page #9 background image
7
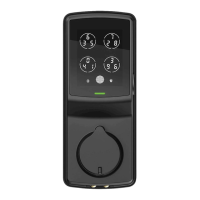
3: Insert and tighten by hand 2
screws located on the left and right
of the blade. Check alignment and
tighten with screwdriver until mount-
ing plate is securely placed on door.
TIP: when installing screws by hand, turn screws clockwise several turns then
counterclockwise one turn to ensure smooth threading and no cross threading.
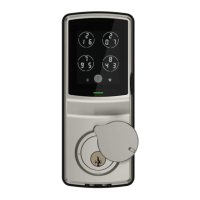
4: Use the key to ensure deadbolt locks and
unlocks smoothly(no binding or rubbing).
IMPORTANT: when finished, leave the dead-
bolt extended and remove the key before
proceeding to the next step.
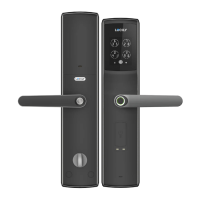
2: Align and secure mounting plate with
adhesive strips. Guide connection cables
through the hole and secure to the lower
left notched hole.
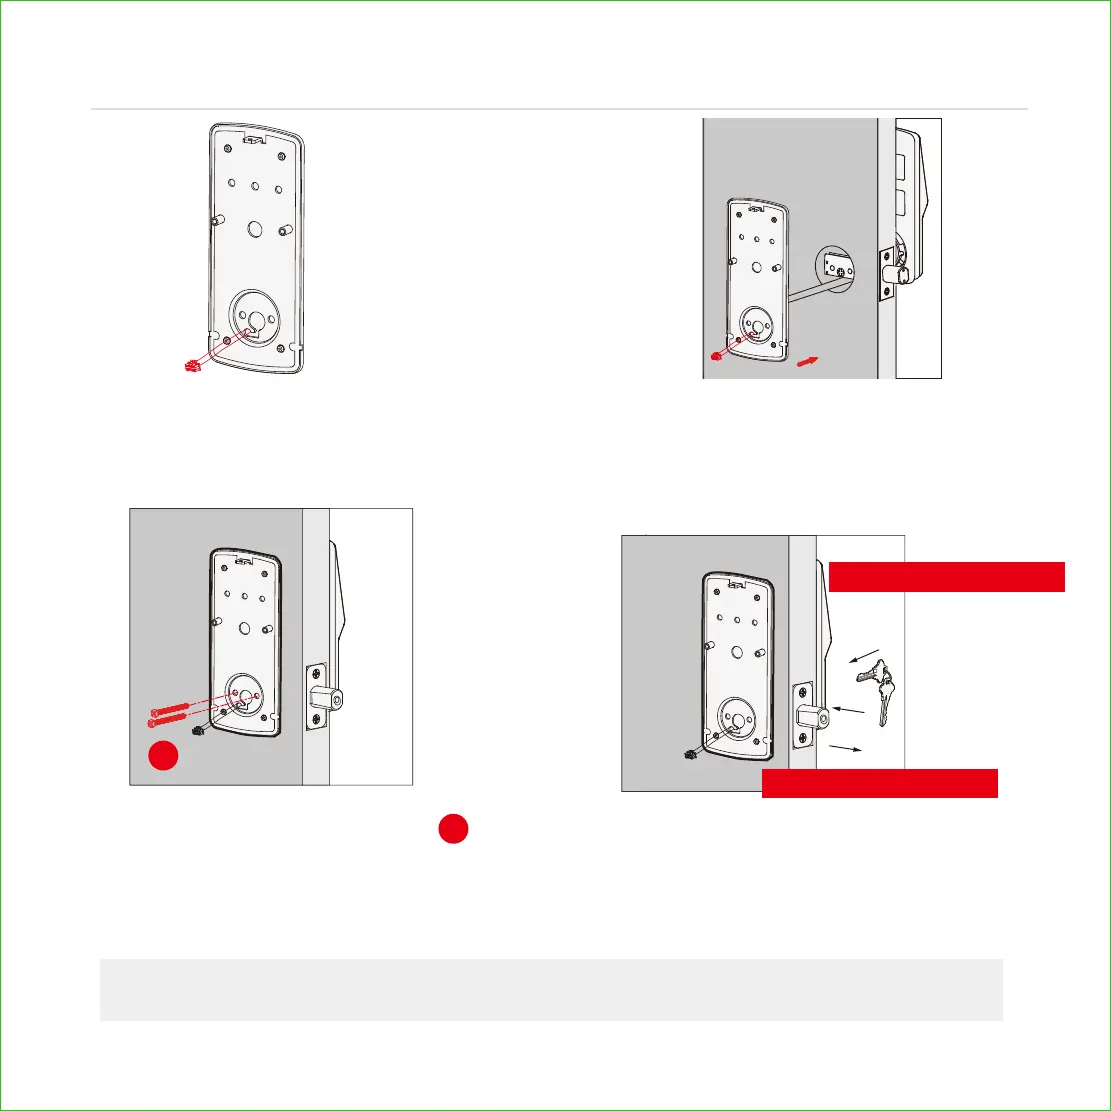
1: Check interior mounting plate (D)
alignment to your door hole before
securing with adhesive strips.
G
(2X)
INSTALLING INTERIOR ASSEMBLY (F)
Step 3
G
Remove key when finished
Leave deadbolt extended

Questions and Answers:

Question and Answer IconNeed help?

Do you have a question about the Lockly SECURE PRO and is the answer not in the manual?

Lockly SECURE PRO Specifications

General IconGeneral
Lock TypeDeadbolt
ConnectivityWi-Fi, Bluetooth
Fingerprint SensorYes
Voice Assistant CompatibilityAmazon Alexa, Google Assistant
Mobile AppLockly App
Power Source4 AA batteries
Backup KeyYes
MaterialZinc alloy
Operating Temperature-4°F to 140°F (-20°C to 60°C)
Battery LifeUp to 1 year
Auto-LockYes
Weather ResistanceYes
InstallationDIY
Door Thickness1 3/8” to 2”
BacksetAdjustable 2 3/8” or 2 3/4”
Warranty2 years

Related product manuals