EasyManuals Logo

Lockly SECURE Installation Manual

Lockly SECURE
19 pages
To Next Page IconTo Next Page
To Previous Page IconTo Previous Page
Page #14 background imageLoading...
Page #14 background image
6.3
O
3x
LK
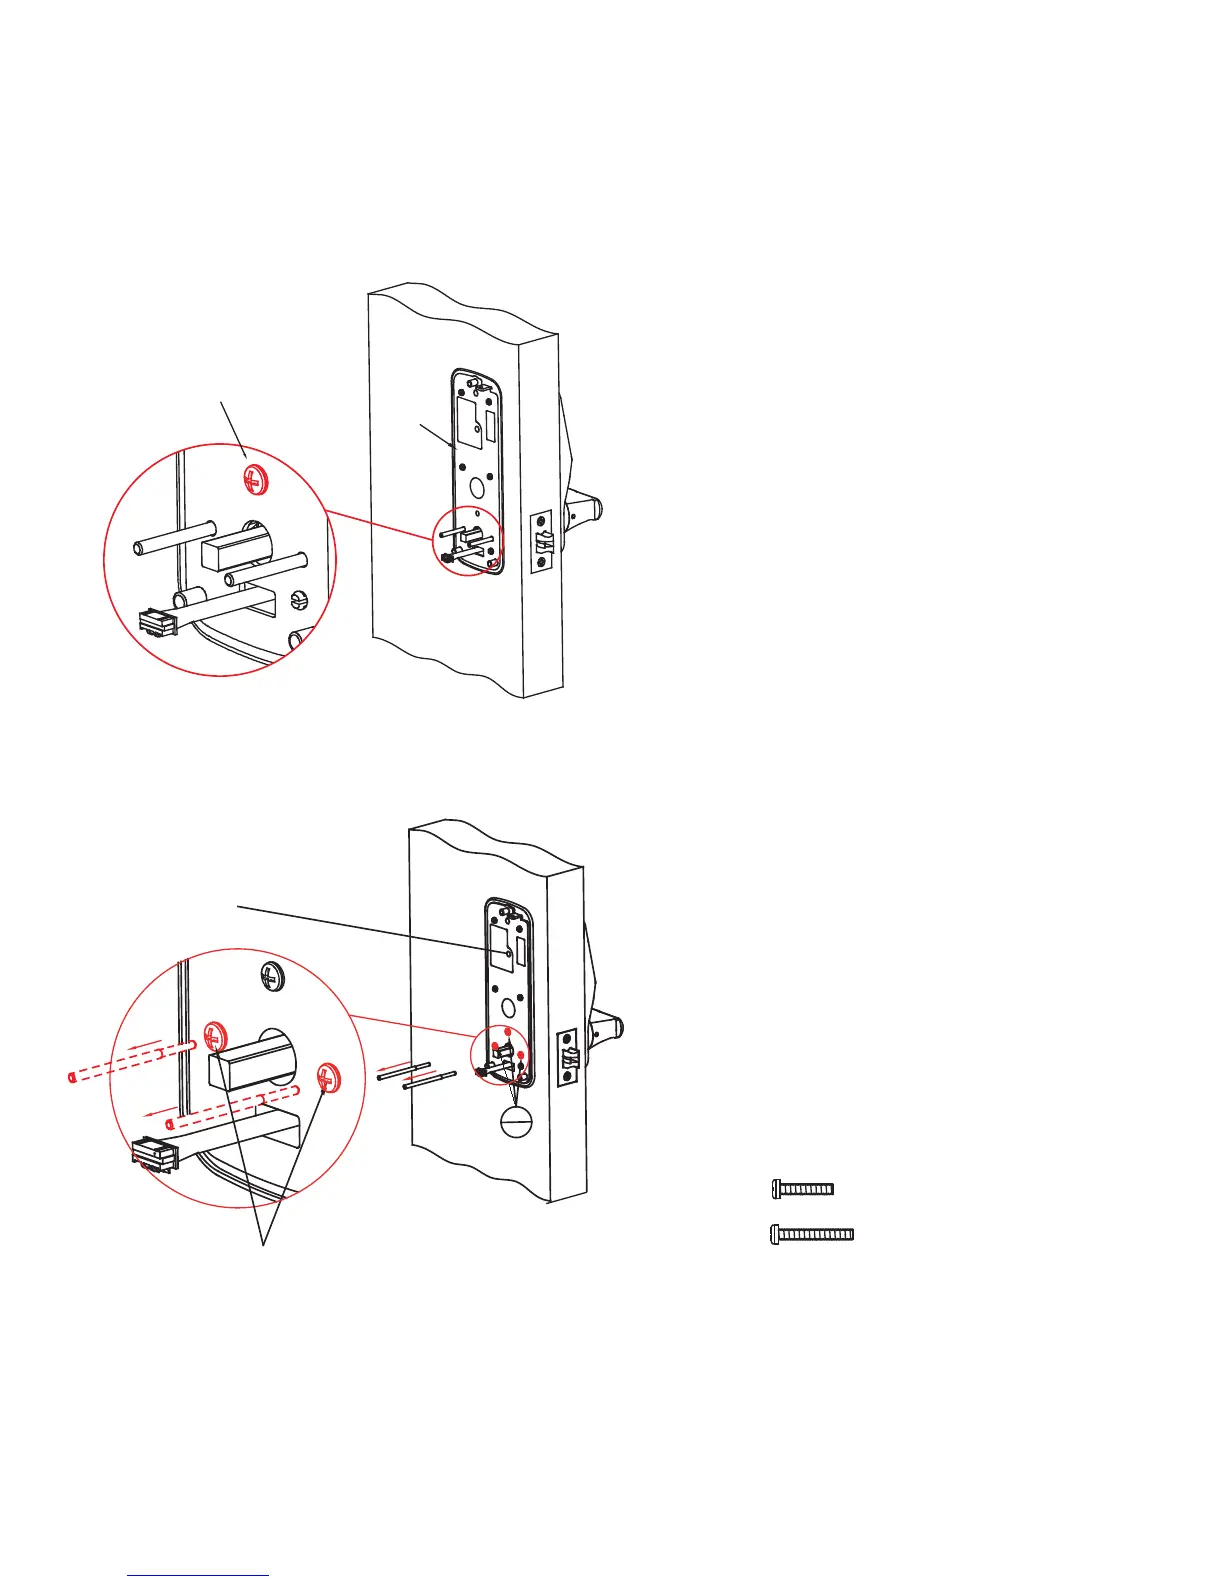
Pull the cable from the exterior
lock through the rectangular
hole underneath the positioning
rods and square rod.
Secure the hole above the
square rod with Part O screw.
O Screw
O Screw
6.4
Remove the position rods (Part V)
and replace them with Part O
screws. Tighten clockwise until the
mounting plate is secure.
* If you have drilled a hole on the
top in Step 1, please secure the
hole with part M1 or M2 depending
on your door thickness. Skip this if
no hole was drilled in Step 1.
*Secure top with M1 or M2
PM5X25mm
PM5X35mm
M1
M2

Other manuals for Lockly SECURE

Questions and Answers:

Question and Answer IconNeed help?

Do you have a question about the Lockly SECURE and is the answer not in the manual?

Lockly SECURE Specifications

General IconGeneral
Power SourceBattery
CompatibilityStandard doors
Operating Temperature-4°F to 140°F (-20°C to 60°C)
Keyless EntryYes
Access MethodsFingerprint, Keypad, Physical Key, Mobile App
Fingerprint Capacity99 fingerprints
ConnectivityBluetooth, Wi-Fi
Battery LifeUp to 1 year (depending on usage)
KeypadYes
Voice ControlYes (Amazon Alexa, Google Assistant)
Door Thickness1.375 to 2 inches
Battery Type4 AA batteries
Mobile AppLockly App
Auto-LockYes
Weather ResistanceYes
InstallationDIY
Lock TypeSmart Deadbolt
MaterialZinc Alloy

Related product manuals